Posted on Leave a comment

This Ruffled Side Knot Is An Easy Way to Transform Your Plain White T-shirt

This may surprise you, but a simple T-shirt can be just as fashionable as any other top. When paired with your favorite high-waisted jeans, a T-shirt can be knotted, tucked, tied and wrapped in different ways to give it more pizzazz. That’s why we’re sharing how to tie a shirt knot to bring more personality to your look.

Below, you’ll find 10 shirt knot ideas. We have the basic front knots, back knots and side knots. Those who prefer more elevated and cropped styles can consider the ruffled side knot or the pretzel knot (and yes, the finished look should be just as eye-catching as the treat itself!). And if you’re looking forward to wearing button-down shirts for the cooler weather, we have a knot idea just for you! Plus, we have a few creative fake knot options that’ll require a rubber band and a decorative scarf.

Remember, when making these knots, your shirt can be as low or cropped as you’d like. It all depends on your personal preference and plans for the day. So, grab a white T-shirt (preferably one with a bit of stretch), stand in front of the mirror and get to knotting, because we’re showing you how something so simple can be transformed into a must-have piece.


how to tie a t shirt

mike garten

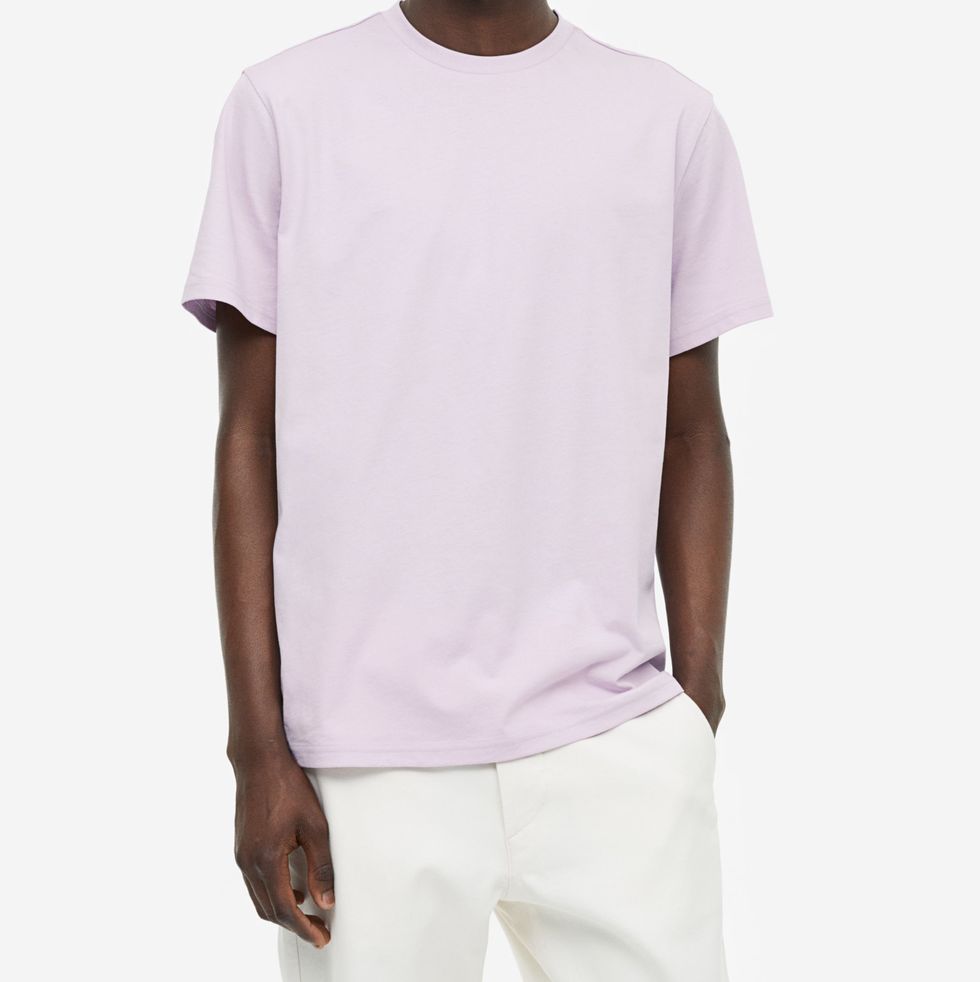
Cotton T-shirt
H&M Cotton T-shirt

Now 33% Off

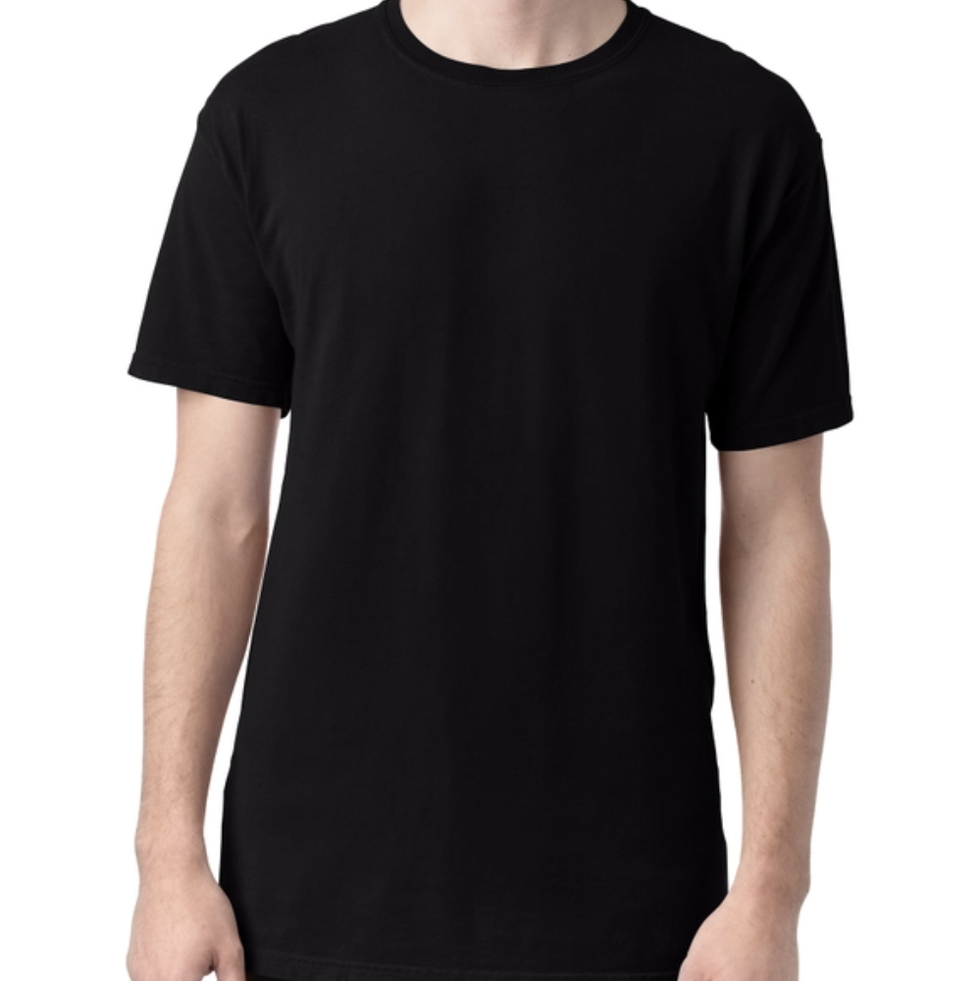
Originals Men's Garment Dyed T-Shirt
Hanes Originals Men’s Garment Dyed T-Shirt

Now 18% Off

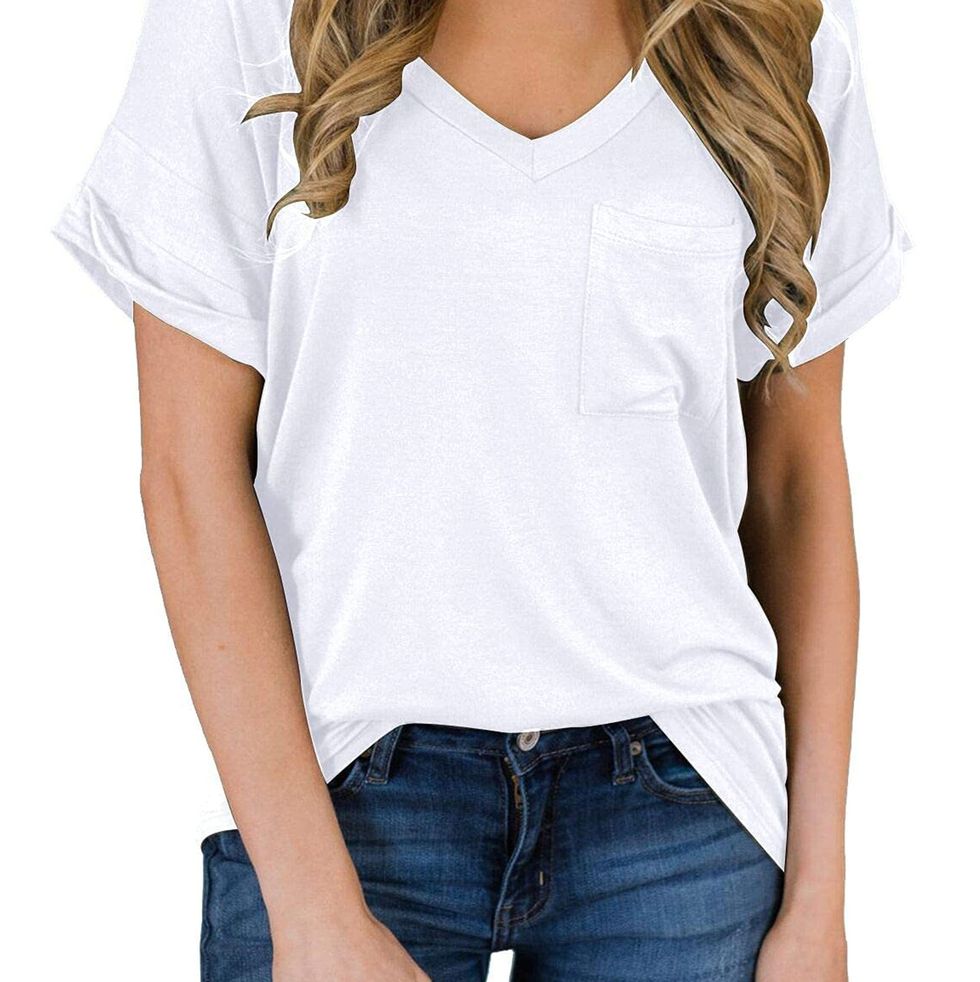
Short Sleeve V-Neck Shirt
MIHOLL Short Sleeve V-Neck Shirt

Now 24% Off

Regular Fit Crew-Neck T-shirt
H&M Regular Fit Crew-Neck T-shirt
Classic T-Shirt
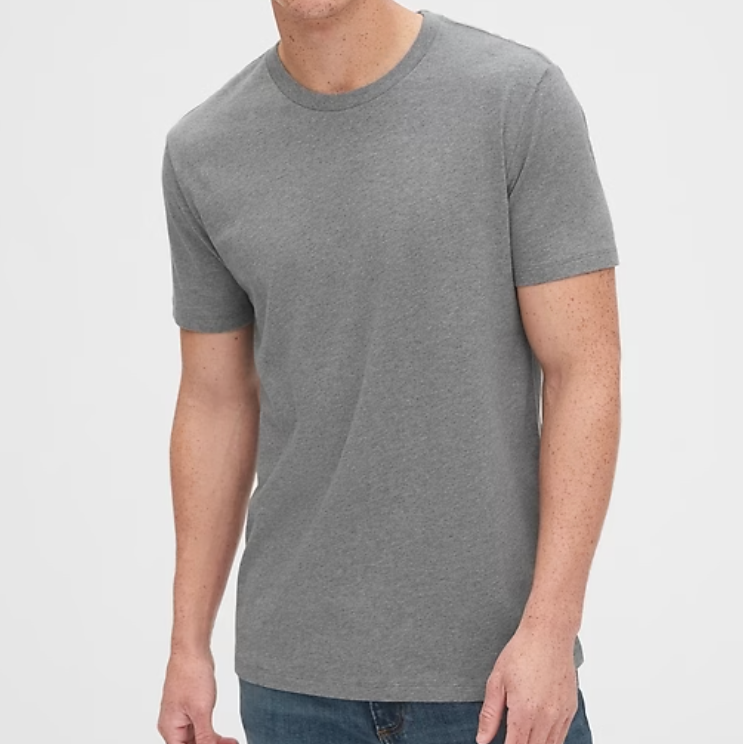
100% Organic Cotton Big Shirt
Gap 100% Organic Cotton Big Shirt

Now 22% Off

Front Knot

    how to tie a t shirt front knot

    mike garten

    how to tie a t shirt front knot

    mike garten

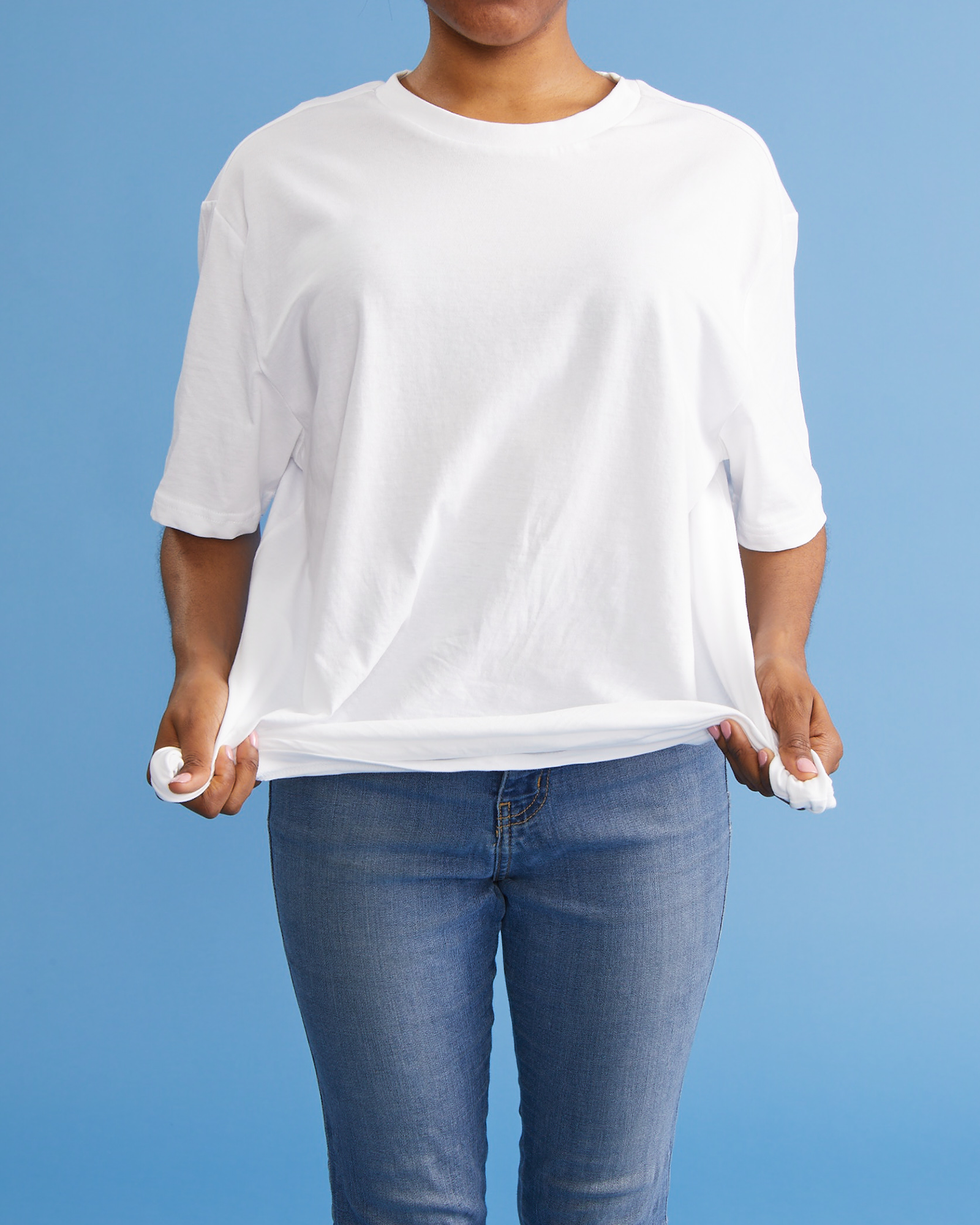
    Changing your T-shirt’s style can be as easy as creating a knot in the front. Let the knot hang as low or high as you want, all while making sure the knot is tight for a fitted look.

    1. Fold up the T-shirt in the back.
    2. Grab a section of your shirt’s fabric in the front.
    3. Twist the front section into a spiral.
    4. Wrap the spiral around itself until you create a ball, before pulling the end piece through the hole.
    how to tie a shirt front knot, woman standing with hands to her side wearing a plain t and jeans

    Mike Garten

    Back Knot

    how to tie a t shirt back knot

    mike garten

    how to tie a t shirt back knot

    mike garten

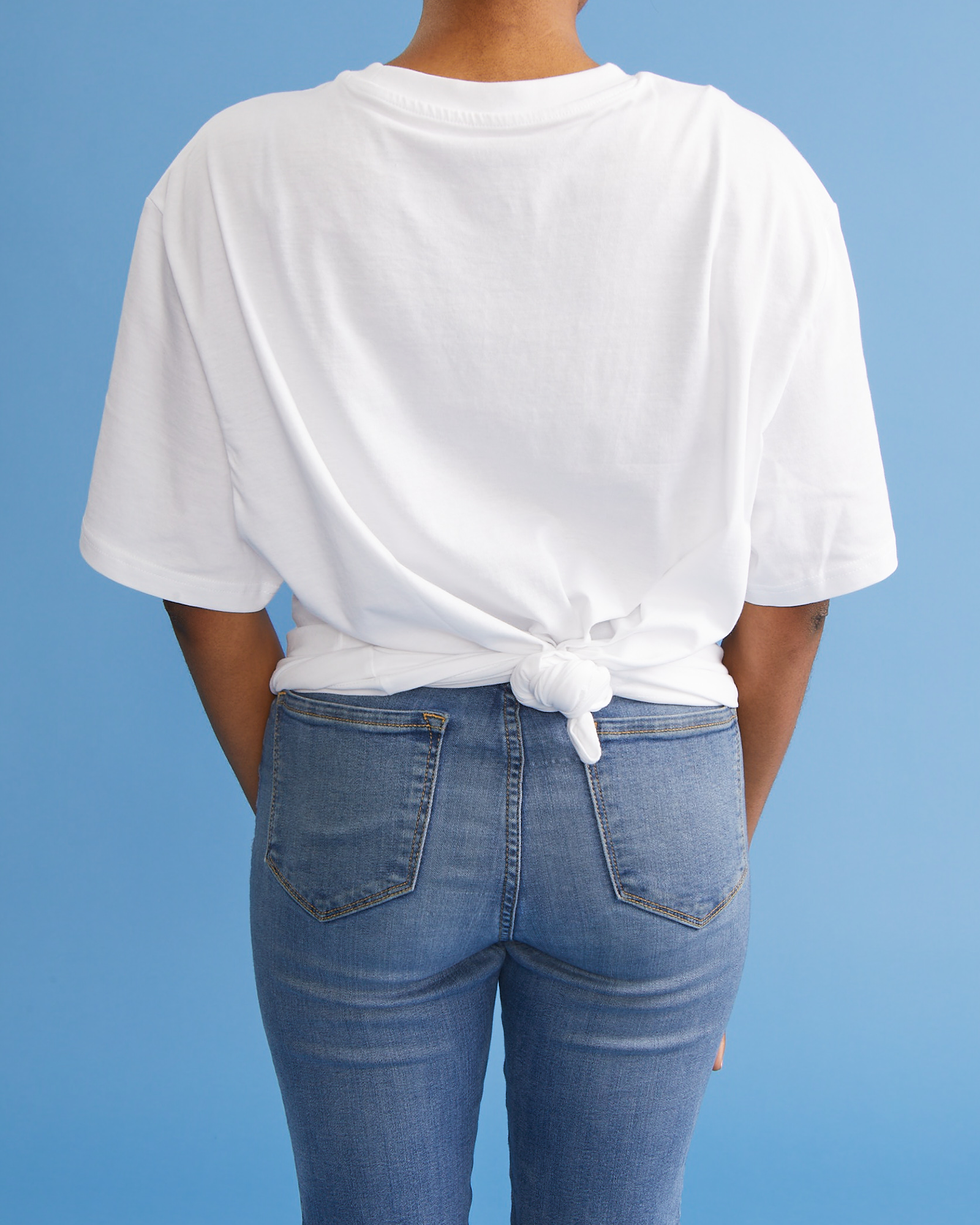
    Consider a back knot if you want the shirt to look tighter and more fitted in the front. It’s just as easy as a front knot, with only minimal changes to the steps.

    1. Fold up your T-shirt in the front.
    2. Grab a section of the shirt’s fabric in the back.
    3. Twist the back section into a spiral.
    4. Wrap the spiral around itself until you create a ball, before pulling the end piece through the hole.
    how to tie a shirt back knot on a woman's white shirt while she wears jeans

    Mike Garten

    Two Side Knots

    how to tie a shirt two side knots

    mike garten

    how to tie a shirt two side knots

    mike garten

    It’s double the knot and double the style! Create a simple knot on both sides of the shirt. If you create the knots in your midsection or higher, it’ll give you a cropped look that’s perfect for summer.

    1. Separate the shirt into two.
    2. Create a knot on both sides similar to the front knot by following these instructions:
      • Twist the section until it forms a spiral.
      • Wrap it around the ball and pull the end piece through.

      Optional: Rubber bands will help keep your knots in place.

      how to tie a shirt two side knots

      mike garten

      how to tie a shirt two side knots

      mike garten

      Pretzel Knot

      how to tie a shirt pretzel knot

      mike garten

      how to tie a shirt pretzel knot

      mike garten

      We call this a pretzel knot because the shape reminds us of the salty chip itself. It’s a style that works well with different types of shirts, including long-sleeved picks that need a bit more oomph.

      1. Grab both sides of your shirt.
      2. Pull the sides to the front and create a basic knot:
      • Create a basic knot by crossing one end of the shirt over the other.
      • Insert one end of the shirt into the loop or hole.
      • Pull both ends in opposite directions to tighten the knot.
      • Tuck the ends into the shirt for a cleaner look. The ends should not be sticking out.
      how to tie a shirt pretzel knot

      mike garten

      how to tie a shirt pretzel knot

      mike garten

      Side Knot

      how to tie a shirt side knot, woman with hands to her side wearing a white shirt and jeans

      Mike Garten

      It’s like the front and back knot, except this time it’s on the side of your waist. Follow the same instructions to create a basic knot. Remember, these knots can be made as high or low as you’d like.

      1. Focus on the side of your shirt.
      2. Create a knot similar to the spiral method used for the front and back:
      • Grab a section of your shirt’s fabric in the back.
      • Twist the back section into a spiral.
      • Wrap the spiral around itself until you create a ball, before pulling the end piece through the hole.

      Optional: Leave the end sticking out of your knot or tuck it in for a cleaner look.

      A Simple Knot and Scarf

        how to tie a shirt with a scarf

        mike garten

        how to tie a shirt with a scarf

        mike garten

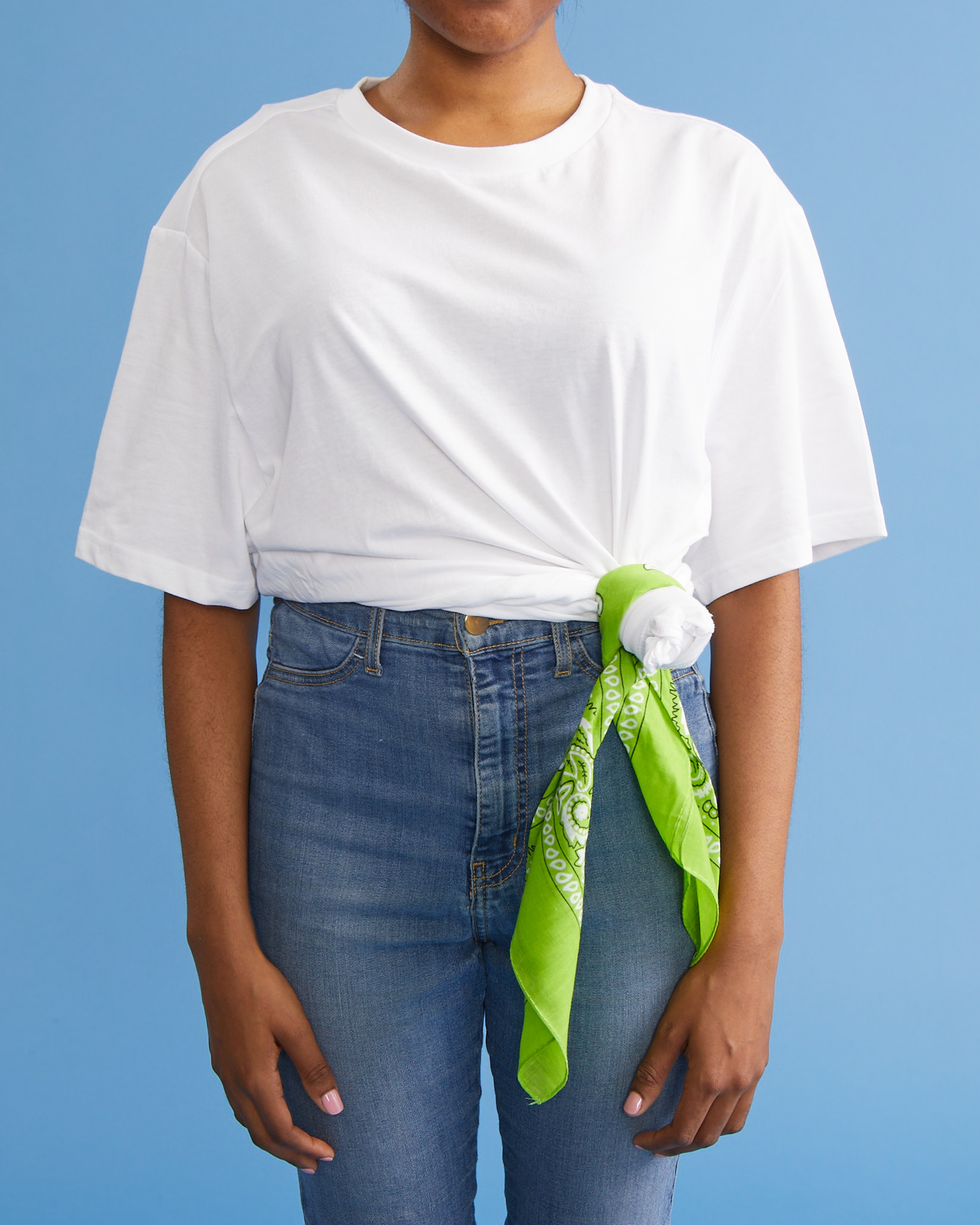
        Use a decorative scarf to give any of your knots a boost of color or visual appeal.

        1. Create a knot similar to the first knot instructions.
        2. Wrap a decorative scarf around your knot.

        Optional: Based on your preference, keep the scarf’s tails hanging or continue wrapping them around your knot until hidden.

        Button-Down Shirt Knot

        how to tie a button down shirt

        mike garten

        how to tie a button down shirt

        mike garten

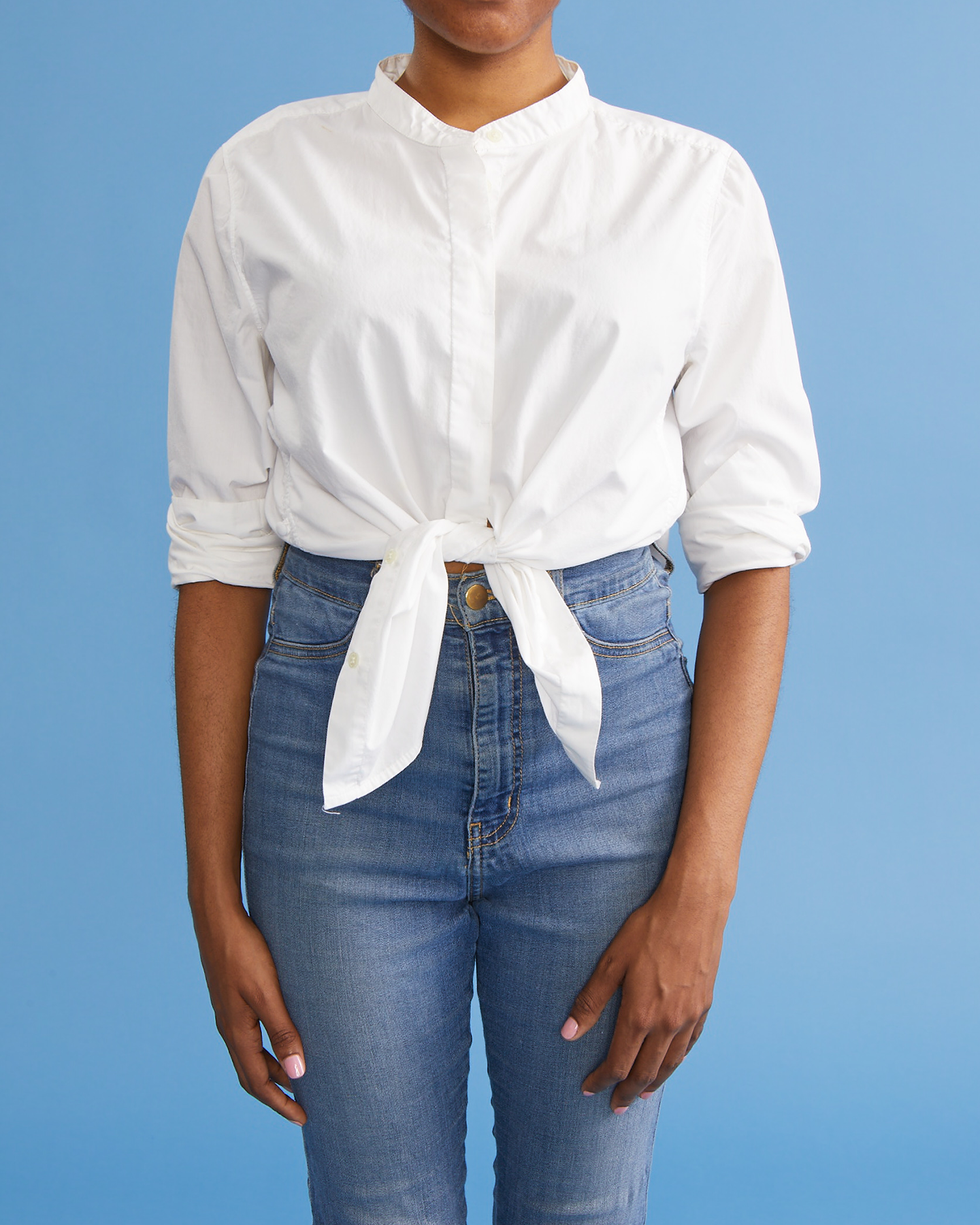
        Here’s a knot idea specifically for your button-down shirts. For cooler weather, you’ll want to find creative ways to give long-sleeve shirts some flair.

        1. Button your shirt but leave the two ends out.
        2. Create a basic knot by crossing one end of the shirt over the other.
        3. Insert one end of the shirt into the loop or hole.
        4. Pull both ends in opposite directions to tighten the knot.
        how to tie a shirt knot, woman wearing a white button down shirt with hands at her sides while wearing jeans

        Mike Garten

        Ruffled Side Knot

        how to tie a shirt ruffle knot

        mike garten

        how to tie a shirt ruffle knot

        mike garten

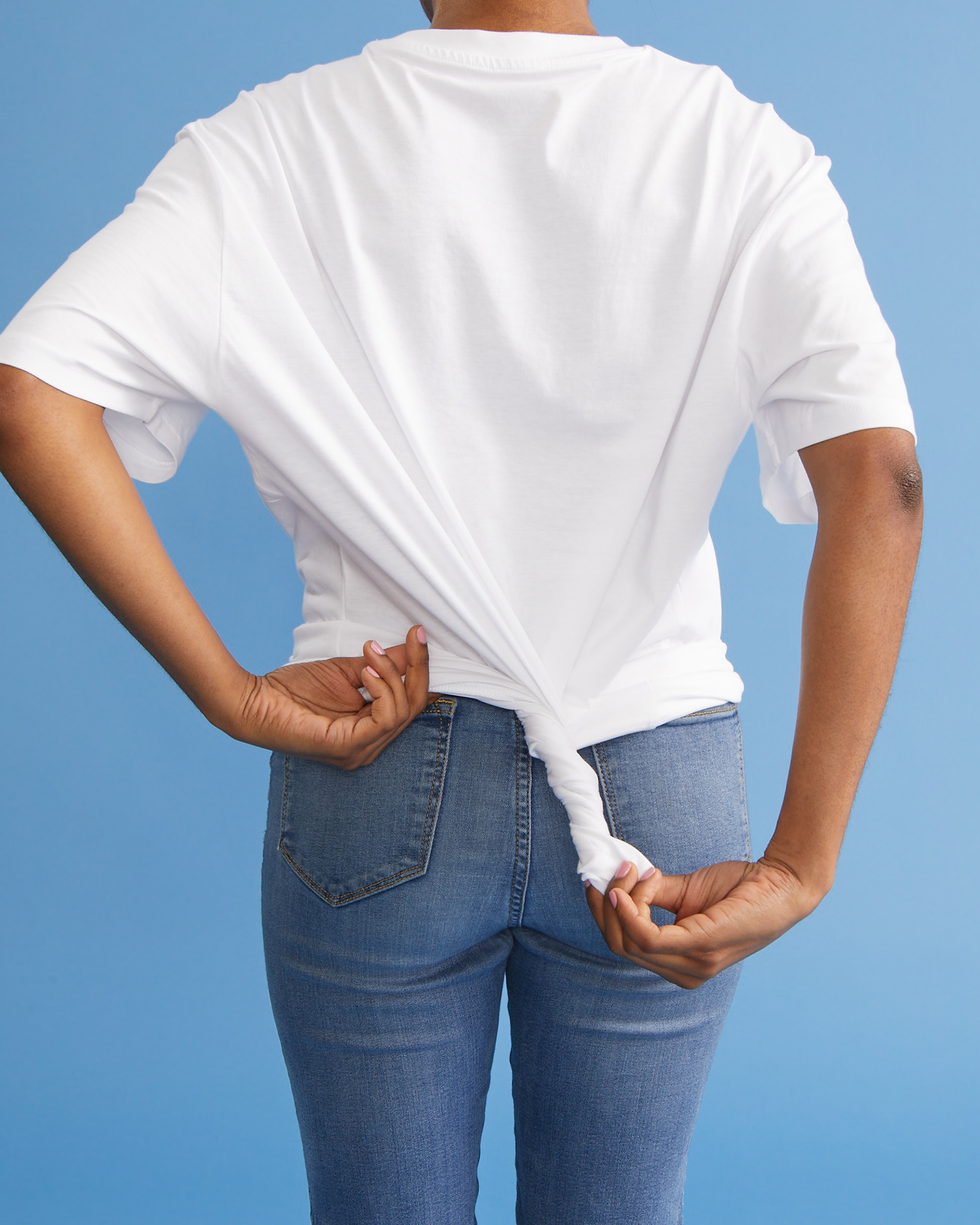
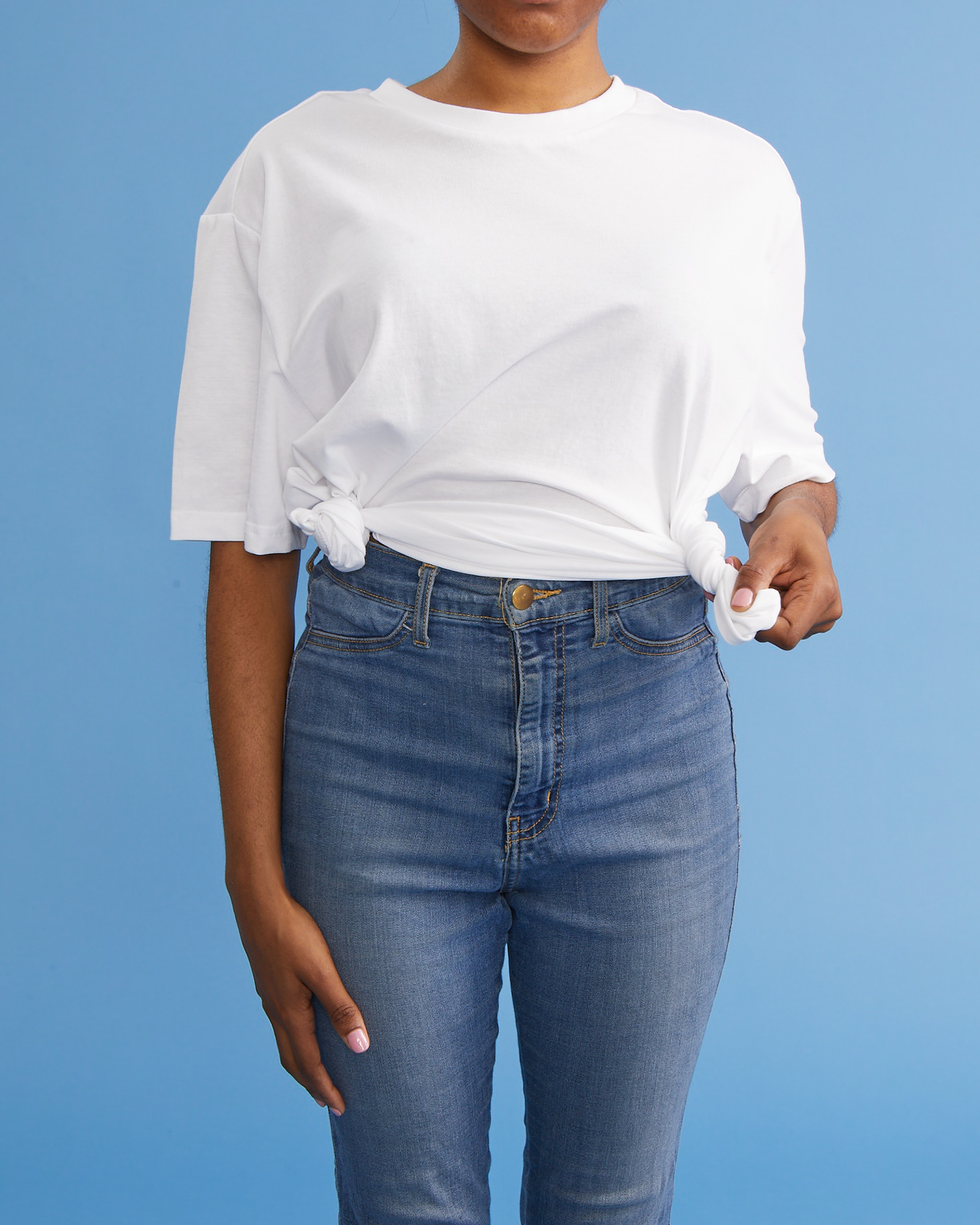
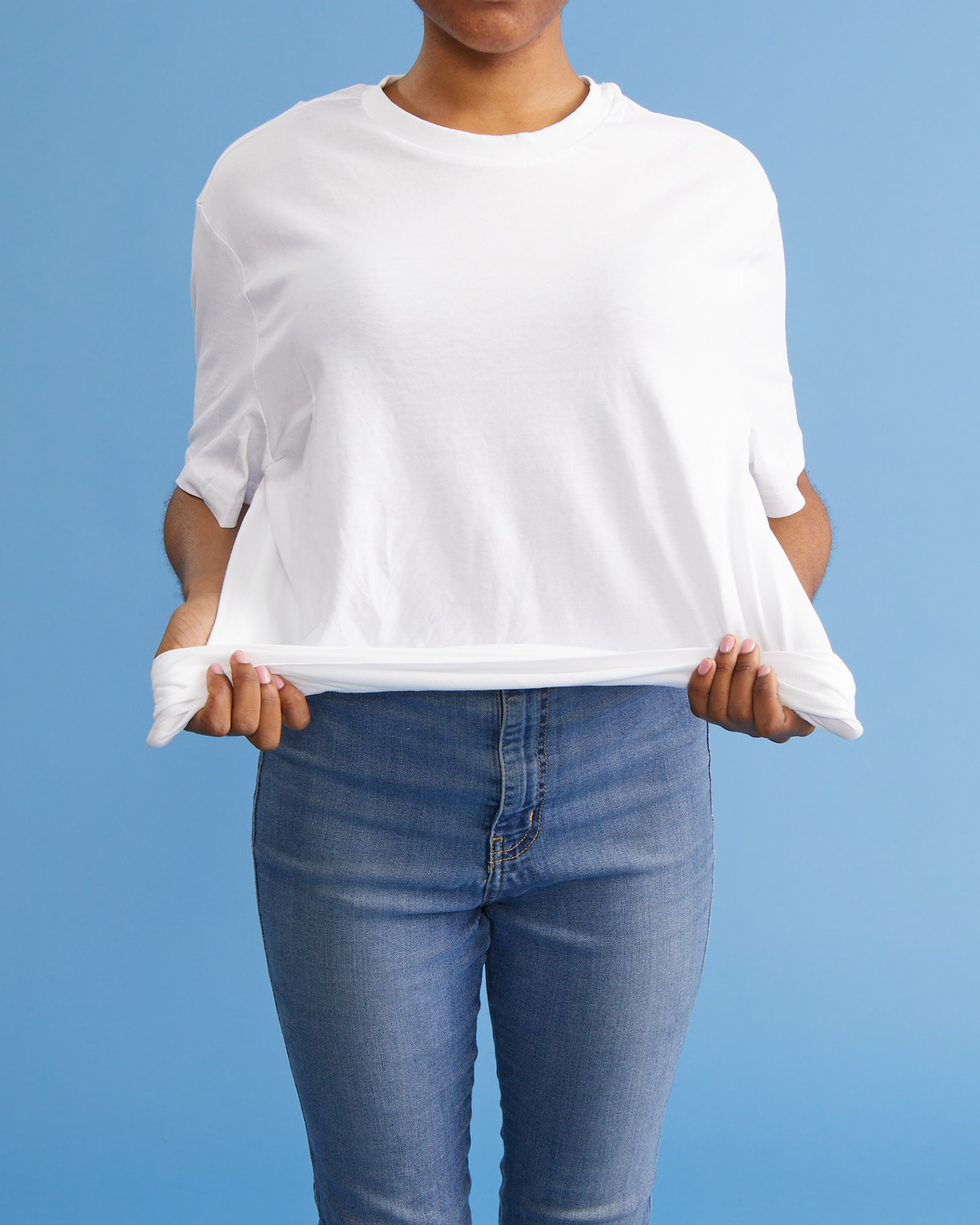
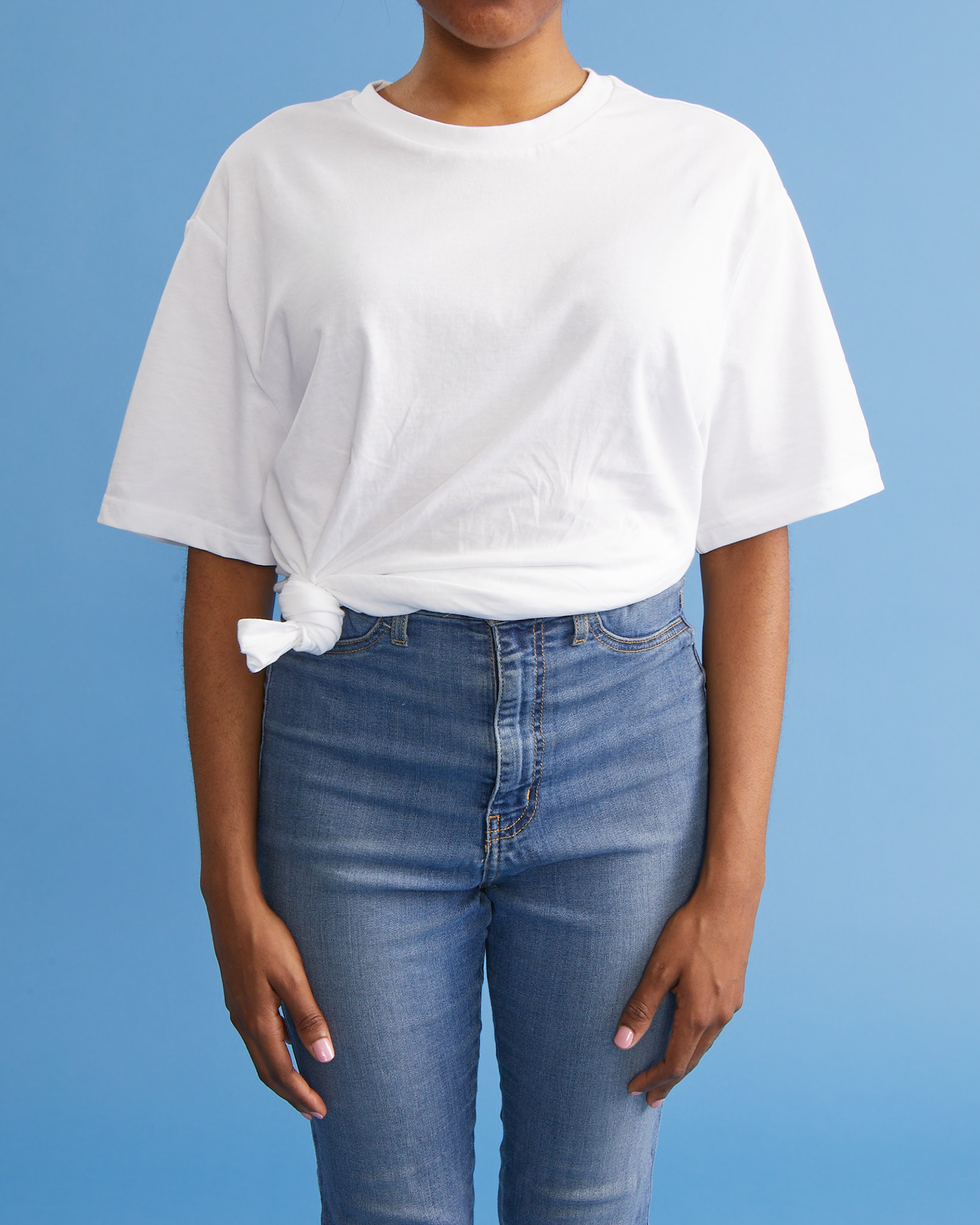
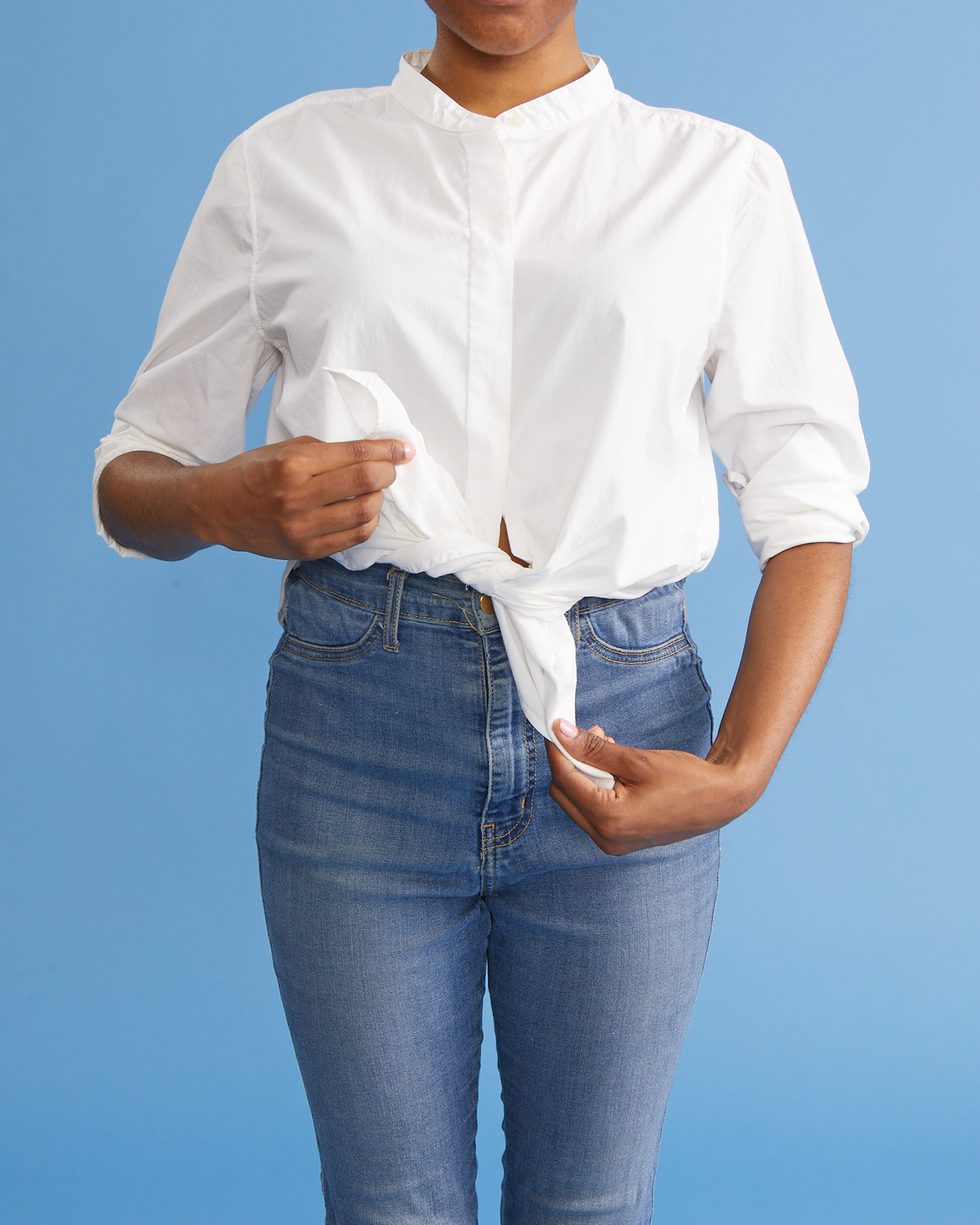
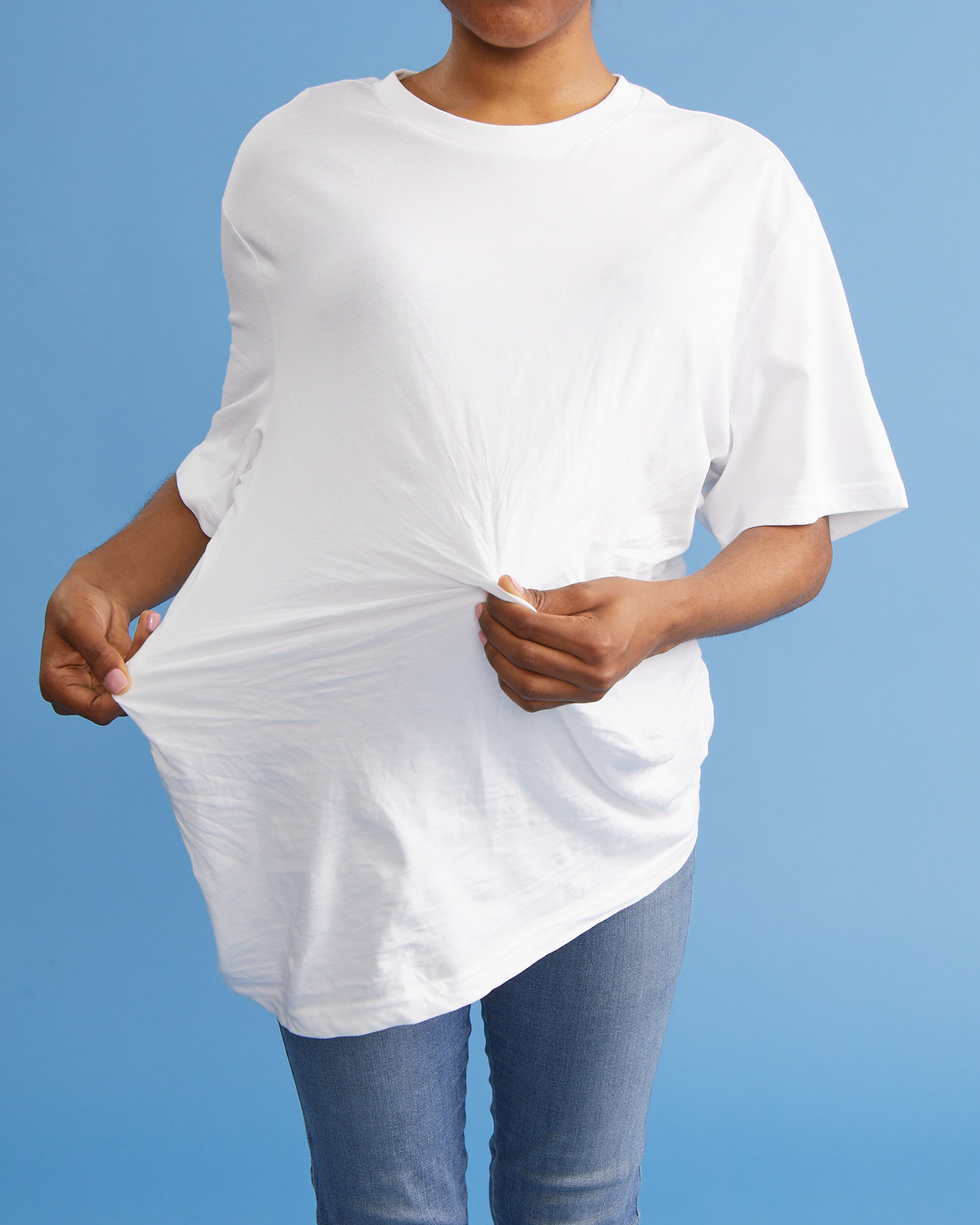
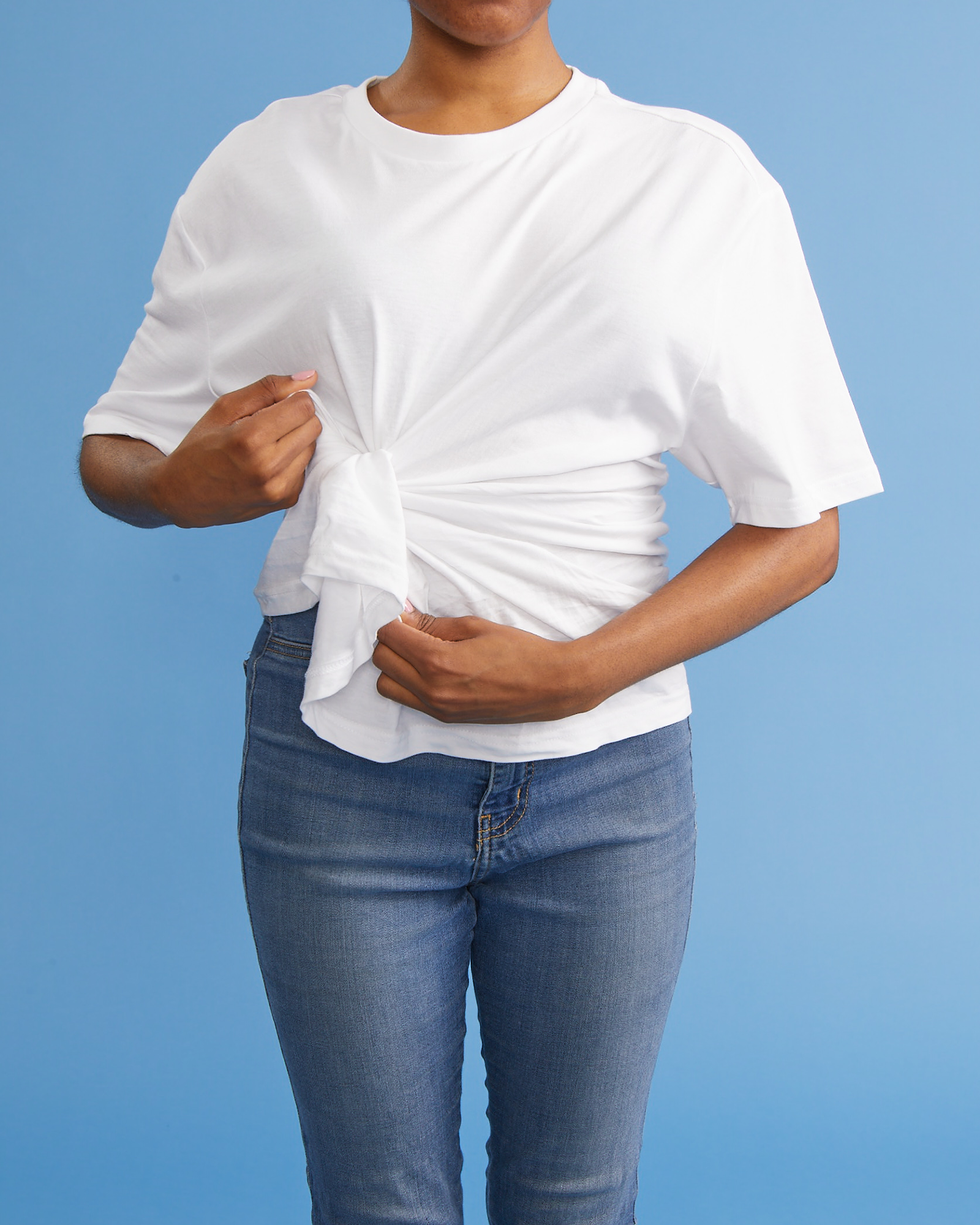
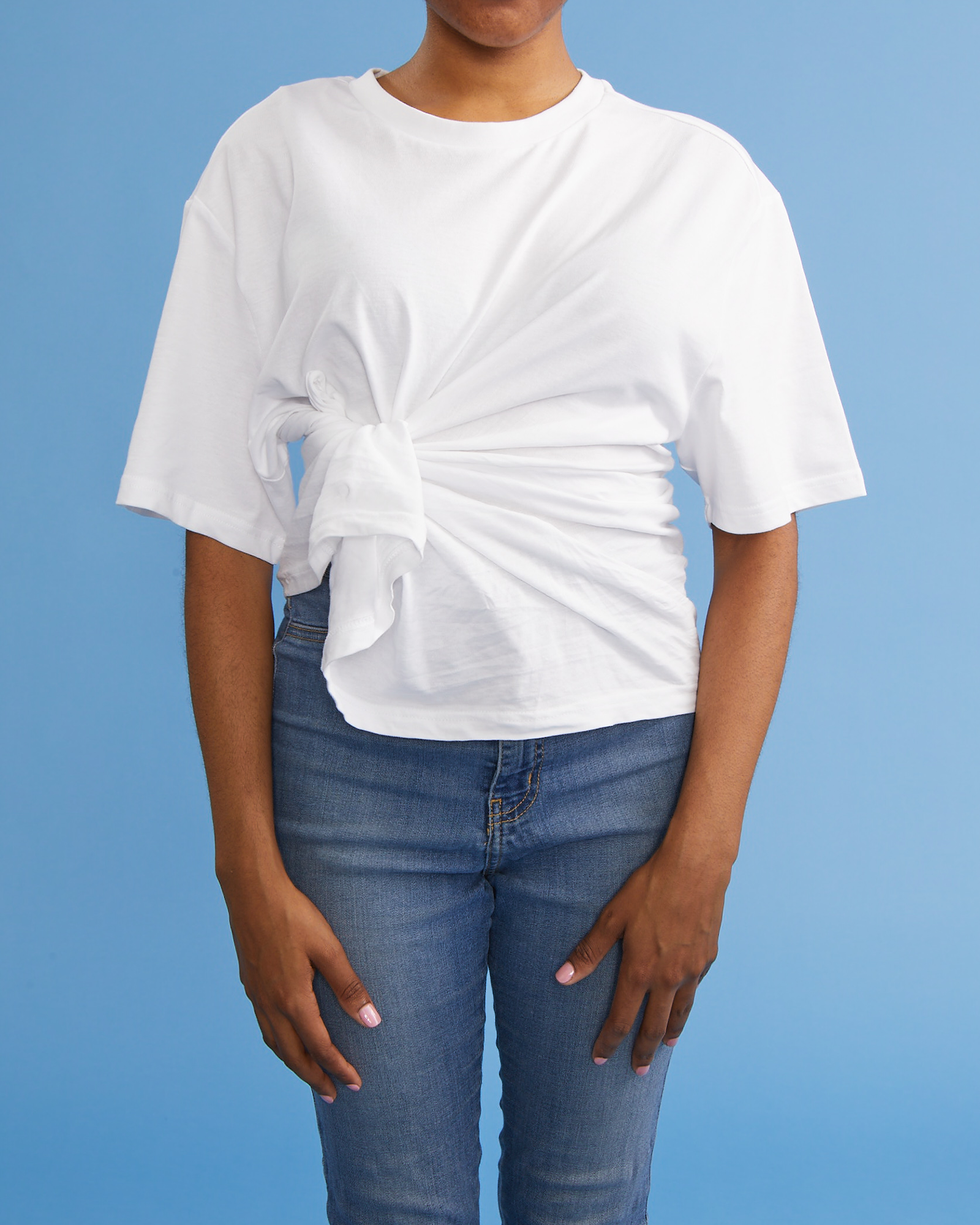
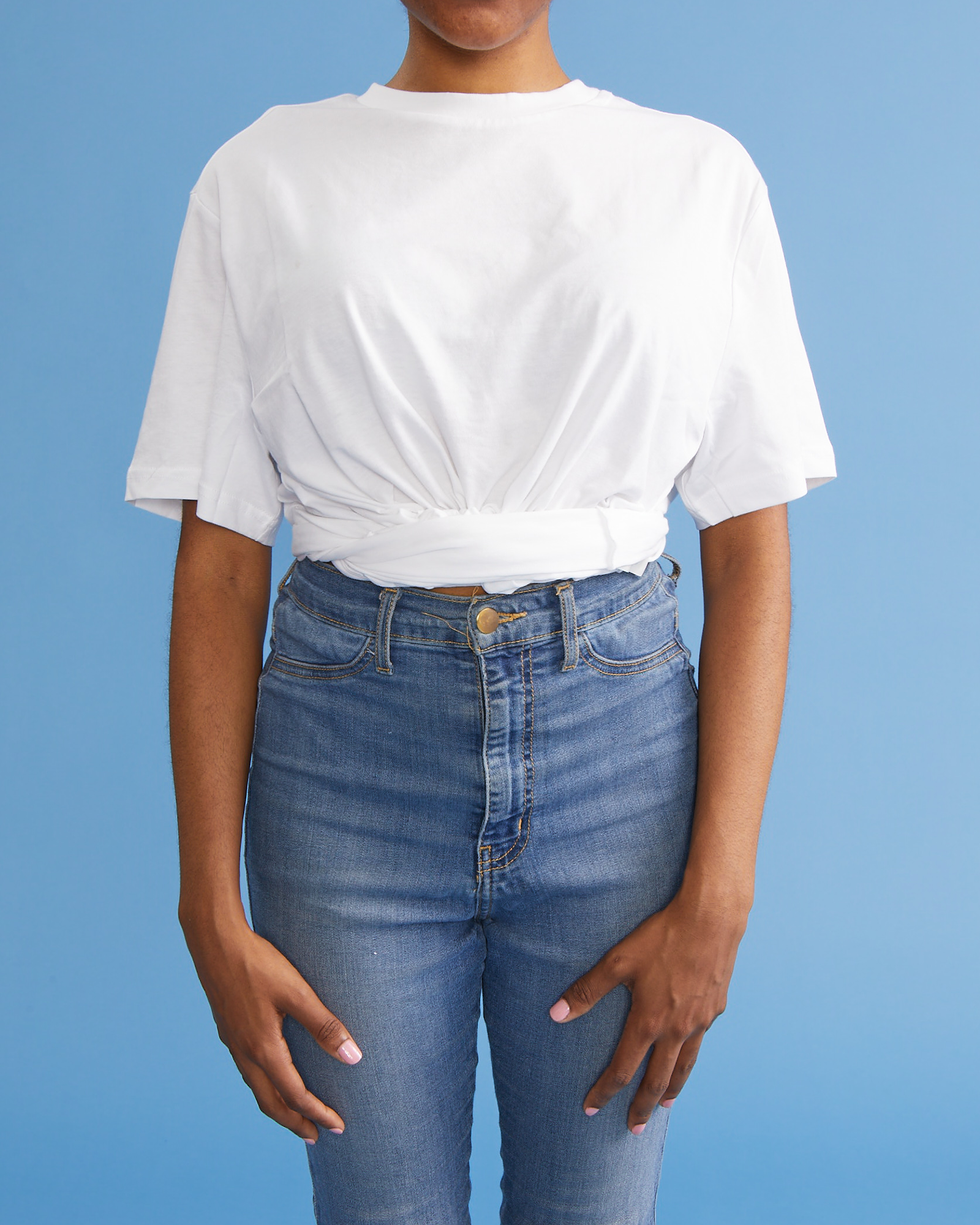
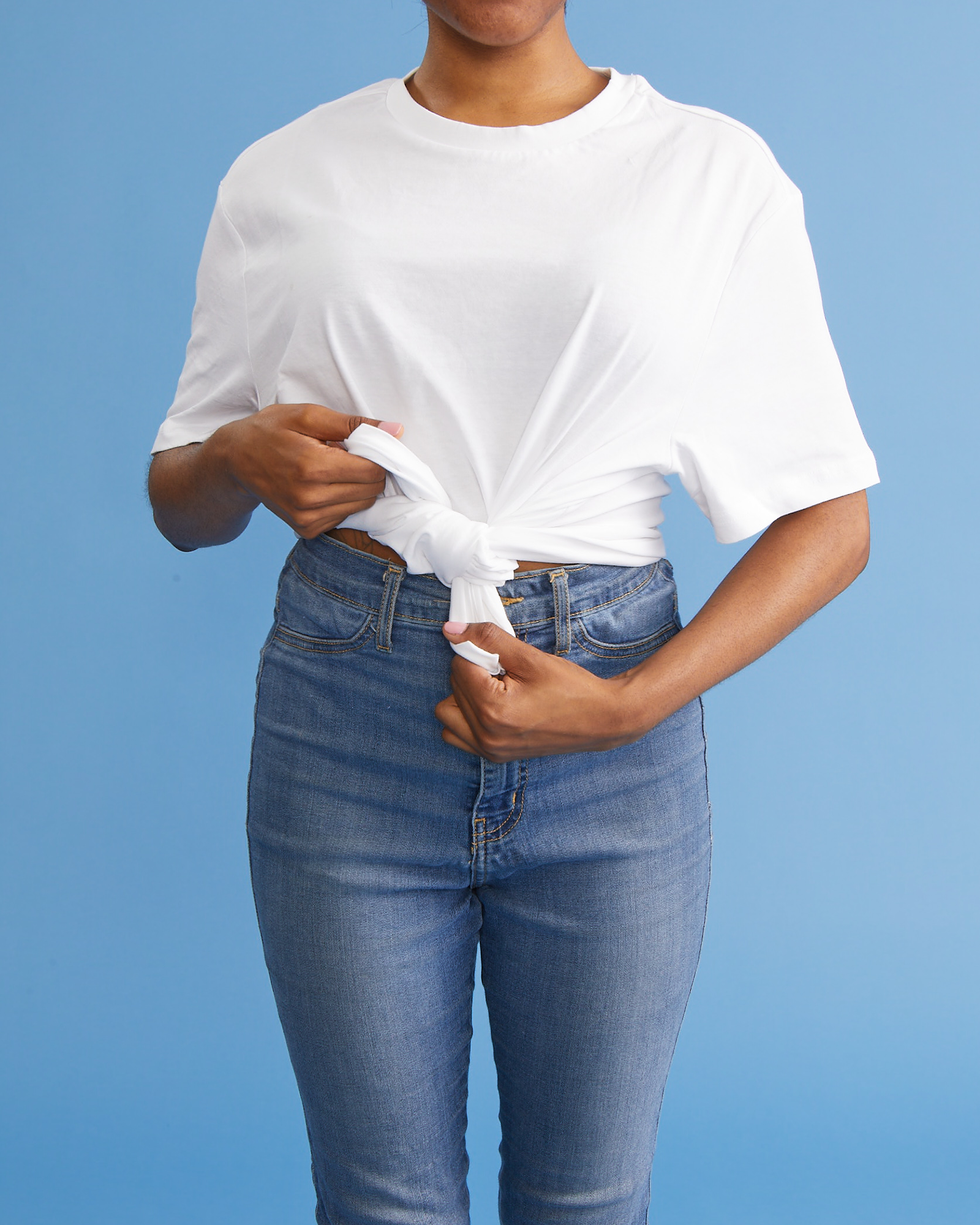
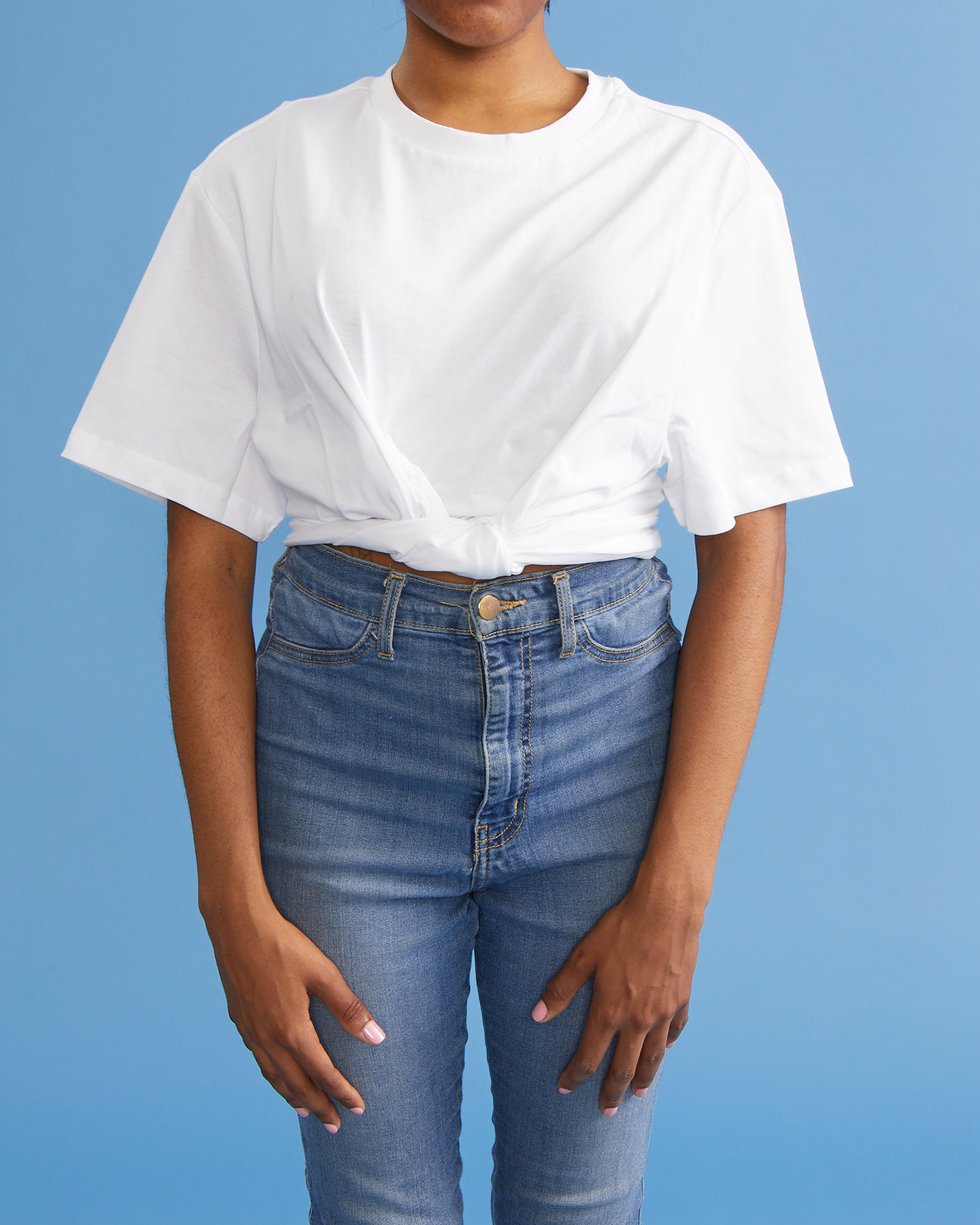
        This may be one of the cutest knots on our list. It’s a unique ruffled look that you can recreate with your own T-shirt rather than going for a store-bought version.

        1. Take two pieces of the material mid-tummy on both sides.
        2. Pull those two pieces to the side of your choosing.
        3. Create a basic knot by crossing one end of the shirt over the other.
        4. Insert one end of the shirt into the loop.
        5. Pull both ends in opposite directions to tighten the knot.
        how to tie a shirt knot, ruffled side knot on a white shirt

        Mike Garten

        Rubber Band “Knot” and Tuck

        how to tie a tee shirt with a rubberband

        mike garten

        how to tie a tee shirt with a rubberband

        mike garten

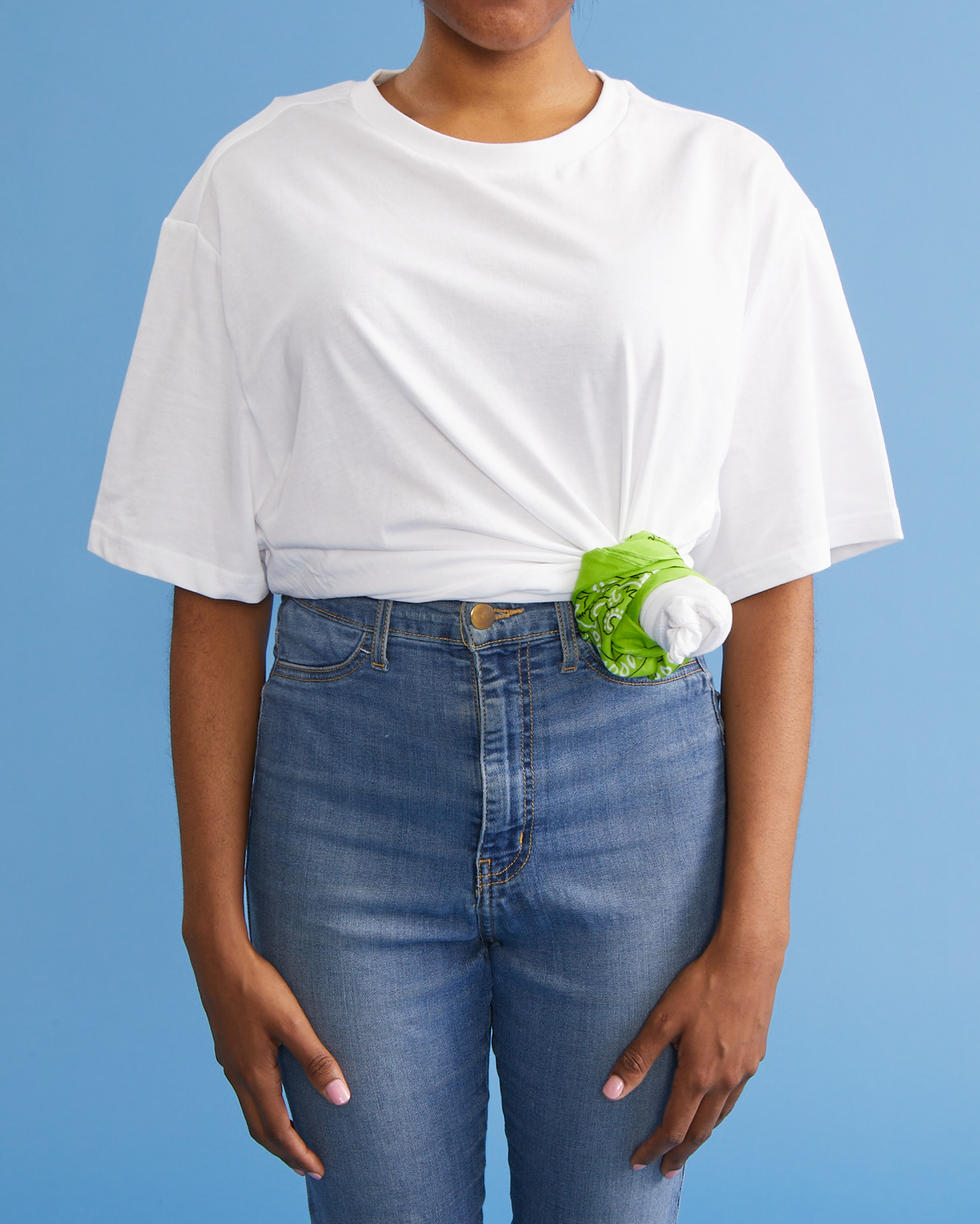
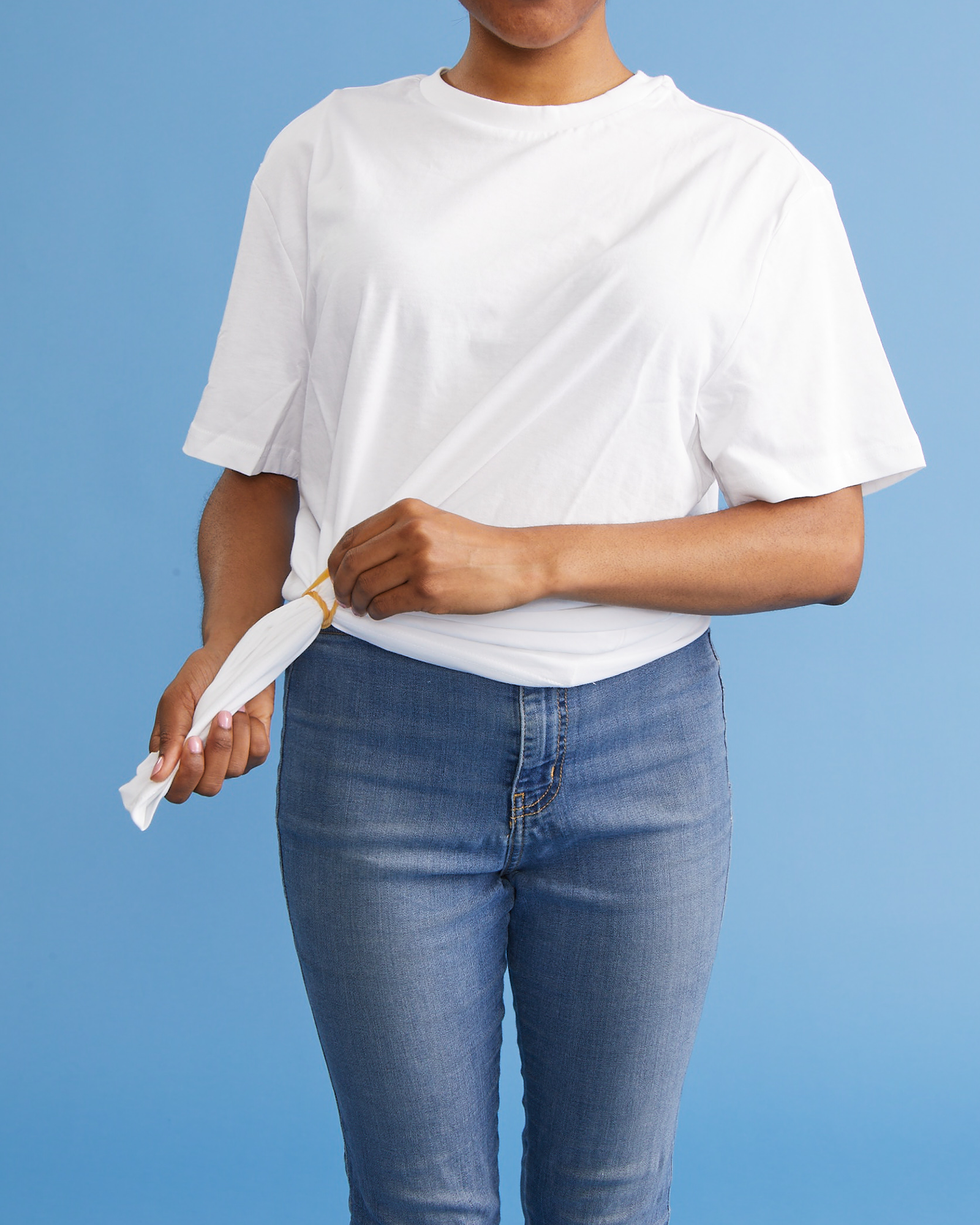
        If knots aren’t your forte or you find these ideas to be complicated, then use a rubber band to fake it.

        1. Take one side of your shirt and wrap the end with a rubber band.
        2. Tuck the extended piece underneath your shirt to hide the “knot.”

        Criss-Cross Shirt Tie

        how to tie a shirt criss cross tuck

        mike garten

        how to tie a shirt criss cross tuck

        mike garten

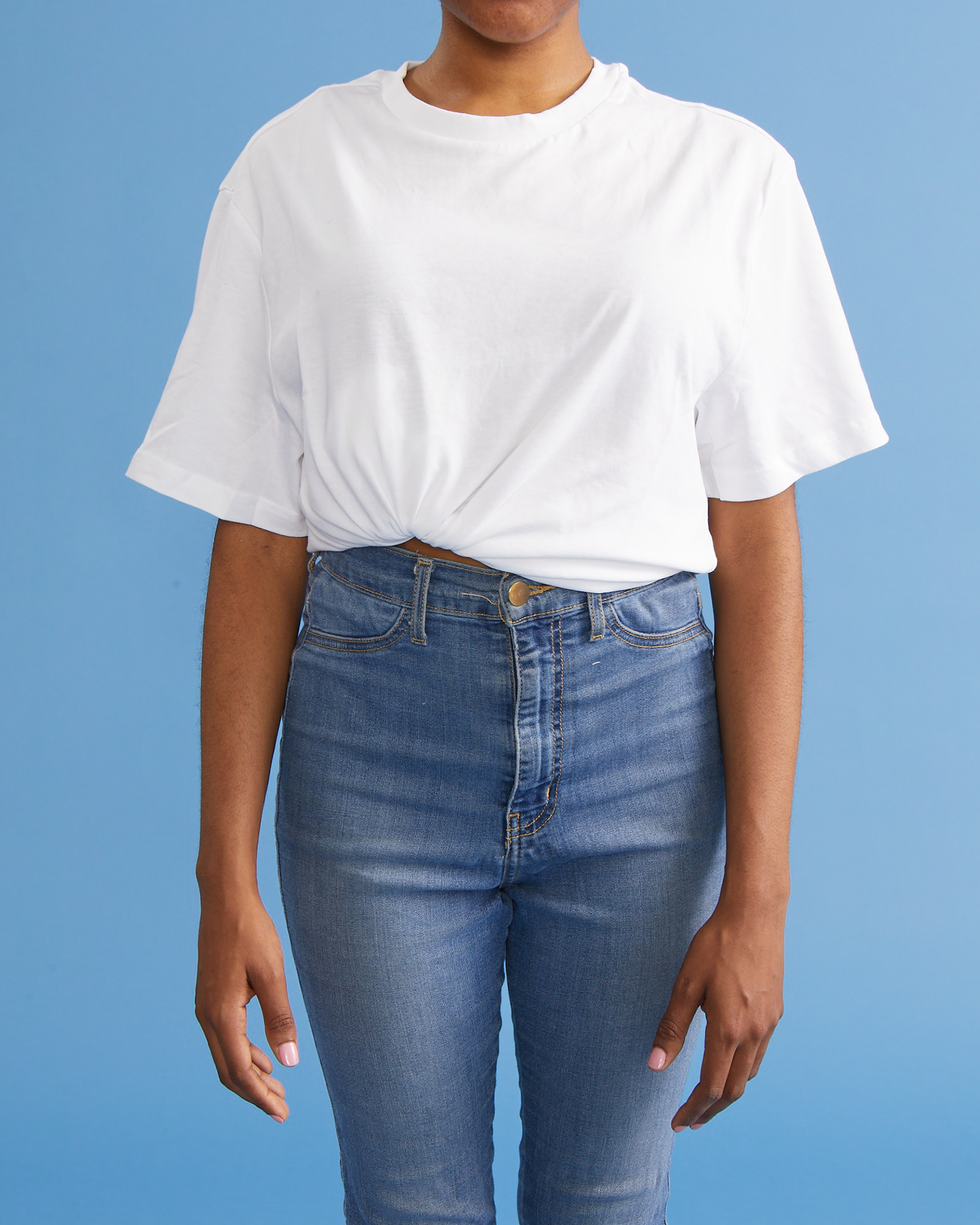
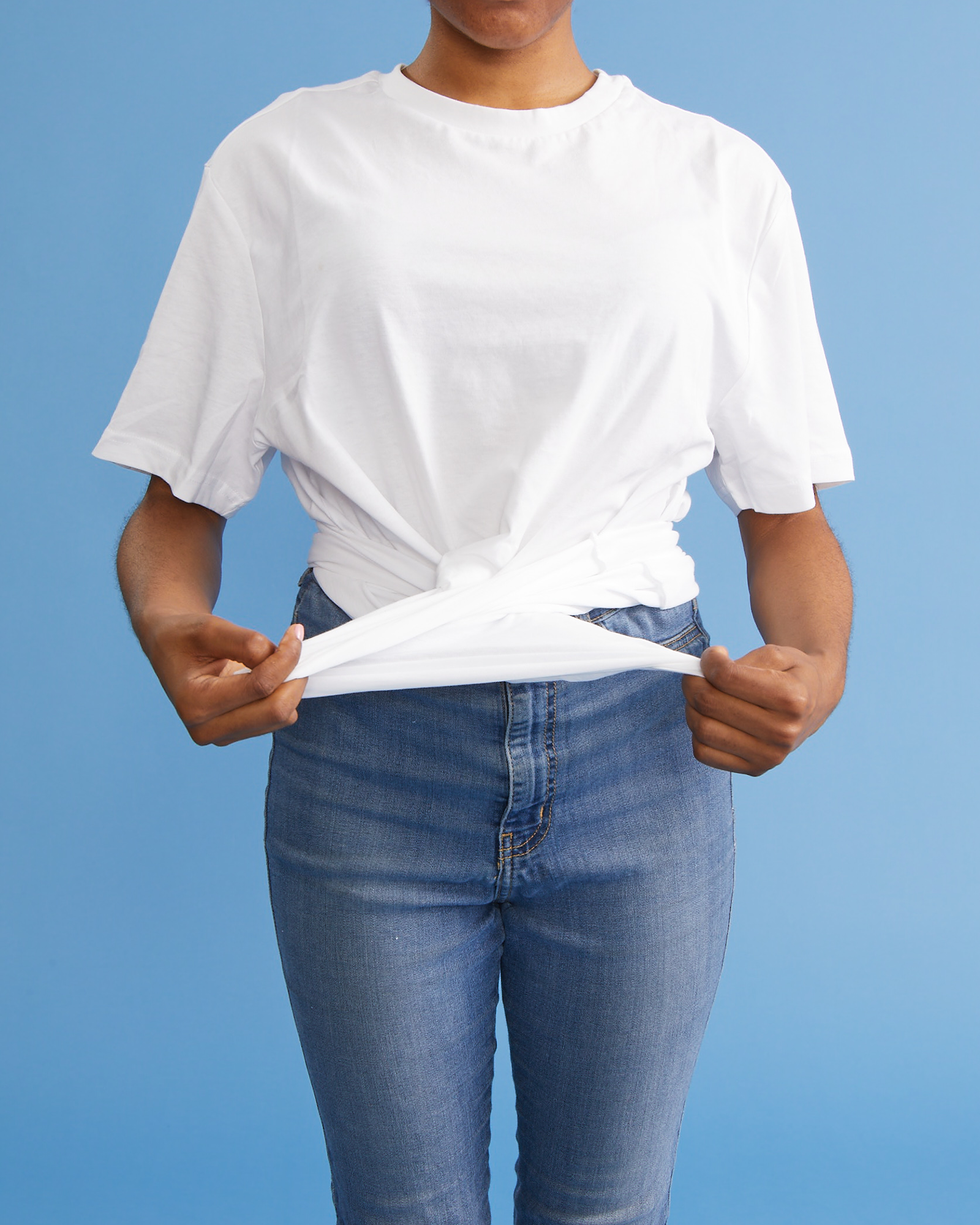
        Here’s another shirt idea that’ll look like it’s knotted, but in reality, your tee is just crisscrossed and tucked!

        1. Cross your arms and grab both sides of your shirt.
        2. Cross the sides over.
        3. Tuck the ends underneath your shirt.
        how to tie a shirt knot, woman wearing a white shirt and jeans with hands at her sides

        Mike Garten

        Headshot of Mariah Thomas

        Assistant Editor

        Mariah Thomas (she/her) is an assistant editor for Good Housekeeping, where she covers home and lifestyle content. Mariah has more than four years of editorial experience, having written for TLC, Apartment Therapy, Women’s Health and Avocado Magazine. She received her master’s degree in journalism at the Craig Newmark Graduate School of Journalism and published her first book, Heart and Soul: Poems of Thoughts and Emotions, in 2019. She’s also the founder of RTF Community a platform for creatives of color to connect, learn and showcase their work. 

Xhicboutique.com – Get this Product & More at Discount Prices!

Source link
Posted on Leave a comment

Skincare Experts Explain How to Make Sugar Wax for Easy At-Home Hair Removal

Hair removal may have satisfying results, but can be painful. Razors come with the risk of nicking skin and creating razor bumps; waxing strips make some flinch; while IPL hair removal devices quite literally zap away hair. If your skin keeps speaking up through redness and irritation, it may be time to graduate to body hair removal’s more sensitive skin-friendly method: Sugaring.

Sugaring is a gentler alternative to traditional waxing, and it’s easy to make at home. We rounded up everything you need to know on how to make DIY sugar wax at home.


What is sugaring?

Sugaring, an all-natural method of hair removal, commonly uses a mixture of sugar, lemon and water that forms a hair removal paste. Sugar wax is applied against hair growth to remove hair. Hair removal enthusiasts tend to reserve it for the bikini area, face, underarms, legs and arms, but it can be used for other parts of the body as well. Sensitive skin types tend to go for sugar waxing as it’s less irritating and painful than waxing, according to Michele Green, M.D., a board-certified dermatologist in New York.


Is waxing or sugaring better?

Both make effective ways of removing unwanted body and facial hair, but there are a few differences to keep in mind:

  • Sugaring uses fewer potentially irritating ingredients. “Based on the ingredients alone, sugaring is a better option since additives have a higher chance of causing skin irritation,” says Dr. Green. Waxing uses beeswax, resin, oils and other additives that might irritate sensitive skin.
  • Sugaring has a lower risk of breaking hair follicles on removal. Sugaring is applied against the hair growth and removed with the hair growth while waxing applies wax in the direction of hair growth and then removed against hair growth. As a result, waxing may cause hair follicles to break in half, which may cause ingrown hairs and additional irritation, according to Dr. Green.
  • In-salon sugaring is pricier than waxing. In terms of affordability, waxing tends to be slightly more inexpensive when compared to sugaring.
  • Sugaring might take longer. Waxing can be a faster process than sugaring when used for larger surface areas like the legs or back.

Is homemade sugar wax safe?

When properly educated on how to safely sugar wax at home, it can be a good option, plus cheaper and more comfortable, says Dr. Green. That said, DIY sugar wax removal can come with some risks. You can accidentally rip your skin off instead of hair, which can cause pain, inflammation and an increased risk of infection — sugar waxing at home is often less sanitary than sugar waxing done at a salon. That’s why it’s best to start on clean skin, use clean tools, let the hair grow out slightly so the wax has something to grip onto and follow all the proper skin prep steps, below.

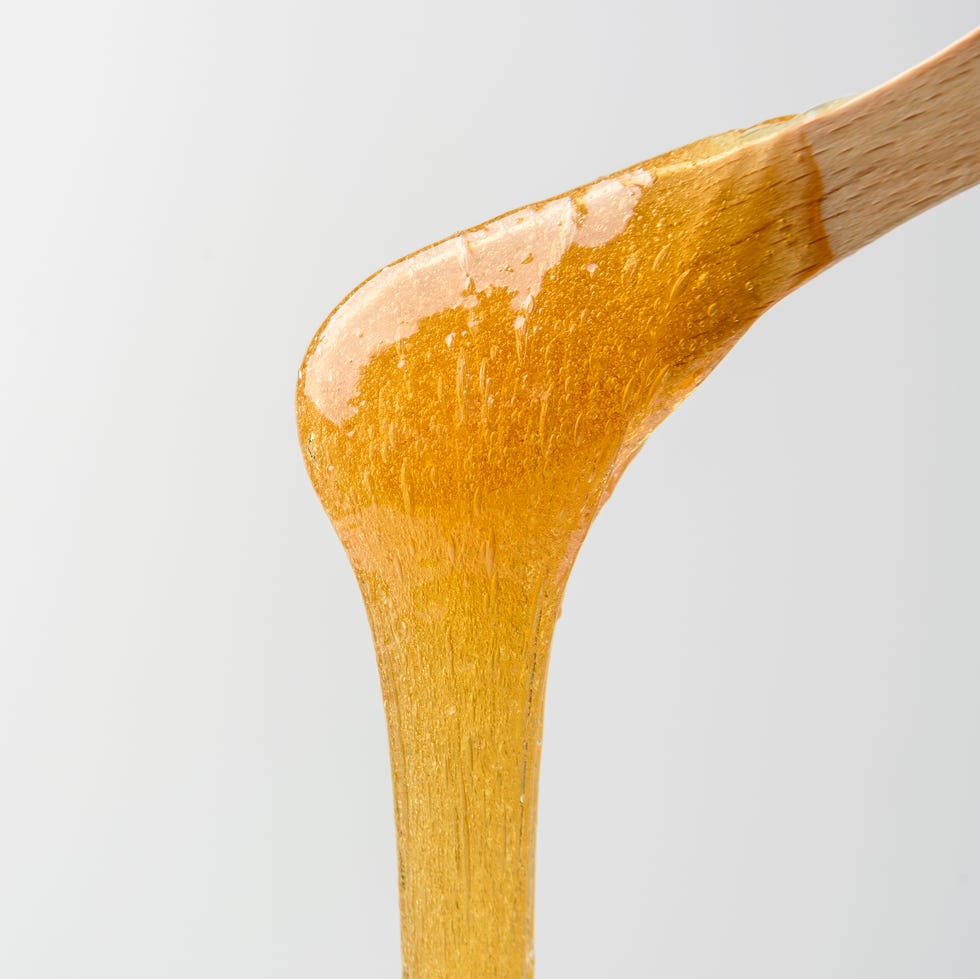
“Sugar mixtures that are too hot when applied can burn, and technique matters when pulling off the strips,” Dr. Amin says. “It does take experience to get the right consistency, so maybe skip the mess and leave it to the pros.” If you decide to take it into your own hands, he recommends letting the mixture cool to room temperature and soften to a sticky, honey-like texture. If it’s too hard, add a little water.

Lastly, you should avoid both traditional waxing and sugar waxing if you are undergoing treatment with oral isotretinoin, treated the area with laser hair removal or if you have any skin conditions. Sugaring should only be done on intact skin.


What’s the best sugar wax recipe?

Tatyana Aksenova / 500px//Getty Images

You’ll need a simple trio of sugar wax ingredients that’s probably already in your kitchen: Sugar, water and lemon. The recipe follows a 2:1 sugar to liquid ratio, according to Snehal Amin, M.D. a board-certified dermatologist and the co-founder and surgical director of MDCS Dermatology:

Sugar wax ingredients

How to make sugar wax on a stovetop

Ingredients

  • 1 cup of sugar
  • 1/4 cup of lemon juice
  • 1/4 cup of water

Directions

  1. Melt the mixture in a saucepan, then bring to a boil for about 10 minutes while stirring continuously.
  2. Remove from heat once it turns a caramel color.
  3. Pour into a heat-proof jar and let cool for 5-10 minutes. Do not apply until the mixture has gelled together and has “a consistency a little thicker than honey,” Dr. Amin says.

How to make sugar wax in a microwave

Ingredients

  • 1 cup sugar
  • 2 teaspoons lemon juice
  • 2 tablespoons water
  • 1 tablespoon salt

Directions

  1. Combine ingredients in a microwaveable glass bowl.
  2. Microwave in 1-minute intervals, checking on it after each minute. (It may take 5-6 minutes, which varies depending on your microwave’s power.)
  3. Let the mixture cool and turn a maple syrup color with a sticky, spreadable, stretchy consistency.

How to use sugar wax with traditional wax strips

The idea of waxing yourself may make you wince, but here’s the most seamless step-by-step guide for removing hair with either traditional wax strips or just sugar wax itself:

  1. Scoop out a thick layer of the sugar wax paste using a clean wax stick.
  2. Apply the mixture directly to skin against the direction of hair growth.
  3. Cover the wax completely using clean cotton cloth strips.
  4. Pull skin taut and swiftly peel back with the grain of your hair.
  5. Repeat using clean cloth strips for each section until hair is removed completely.

How to use sugar wax without strips

  1. Grab the cooled wax using clean fingertips and apply it directly onto the skin opposite the direction of hair growth.
  2. Pull skin taut with the free hand.
  3. Remove with quick, short pulls in the same direction as the hair growth.

How to prep skin for sugaring

“Be mindful that proper hygiene prep and clean tools are necessary to avoid potential infection, Dr. Amin says. Here’s what to keep in mind:

  • Exfoliate skin a few days before the treatment — this strips away any dead skin cells while reducing the risk of ingrown hairs.
  • Let hair grow out a little or skip shaving for at least a week prior so that your hair is at adequate length for the sugar waxing.
  • Put a pause on tanning, retinols or other similar products in the treatment area one week prior. “These topicals can sensitize the skin and increase the risk of developing hyperpigmentation (dark spots) after waxing,” Dr. Amin says.

How to care for your skin post-sugaring

Post-sugar wax, avoid exfoliating, friction and minimize touching the area for 48 hours. Tip: Loose, comfortable clothing prevents friction in the area. Skip moisturizers and product application and minimize sweating for 24 hours to avoid clogged pores. “Bacteria thrive in moist, warm environments and sugar is food,” Dr. Amin says. “Folliculitis, little bumps on the skin, can sometimes occur after waxing from irritation to the hair follicle or because of infection.”

Meet the experts

  • Michele Green, M.D., is a board-certified dermatologist who attended Mount Sinai Medical School in NYC. She specializes in a variety of cosmetic dermatology treatments.
  • Snehal Amin, M.D. is a board-certified dermatologist and the co-founder and surgical director of MDCS Dermatology.
  • Chiara Butler is a reviews analyst in the Good Housekeeping Institute Beauty Lab.

Commerce Editor

Jacqueline (she/her) covers all things e-commerce in beauty, lifestyle and beyond for the Good Housekeeping Institute. Before joining GH in 2021, she was a style and beauty reviews fellow at Insider, testing viral trends, reviewing sustainable brands and more. She’s a graduate of the University of Florida’s School of Journalism, with a specialty in magazines and mass communication.

Xhicboutique.com – Get this Product & More at Amazing Prices!

Source link

Posted on Leave a comment

19 Easy (and Cheap!) Ways to Look Younger, According to Experts

how to look younger

Getty Images

We asked experts like dermatologists, nutritionists and makeup artists for their secrets to younger-looking skin, voluminous hair, eating well and more so you can look and feel your best for years to come.

Advertisement – Continue Reading Below

1

Use a Moisturizer, Then Foundation

e.l.f.

Hydrating Face Primer

2

Try a Collagen-Based Face Cream

Elemis

Pro-Collagen Marine Cream

3

Use a concealer for dark circles

Estée Lauder

Double Wear Stay-in-Place Flawless Wear Concealer

4

Keep your eye makeup simple

Urban Decay

Anti-Aging Eyeshadow Primer Potion

5

Curl those lashes

ULTA

Eyelash Curler

6

Apply SPF Daily

Vichy

LiftActiv Peptide-C Sunscreen SPF 30

7

Take your time removing your makeup

Clinique

Take The Day Off Cleansing Balm

8

Find a “happy medium” hair length.

Forget the idea that a super-short chop is an age requirement. If you want to cut it short, make sure it’s slightly shaggy so it’s both modern and manageable. That being said, excessive length can drag your hair down, so consider a choppy bob that sits just below the collarbone, suggests Paul Labrecque of the eponymous New York City salons. “Asymmetrical or less-than-perfect shapes deflect attention away from wrinkles,” he adds.

9

Consider lightening your hair.

Dark hair against a light scalp can make thinning even more visible. It also casts shadows on your skin so wrinkles look more pronounced, says Gary Howse, creative director of the Gary Manuel salons in Seattle. If you go two to three shades lighter with permanent color or highlights around your face, it’ll make all the difference, says colorist Sharon Dorram of Sharon Dorram Color at Sally Hershberger in New York City.

10

Embrace (and protect) your grays.

Say it with us: Gray is beautiful! More specifically, vibrant gray hair is beautiful. “Yellowing gray hair is as bad as yellowing teeth,” says Howse. Prevent your silver hair from dulling with products that contain shine enhancers and UV filters. If your hair is more than 50% gray, use a shampoo with blue or violet undertones to neutralize yellow. But if your hair is 100% white, dyeing it light blonde is your best bet.

11

Channel your hairstyle icon.

Similar to overdoing your makeup, it’s best to avoid a severe haircut. “Look for photos of celebrities your age with great hair like Halle Berry or Susan Sarandon,” says Howse. “Then show your favorites to your stylist.”

12

Go to the salon for a fringe.

Bangs are one way to experiment without going over-the-top. “They usually make people look younger,” says Howse. But do a road test before you commit: Put your hand over your forehead when you look in the mirror, then take your hand away — which look do you prefer? And make sure those bangs are full and reach the center of your brows, or that they’re longer and more side-swept.

You read that correctly. Some research suggests that having sex frequently could help you live longer. And as one 43-year-old woman named Emily shared with us, “Whenever people ask me how I look so young, I always answer ‘sex and yoga.’”

14

Load up on Vitamin-C packed fruits and veggies.

Vitamin C naturally boosts your body’s collagen, which helps keep your skin firm and youthful-looking, says Jaclyn London, M.S., R.D., C.D.N. Stick with bell peppers and strawberries, among others, to give you that youthful glow.

15

Make salmon a weeknight staple.

“The fish’s high amounts of omega-3 fatty acids help reduce inflammation, which can affect how skin looks,” explains Tamara Melton, M.S., R.D.N., L.D. Nutrients like vitamin D and antioxidants can also reduce the risk of skin cancer and help with acne and rosacea, adds Lauren Ploch, M.D., M.Ed., FAAD, a New Orleans-based dermatologist.

16

Grab those leafy greens.

London says these powerhouse veggies have the carotene compounds lutein and zeaxanthin, which help protect and hydrate skin cells. You can throw them into smoothies, toss them in salads, or snack on these easy kale recipes to get those nutrients.

They are loaded with beta-carotene, says London, which helps your skin repair itself, stay smooth, and even delay the appearance of wrinkles. When it’s not their season, reach for winter squash, sweet potatoes, carrots, cantaloupe, and apricots for the same effects.

Don’t wait until you feel thirsty: It means you’re already somewhat dehydrated, according to Baylor College of Medicine. And take it from 46-year-old Chris, who says, “When I drink the amount I’m supposed to — at least eight large glasses a day — I look years younger, feel better, and drop five pounds without trying.”

19

Cut down on the alcohol.

Advertisement – Continue Reading Below

Xhicboutique.com – Search for this Product & More at Discount Prices!

Source link
Posted on Leave a comment

Easy Ways to Pamper Mum this Mother’s Day! – Latest In Beauty Blog

I have fond memories of Mother’s Day from when I lived at home; I always liked to give my mum a day full of little indulgences – even from a young age when I insisted I could carry her tea and breakfast tray all by myself (I couldn’t). She’d complain throughout the year that we didn’t help enough around the house, but we did always spoil her on “her day”.

You don’t need to spend lots of money to make your mum feel special – a card and a thoughtful gesture is enough! Here are a few ideas on how to pamper your Mum at home – perfect for showing the number one woman in your life just how much you care, because let’s face it, she’s most definitely your number one fan and probably still does your washing when you visit.

Fresh flowers

Simple, classic, beautiful. We’re big fans of letterbox flowers and can always rely on Bloom & Wild to deliver gorgeous blooms from me. They have a good selection for Mother’s Day – we love the Violet bouquet.

Breakfast in bed

If you’re fortunate enough to spend Mother’s Day with your mum at home, get extra brownie points by serving her breakfast in bed. Croissants, scrambled eggs, fresh fruit, her favourite coffee… maybe even a glass of bucks fizz?  How indulgent.

At-home spa

Most mums are always on the go, so arranging time for relaxation will always go down a treat. Put the kettle on, let her put her feet up while you run her a bath and give her a hamper of pampering at-home spa products. If you’re feeling extra nice, book in for an at-home mani/ pedi.

Do her makeup

Who doesn’t like a mini makeover? If you’re no good at makeup, don’t worry – why not take her to a counter in a department store? Something you can both do together, for free. Afterwards, you could treat her to her favourite product (and one for you, too…)

Life lessons from mum

In the spirit of celebrating everything that’s great about mums, we got the whole team involved to share what our mothers taught us. Although there are – of course – many times I’ve not listened to my mum (and later regretted it – why are they always right?) she has passed on her wisdom and taught me many things, like how to apply eyeshadow by blending three shades together. Now I own over 20 palettes. Thanks, Mum! She also taught me how to cook and experiment with food, in addition to nailing the perfect cupcake recipe – one that I hope to share with my own children one day.

My mum taught me to let things go. She is a very calm person who doesn’t let things get to her and has the ability to move on from problems very quickly. I am the type of person who holds grudges and takes things personally, but Mum always told me to “chill” and “move on” p.s she is not a hippy” – Christina

My mum taught me to invest in your hair as you wear it everyday! Find a great hairdresser and build a trusting relationship with them so that eventually (after about 2-4 trips) they become an expert in your hair (they will learn to understand the texture, how it takes to colour, the shape of your face, how your hair changes seasonally, how you like it styled) – she also taught me to always wear an outfit to the salon (especially if you’re going there for the first time!) that represents your personal style the most so that they understand your “look” as well.

Also, take pictures of hairstyles that you love, but also include images of hair that you don’t like – hairdressers aren’t mind readers, so provide as much direction as possible.

Finally… Don’t shy away from asking your hairdresser what they’d do if they had free reign (they’re the experts) – This makes hairdressing trips a fun, exciting and collaborative experience, you might leave the salon with a cut or colour that you never thought would suit you, but looks amazing – never be afraid of change!” – Harriet

My mum taught me to always have lovely nails… painted and not chipped!” – Jess

My mum taught me the importance of perfume!  My earliest beauty memory is spraying one spritz of a pretty little bottle of Yardley fragrance on each wrist before going to birthday parties.  I was only allowed to wear it for “special occasions” and really treasured it; now, I adore perfume, have a decent-sized fragrance wardrobe to suit each mood, and don’t feel dressed without it.” – Emma

What’s the biggest life lesson your Mum has taught you? Tweet us and let us know! We’ll pick one of our favourites to win the new Mother & Daughter Box…

Xhicboutique.com – Find this Product & More at Fun Prices!

Source link
Posted on Leave a comment

A nail polish that lasts two weeks, but is still easy to remove? Bring it on…

CND Vinylux 7 day nail polish

I’ve never been the kind of woman who spends a lot of time on her nails.

Mine are short and brittle, with super-dry cuticles, and a nice little selection of hangnails, into the bargain. I can’t stand the feeling of long nails on my keyboard, and I have a job which requires me to type thousands of words every day, so although my nails grow quickly, I’m forever filing them down… and because I’m not very good at it, they always end up misshapen and awkward looking. Nail polish, meanwhile, doesn’t remain intact on me for more than a couple of hours – and that’s no matter how carefully I apply it, or what brand of “miracle” topcoat I use. It always chips, and always looks scruffy, so I mostly try to stick to the natural nail look, and sit on my hands whenever I’m in company, so no one can see the state of then.

Or I used to, anyway.

A couple of years ago, ShoeperMan bought me a gel nails kit for Christmas, and I never looked back. It’s quick and easy to use, and it leaves my nails looking shiny and polished until I decide to take it off again. And therein lies the problem. Gel nails might look great, and be virtually impossible to chip, but it’s also virtually impossible to remove – or not without a struggle, anyway.  Mine has to be soaked off with acetone: technically it should only take around ten minutes, but it always seems to take much longer than that, and to leave my nails looking even worse than when they started, so while I swear by it for my toenails, lately I’ve been choosing to leave my fingernails bare – or to go back to “regular” polish, even although I know it’ll have chipped by the end of the first hour.

Which brings me to CND’s Vinylux.

This is the brand behind Shellac – which is one of the leading gel polish systems on the market – and although it’s NOT a gel polish itself, and doesn’t have to be cured under a lamp, it does claim to last almost as well as one. Note the word “almost” here: this bills itself as a “weekly” polish – so you’ll get around 7 days wear out of it, as opposed to the 2-3 weeks you get from Shellac and other gel polish.  That might sound like a downside to some, but actually, one of the other issues some people have with gel nail colours is that they don’t allow you to change colour very often: that isn’t an issue for me, because I usually like to stick to either nude or red, but I know some serious nail polish addicts who like to switch colours every few days, and are frustrated by the long removal process you get with gels.

The big advantage of Vinylux, meanwhile, is that it doesn’t need to be soaked off. The brand claims that the longwear topcoat (there’s no base coat required) will “cure” in natural light – so the longer you wear it, the better it should get. I’m ever-so-slightly sceptical about that, but if it works, they can count me in as a customer: because who WOULDN’T want a nail polish that last all week without chipping, but which can be removed quickly and easily, with your regular nail polish remover?

I’ve yet to try this, but I have a feeling it won’t be too long before I do. If you’ve tried it already, meanwhile, I’d love to hear what you thought of it!

Xhicboutique.com – Discover this Product & More at Super Prices!

Source link
Posted on Leave a comment

Easy at-home exercise routine – Latest In Beauty Blog

If you ask anyone about their 2018 New Year resolutions, there’s a high chance that upping their exercise game is on the list, and before your eyes roll back into your head, hear us out…

Joining a gym isn’t always necessarily the answer as exercise can quickly feel like an expensive chore, therefore we have put together a few at-home exercises that can be done anytime, anywhere. We’re hoping these will help us all to stay energised and keep up the fitness resolution throughout and beyond January.

It is always important to start with at least a 5-minute warm up to work on your muscles while increasing your heart rate. If you own a skipping rope, this is a fantastic way to warm-up. If you don’t, don’t worry, but should you want to buy one you can do so cheaply. A few examples here.


Skipping warm-up

– 2 minutes – Low-intensity skip
– 20 seconds – High-intensity (high knees, faster pace) / 10 seconds low-intensity skipping
– 20 seconds- High-intensity (high knees, faster pace) / 10 seconds low-intensity skipping
– 30 seconds – Rest
– 1 minute – Low-intensity skipping

Standard warm-up

60 seconds – March on the spot (stand with your feet shoulder-width apart and lift your left leg up to your chest then back to the floor, followed by your right leg. Repeat for 60 seconds)

60 seconds – Walk outs (stand with your feet shoulder-width apart. Bend at the hips and plant your hands on the floor, shoulder-width apart, a couple of inches in front of your feet. Walk your hands forward until your body is in a push up position. Now reverse the movement and return to standing)

60 seconds – Jumping jacks (Stand with your feet together and your hands at your sides. Simultaneously raise your arms above your head and jump up just enough to spread your feet out wide. Quickly reverse the movement and repeat.)

60 seconds – Alternate lunges with rotation (Stand with your feet hip-width apart. Step forward with one foot and slowly lower your body into a lunge. Your front knee should be bent at 90 degrees and your rear knee should be a few inches off the floor. As you lunge, rotate your upper body toward your lead leg. Rotate from your upper back—not your lower back. Pause, and return to the starting position. Now repeat with the other leg leading and repeat).

30 seconds – Double arm rotation forwards (Stand with feet shoulder width apart and arms by your side. Swing both arms simultaneously forwards as if drawing a circle with each arm).

30 seconds – Double arm rotation backwards (Stand with feet shoulder width apart and arms by your side. Swing both arms simultaneously backwards as if drawing a circle with each arm).

Now that you’re all warmed up, you’re ready to tackle the at-home HIIT (High Intensity Interval Training) burner. HIIT combines quick bursts of exercise with recovery periods, and the reason for its popularity? The results proven from short explosive exercise are great! This also means the added bonus of shorter exercise sessions (see, it’s not all bad…)

HIIT raises the heartrate very quickly, providing you are putting 100% effort into the burst of exercise. It is essential that you work as hard as you possibly can during the intervals and take the rest in-between to reap the rewards. The key to success is to make sure that you do every set properly and that every rep is precise; go for technique on your first few rounds and then build up to speed.

Home workout

There are a total of six exercises and you have four rounds to complete them, with 30-40 seconds in-between each round (so the recovery after exercise six is always longer).

Round 1 – 20 second interval and 20 second recovery
Round 2 – 30 second interval and 20 second recovery
Round 3 – 40 second interval and 20 second recovery
Round 4 – 20 second interval with 20 second recovery

1-Squat with knee lift II

Exercise 1: Squat with knee lift

Stand with your feet shoulder-width apart and drop into a squat. Keep you back straight and make sure your legs are bent at 90 degrees. Power back up and bring your right knee up to meet your left elbow, then back into a squat and back up with a left knee up. That’s one rep.

1-Squat with knee lift IV

Exercise 2: Burpee

Stand with your feet about twice shoulder-width and your arms hanging naturally by your sides. Push your hips back, bend your knees, and lower your body into a sumo squat until you can place both hands on the floor between your feet. Jump or walk your legs back so you’re in a push up position. Quickly pull your legs back into a sumo squat and then stand up. That’s one rep.

3-Bicycle Crunch copy

Exercise 3: Bicycle crunch

Lie on your back and bring your hands up to your temples. Crunching your abs, bring your left knee in towards your waist while simultaneously bringing your right elbow in to meet it, then swap sides. It should be a fluid motion, as if you were riding a bike. To challenge yourself you can speed the movement up and slow it down.

4-Glute Bridge III

Exercise 4: Glute bridge

Lie on your back with your knees bent and arms out to the sides. Lift your hips off the mat so your back, hips and thighs are in a line. Remember to keep your glutes and core engaged. Then lower your hips to the floor. Repeat the motion.

Exercise 5: Butt kicks into high knees

Stand with your feet shoulder-width apart. Kick your feet up behind you one at a time until the heel touches the glutes and pump your arms at the same time. Repeat 10 butt kicks and then swap to 10 high knees, raising your knees in front of your chest and pumping your arms.

6-Plank I

Exercise 6: Plank

A plank is simple but effective if you are in the right position! Assume a push up position, but bend your elbows and rest your forearms on the floor. Your body should form a straight line from your head to your ankles. Now tighten your core and remember to breathe.

Some food for thought before we finish; it will make it much easier to stick to a healthier way of life if you remember to get plenty of rest and drink at least two litres of water each day. It is also good to remember that getting fit and staying healthy is as much what you put into your body as the exercise you take, so remember to make better choices this January to really reap the rewards of your New Year’s resolution!
Working out is sweaty business, so why not add Soft & Gentle’s new Aluminium Roll On Anti-Perspirant or Dandi Patch to your box this month?

Xhicboutique.com – Find this Product & More at Great Prices!

Source link