Posted on Leave a comment

HOW TO: Latte Makeup – A Nod to 90’s Hair and Beauty Trends – Latest In Beauty Blog

The 1990s were an era that brought forth a plethora of iconic beauty trends, from grunge-inspired looks to minimalistic chic styles. One standout trend that continues to captivate beauty enthusiasts is the “Latte Makeup” look. This trend combines warm, earthy tones reminiscent of a creamy latte, with a nod to the voluminous hair that was all the rage during that era. In this guide, we’ll take you through the steps to achieve this effortlessly stylish makeup look, all while paying homage to the 90s hair that compliments it perfectly, with the help of the Sarah Jossel’s Edit, expertly curated from her column in The Sunday Times Style. 

Step 1: Flawless Canvas

To begin, prep your skin with the MZ Skin Hydrate & Nourish Hyaluronic & Retinol Day Moisturiser SPF 30 that will ensure a smooth canvas for makeup application. To double up on the radiant finish, apply the Supergoop! Glowscreen SPF 30 to give your skin a subtle glow and provide sun protection, and follow up with the Collection Cosmetics Gorgeous Glow Filter Finish in Fair/Medium for the ultimate glow. For a final touch, add the Trinny London Sheer Shimmer in Katie to your key features for a delicate shimmer.

To make sure your skin always stays radiant, use the Paula’s Choice 10% Azelaic Acid Booster at night and seal in the moisture with the Elizabeth Arden Retinol Ceramide Capsules Line Erasing Night Serum.

Step 2: Subtle Contouring

Channel the 90s by embracing subtle contouring. To add dimension to your contours, employ the Spectrum Collections B06 Tall Tapered Blender Brush to blend a matte bronzer into your cheekbones, jawline, and forehead.

Step 3: Warm and Earthy Eyes

For the eyes, opt for the SURRATT BEAUTY Smoky Eye Baton to achieve warm, earthy tones that emulate the hues of a latte. Apply the shades using the same product, sweeping medium-toned hues across the lid and deepening the crease for a seamless transition. To add a touch of 90s shimmer, consider using the shimmer end of the Smoky Eye Baton.

Step 4: Defined Brows

Bold brows are synonymous with the 90s look. Define and fill in your brows using your preferred brow product.

Step 5: Luscious Lashes

Enhance your lashes with a few coats of your favorite mascara. To achieve that wide-eyed 90s effect, apply individual false lashes if desired.

Step 6: Latte Cheeks, Latte Lips

Embrace warm, muted brown tones or terracotta shades for your lips and cheeks. Achieve the perfect lip line using a lip liner and then fill in with a lipstick. For the perfect flush go for the Saie Beauty Dew Blush.

Step 7: Nailing the 90s Hair

To capture the essence of 90s voluminous hair, start by using Garnier Ultimate Blends Smoothing Hair Food Coconut & Macadamia 3-in-1 Hair Mask to nourish your locks. Before styling, apply the Bumble and bumble Heat Shield Thermal Protection Mist to shield your hair from heat damage. Achieve loose waves using a large-barreled curling iron for that quintessential 90s volume.

In conclusion, the Latte Makeup look merges the beauty trends of the 90s with a contemporary twist. With the help of the Sarah Jossel Edit, you’ll have the ultimate tools to recreate this nostalgic yet on-trend look. So go ahead and indulge in the nostalgia while staying effortlessly chic!

Xhicboutique.com – Get this Product & More at Great Prices!

Source link

Posted on Leave a comment

12 Toners That Fight Brassiness in Blonde Hair Between Salon Appointments

“Toner is a science,” Friedman explains. “If you apply too much, hair becomes dull and dark, but if you don’t use it at all, hair can become brassy.” Follow her guidelines to choose the right one for you:

✔️ Consider the formula. At-home toner options include rinses, drops, sprays, glosses and purple shampoos, but Friedman prefers toning conditioners, treatments and masks for their added moisturizing benefits.

✔️ Check the tint. You may notice that there are both purple and blue tinted formulas that can help tone hair. Purple formulas help cancel unwanted yellow or brassy tones, as purple and yellow are opposite on the color wheel and neutralize each other. Blue formulas are best for orange undertones and brassiness, and perform that same function. So choosing the right one for you depends on whether you have unwanted yellow or orange brassy tones in your hair color.

✔️ Take your hair type into account. If your hair is dry or damaged, a toning product that is more nourishing (like conditioners or masks) will be the most beneficial. Shampoos, drops, glosses, rinses and sprays are great for hair types that don’t have as much damage and need more of a color and shine boost.

Xhicboutique.com – Search for this Product & More at Great Prices!

Source link

Posted on Leave a comment

HOW TO SAVE YOUR HAIR FROM POST-SUN FRAZZLE – Latest In Beauty Blog

Basking in the azure blue pool during the summer feels like a dream come true until the holidays are over, and you take a closer look at your hair, and reality bites. Between the sun, sea, and sand, our hair takes a beating during summer holidays. The harmful sun rays, coupled with the drying effects of saltwater and chlorine, can leave our locks feeling lifeless and damaged. Our usual ‘leave it and hope for the best’ approach won’t cut it. But fear not! With a little care and attention, you can revive your hair and restore its natural shine and health. Here are some tips to save your hair from post-sun frazzle:

Deep Conditioning is Key: Invest in a good quality deep conditioning treatment or hair mask and use it at least once a week. Look for products that are specifically designed to repair and hydrate sun-damaged hair. We recommend SACHAJUAN’s Hair After The Sun, our Haul of Fame of the month. If you want to revive your sun-kissed mane and restore its shine and vitality, this lightweight cream, enriched with protein-rich algae and minerals and powered by an innovative Ocean Silk Technology, is the ultimate summer saviour.

Trim Those Split Ends: Sun exposure and other environmental factors can cause split ends, making your hair look frizzy and unhealthy. Schedule a trim at the end of your summer holiday to get rid of those split ends.

Protect Your Hair from UV Rays: Just like our skin, our hair needs protection from the sun’s harmful UV rays. Wear a hat or a scarf to shield your hair from direct sunlight when you’re spending extended periods outdoors. Additionally, consider using hair products that contain UV filters for added protection.

Rinse with Fresh Water: After swimming in the sea or pool, rinse your hair with fresh water. This will help remove salt, chlorine, and other impurities that can damage your hair over time.

Limit Heat Styling: Give your hair a break from heat styling tools, especially during the post-summer period. Embrace natural hairstyles or let your hair air dry whenever possible to minimise further damage and breakage.

Use Leave-In Conditioner: Incorporate a leave-in conditioner into your daily hair care routine. Leave-in conditioners provide ongoing hydration and protection, making them perfect for combating post-sun dryness and frizz. The Hair After The Sun can be used as a leave-in treatment for an extra boost of hydration, leaving your strands replenished and easier to manage while minimising the risk of breakage.

When it comes to protecting our hair from the harsh effects of sun exposure during summer, having an effective after-sun hair care product is essential. SACHAJUAN’s Hair After The Sun lightweight cream is a game-changer in the world of haircare, offering nourishment, shine, and protection.

You can check out SACHAJUAN’s Hair After The Sun on the Beauty Counter now.

Xhicboutique.com – Discover this Product & More at Great Prices!

Source link

Posted on Leave a comment

Skincare Experts Explain How to Make Sugar Wax for Easy At-Home Hair Removal

Hair removal may have satisfying results, but can be painful. Razors come with the risk of nicking skin and creating razor bumps; waxing strips make some flinch; while IPL hair removal devices quite literally zap away hair. If your skin keeps speaking up through redness and irritation, it may be time to graduate to body hair removal’s more sensitive skin-friendly method: Sugaring.

Sugaring is a gentler alternative to traditional waxing, and it’s easy to make at home. We rounded up everything you need to know on how to make DIY sugar wax at home.


What is sugaring?

Sugaring, an all-natural method of hair removal, commonly uses a mixture of sugar, lemon and water that forms a hair removal paste. Sugar wax is applied against hair growth to remove hair. Hair removal enthusiasts tend to reserve it for the bikini area, face, underarms, legs and arms, but it can be used for other parts of the body as well. Sensitive skin types tend to go for sugar waxing as it’s less irritating and painful than waxing, according to Michele Green, M.D., a board-certified dermatologist in New York.


Is waxing or sugaring better?

Both make effective ways of removing unwanted body and facial hair, but there are a few differences to keep in mind:

  • Sugaring uses fewer potentially irritating ingredients. “Based on the ingredients alone, sugaring is a better option since additives have a higher chance of causing skin irritation,” says Dr. Green. Waxing uses beeswax, resin, oils and other additives that might irritate sensitive skin.
  • Sugaring has a lower risk of breaking hair follicles on removal. Sugaring is applied against the hair growth and removed with the hair growth while waxing applies wax in the direction of hair growth and then removed against hair growth. As a result, waxing may cause hair follicles to break in half, which may cause ingrown hairs and additional irritation, according to Dr. Green.
  • In-salon sugaring is pricier than waxing. In terms of affordability, waxing tends to be slightly more inexpensive when compared to sugaring.
  • Sugaring might take longer. Waxing can be a faster process than sugaring when used for larger surface areas like the legs or back.

Is homemade sugar wax safe?

When properly educated on how to safely sugar wax at home, it can be a good option, plus cheaper and more comfortable, says Dr. Green. That said, DIY sugar wax removal can come with some risks. You can accidentally rip your skin off instead of hair, which can cause pain, inflammation and an increased risk of infection — sugar waxing at home is often less sanitary than sugar waxing done at a salon. That’s why it’s best to start on clean skin, use clean tools, let the hair grow out slightly so the wax has something to grip onto and follow all the proper skin prep steps, below.

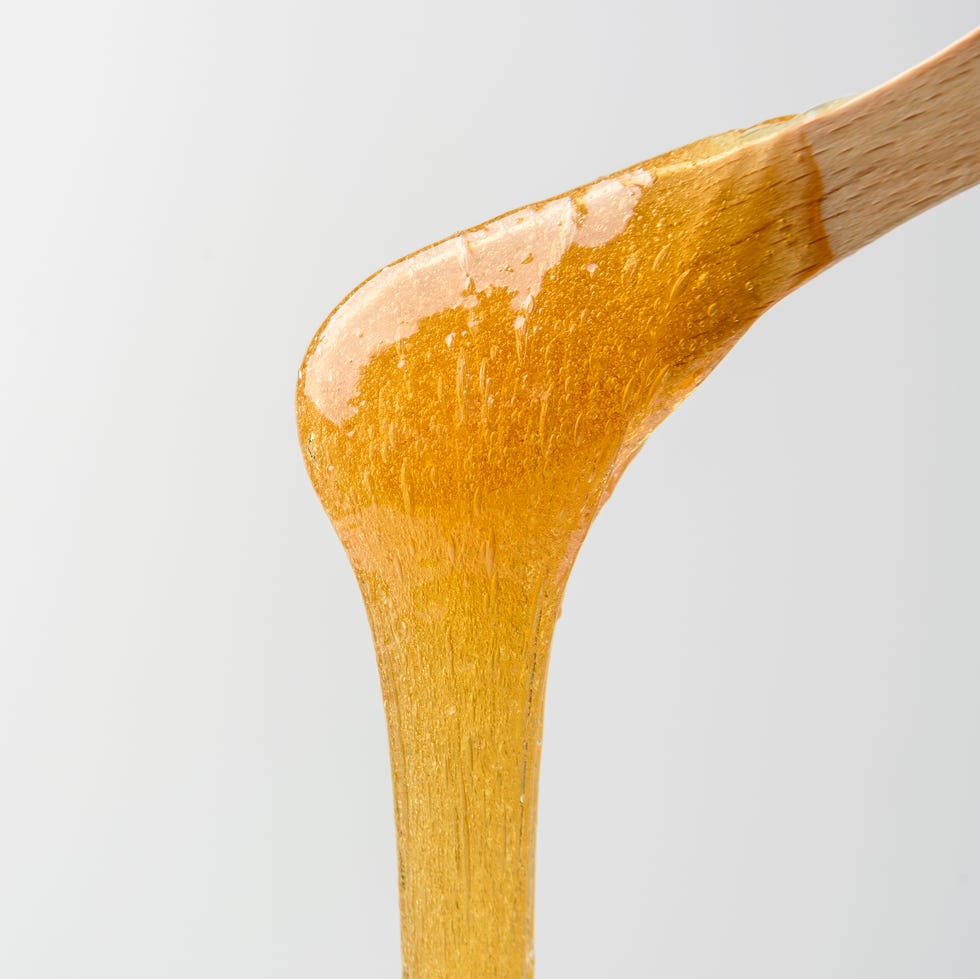
“Sugar mixtures that are too hot when applied can burn, and technique matters when pulling off the strips,” Dr. Amin says. “It does take experience to get the right consistency, so maybe skip the mess and leave it to the pros.” If you decide to take it into your own hands, he recommends letting the mixture cool to room temperature and soften to a sticky, honey-like texture. If it’s too hard, add a little water.

Lastly, you should avoid both traditional waxing and sugar waxing if you are undergoing treatment with oral isotretinoin, treated the area with laser hair removal or if you have any skin conditions. Sugaring should only be done on intact skin.


What’s the best sugar wax recipe?

Tatyana Aksenova / 500px//Getty Images

You’ll need a simple trio of sugar wax ingredients that’s probably already in your kitchen: Sugar, water and lemon. The recipe follows a 2:1 sugar to liquid ratio, according to Snehal Amin, M.D. a board-certified dermatologist and the co-founder and surgical director of MDCS Dermatology:

Sugar wax ingredients

How to make sugar wax on a stovetop

Ingredients

  • 1 cup of sugar
  • 1/4 cup of lemon juice
  • 1/4 cup of water

Directions

  1. Melt the mixture in a saucepan, then bring to a boil for about 10 minutes while stirring continuously.
  2. Remove from heat once it turns a caramel color.
  3. Pour into a heat-proof jar and let cool for 5-10 minutes. Do not apply until the mixture has gelled together and has “a consistency a little thicker than honey,” Dr. Amin says.

How to make sugar wax in a microwave

Ingredients

  • 1 cup sugar
  • 2 teaspoons lemon juice
  • 2 tablespoons water
  • 1 tablespoon salt

Directions

  1. Combine ingredients in a microwaveable glass bowl.
  2. Microwave in 1-minute intervals, checking on it after each minute. (It may take 5-6 minutes, which varies depending on your microwave’s power.)
  3. Let the mixture cool and turn a maple syrup color with a sticky, spreadable, stretchy consistency.

How to use sugar wax with traditional wax strips

The idea of waxing yourself may make you wince, but here’s the most seamless step-by-step guide for removing hair with either traditional wax strips or just sugar wax itself:

  1. Scoop out a thick layer of the sugar wax paste using a clean wax stick.
  2. Apply the mixture directly to skin against the direction of hair growth.
  3. Cover the wax completely using clean cotton cloth strips.
  4. Pull skin taut and swiftly peel back with the grain of your hair.
  5. Repeat using clean cloth strips for each section until hair is removed completely.

How to use sugar wax without strips

  1. Grab the cooled wax using clean fingertips and apply it directly onto the skin opposite the direction of hair growth.
  2. Pull skin taut with the free hand.
  3. Remove with quick, short pulls in the same direction as the hair growth.

How to prep skin for sugaring

“Be mindful that proper hygiene prep and clean tools are necessary to avoid potential infection, Dr. Amin says. Here’s what to keep in mind:

  • Exfoliate skin a few days before the treatment — this strips away any dead skin cells while reducing the risk of ingrown hairs.
  • Let hair grow out a little or skip shaving for at least a week prior so that your hair is at adequate length for the sugar waxing.
  • Put a pause on tanning, retinols or other similar products in the treatment area one week prior. “These topicals can sensitize the skin and increase the risk of developing hyperpigmentation (dark spots) after waxing,” Dr. Amin says.

How to care for your skin post-sugaring

Post-sugar wax, avoid exfoliating, friction and minimize touching the area for 48 hours. Tip: Loose, comfortable clothing prevents friction in the area. Skip moisturizers and product application and minimize sweating for 24 hours to avoid clogged pores. “Bacteria thrive in moist, warm environments and sugar is food,” Dr. Amin says. “Folliculitis, little bumps on the skin, can sometimes occur after waxing from irritation to the hair follicle or because of infection.”

Meet the experts

  • Michele Green, M.D., is a board-certified dermatologist who attended Mount Sinai Medical School in NYC. She specializes in a variety of cosmetic dermatology treatments.
  • Snehal Amin, M.D. is a board-certified dermatologist and the co-founder and surgical director of MDCS Dermatology.
  • Chiara Butler is a reviews analyst in the Good Housekeeping Institute Beauty Lab.

Commerce Editor

Jacqueline (she/her) covers all things e-commerce in beauty, lifestyle and beyond for the Good Housekeeping Institute. Before joining GH in 2021, she was a style and beauty reviews fellow at Insider, testing viral trends, reviewing sustainable brands and more. She’s a graduate of the University of Florida’s School of Journalism, with a specialty in magazines and mass communication.

Xhicboutique.com – Get this Product & More at Amazing Prices!

Source link

Posted on Leave a comment

Can Castor Oil Help Grow Hair? Experts Set the Record Straight

You often hear about the benefits of beauty oils for your hair, nails and skin. And for good reason: they can help with hydration, strengthening, healing and more. One of the most popular is castor oil (a.k.a. ricinus communis seed oil), which is derived from the castor bean plant native to India and East Africa, and and has been used for thousands of years for a variety of purposes, ranging from health to skincare to haircare. It’s an oil that can work wonders for hair, albeit maybe not in the way many people think.

“[Castor oil] is widely used in haircare for its supposed benefits as a hair growth stimulant and moisturizer,” says Snehal Amin, M.D., a board-certified dermatologist in New York. While there is a lot of speculation that it can help with hair thickening and growth, the jury is still out — currently, more scientific data is needed to prove any of these benefits. Here, the lowdown from experts on what castor oil can — and can’t — do for your hair.

What are the main benefits of castor oil for hair?

While castor oil may not help you to suddenly sprout fuller, longer hair, it does have some strand superpowers. The ingredient can:

  • Smooth strands. “When added to leave-in conditioners or pre-shampoo hair treatments, castor oil can help to smooth the outer protective hair cuticle and add shine,” says Anabel Kingsley, brand president and consultant trichologist at Philip Kingsley.
  • Nourish hair. “Castor oil is an emollient, so it can help hair feel less dry,” says Good Housekeeping Institute Beauty Lab Reviews Analyst Chiara Butler.
  • Promote scalp health. “Its antibacterial properties help to reduce fungal and harmful bacteria on the scalp,” Dr. Amin explains.
  • Prevent split ends and breakage. “By coating the hair shaft, it can protect the hair from breaking and future hair damage,” he adds.
  • Helps purify hair and scalp. Castor oil also “absorbs dirt, which is an unexpected benefit,” Dr. Amin notes.

Does castor oil help hair growth or thickness?

Both Dr. Amin and Kingsley agree that there are no quality scientific studies clearly showing a benefit of castor oil for hair growth. “The thinking is that castor oil increases blood flow to the scalp and reduces inflammation, both of which are beneficial for hair growth,” Dr. Amin explains. “That being said, many of these hypotheses have not been proven by any rigorous research.” Kingsley adds that “the benefits of castor oil relate to the impact it can have on the condition, feel and appearance of hair that has already grown. It will not help stimulate new hair growth from the scalp.”

There is one study that was performed in silico — meaning simulated in a computer program — which showed that ricinoleic acid, a component of castor oil, may act similarly to prostaglandin analogues, which are known drugs for counteracting hair loss. “It’s very important to note that this study was speculative; the ricinoleic acid was not actually tested on humans or animals,” Butler explains. She adds that the most effective treatments for hair loss are FDA-approved drugs like Minoxidil and people who are struggling with hair loss should see a dermatologist for treatment.

What’s the best way to use castor oil for hair and can it be applied daily?

“Castor oil is on the thicker side and can make the scalp greasy,” Dr. Amin says. It should be thought of as a weekly treatment and is not meant for daily use. He suggests applying a small amount of castor oil to dry hair once per week, leaving it on for 30 minutes or longer, then washing it out with a clarifying shampoo. You can also mix it with other hair oils, such as coconut oil or almond oil, to balance the texture. “Pure castor oil is very viscous, so it can cause hair to feel oily and weighed down if too much is applied,” Butler adds.

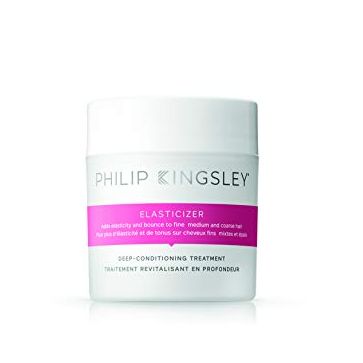
Kingsley suggests using a pre-shampoo conditioning treatment containing castor oil (she recommends Philip Kingsley’s Elasticizer, which contains a blend of castor and olive oil). This type of treatment can improve hair’s elasticity, boost shine and help to reduce frizz. Depending on your hair type and the product’s directions, you can leave it on for anywhere from 20 minutes to overnight.

Does castor oil cause side effects like hair loss or damage?

While castor oil can cause side effects, it’s usually related to the scalp and should not cause hair to fall out. “Some people may have a skin sensitivity to castor oil, and this can cause problems when it’s rubbed into the scalp,” Kingsley says. Steer clear if you have a flaky, oily scalp condition, like seborrhoeic dermatitis, as “applying castor oil to your scalp and leaving it on can make the problem worse,” she explains.

Note that there have been reports of of allergic reactions to castor oil on skin, Butler says. Because of this, and the chance of contracting allergic dermatitis, Dr. Amin advises to apply only a small amount on a hidden area of skin (a DIY patch test) before using castor oil all over your head.

What hair types is castor oil best for?

Castor oil is ideal for any hair type that is dry or frizzy, Kingsley says. If you have fine hair, avoid leave-in castor oil formulas, as they can be heavy on strands, she advises: “Instead, look for lightweight creams or oil-rich pre-shampoo treatments, as they won’t weigh even the finest hair down.”

Dr. Amin suggests using castor oil if you have brittle, damaged hair or a dry scalp. “If you suffer from dandruff, steer clear of castor oil, since fungus may be causing scalp flakiness in this case,” he adds.

The best castor oil hair products to try

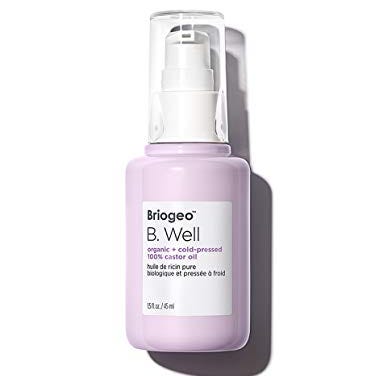
B. Well Organic + Cold-Pressed 100% Castor Oil
Briogeo B. Well Organic + Cold-Pressed 100% Castor Oil

Now 19% Off

Credit: Briogeo
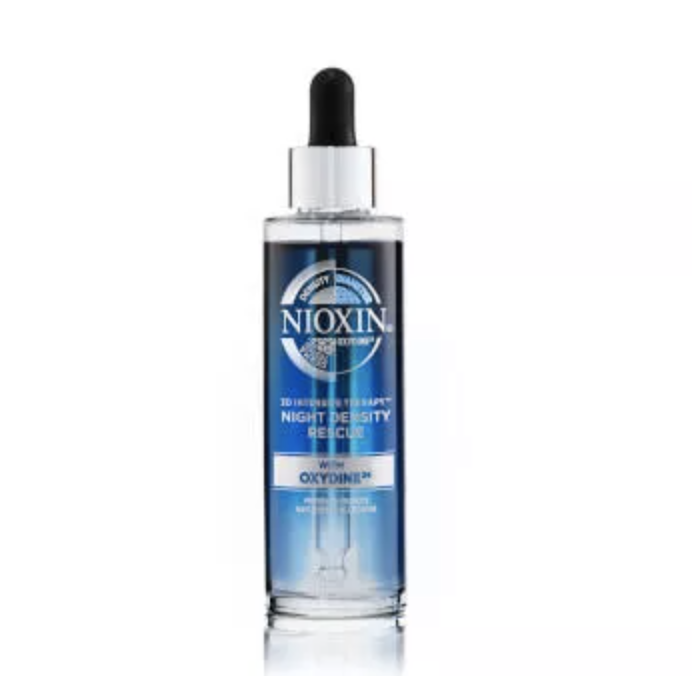
Night Density Rescue Treatment
Nioxin Night Density Rescue Treatment
Credit: Nioxin
On Sale

Elasticizer Deep-Conditioning Hair Mask Repair Treatment

PHILIP KINGSLEY Elasticizer Deep-Conditioning Hair Mask Repair Treatment

Now 31% Off

Credit: Philip Kingsley
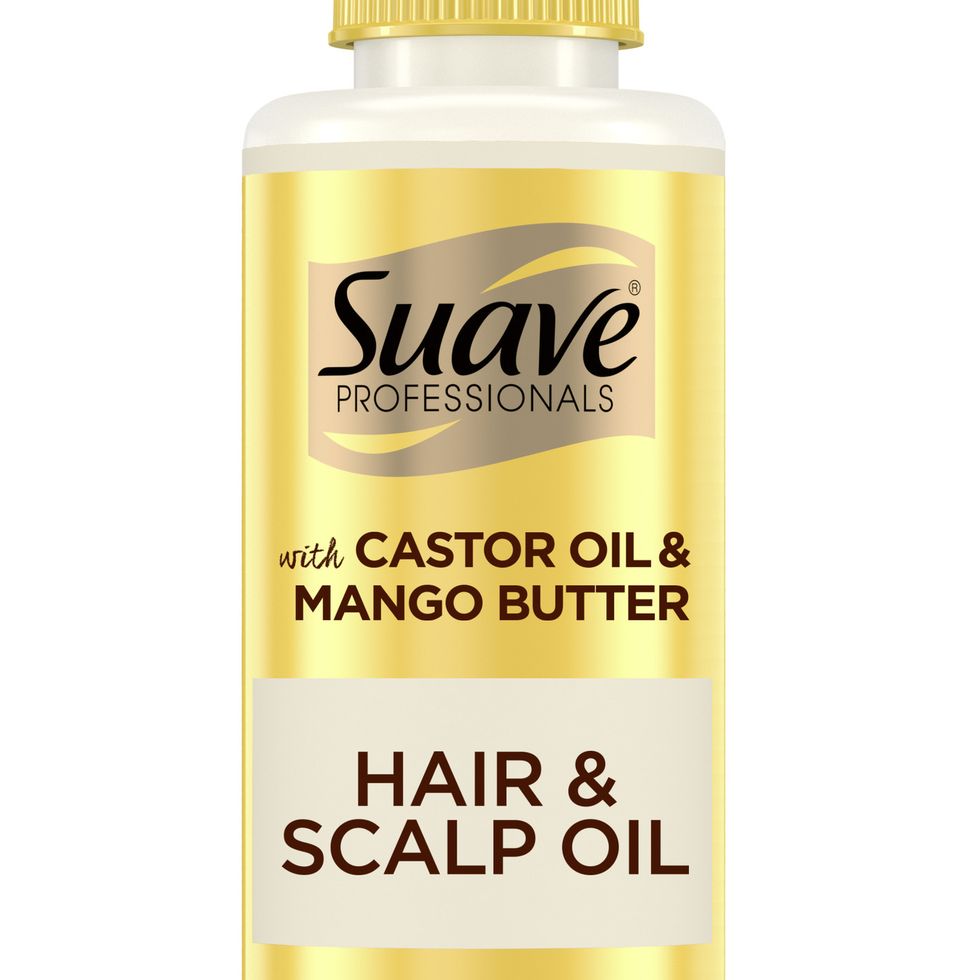
Castor & Mango Butter Scalp and Hair Oil
Suave Professionals Castor & Mango Butter Scalp and Hair Oil
Credit: Suave

preview for We Tested The CryoCare Cold Brush
Headshot of Dori Price

Contributing Beauty Editor

Dori Price is a New York City-based freelance writer and editor and beauty, style and wellness expert who was the Beauty & Fashion Director at Family Circle for 13 years before she joined Good Housekeeping, Prevention and Woman’s Day as a freelance beauty editor. She has also written for WomensHealthMag.com, Elle.com and HealthCentral.com.

Xhicboutique.com – Find this Product & More at Super Prices!

Source link

Posted on Leave a comment

More and More Men Are Looking Into Laser Hair Removal, But Is It a Good Idea?

Body hair — some guys love it, some guys loathe it. If you’re feeling a little too fuzzy for comfort, you could shave, you could pull a Steve Carell in The 40-Year-Old Virgin and get waxed or you could pursue a high-tech option — laser hair removal.

According to Mayo Clinic, laser hair removal works when a concentrated beam of light is directed through a laser at an area of the body with unwanted hair. The light is absorbed by the pigment, or melanin, in the hair itself. The beam of light heats up the skin, which damages follicles in the skin so they can either no longer grow hair, or so the growth process is significantly delayed.

Although it’s estimated that 82% of those who get professional laser hair removal are women, “laser hair removal is just as successful in men as it is in women,” says Evan Rieder MD, a board certified dermatologist and psychiatrist in New York City. In some cases, the process is more effective in men. “Some guys do better with laser hair removal on the face than women do, as the higher density of oil glands in men allows for better healing,” Dr. Reider adds. Men also seek laser hair removal for their backs, chests, legs (especially if they’re involved in certain sports, such as swimming) and private areas.

If you’re a guy who’s interested in laser hair removal, it’s important to get evaluated by a cosmetic dermatologist who is experienced in the procedure. “Beauty clinics” that offer laser hair removal may be plentiful online, but that doesn’t mean they’re safe — an untrained technician can hurt someone severely.

Here are other key facts a guy needs to know before having laser hair removal to help you get the best results.

1. You really have to commit.

Laser hair removal is pretty much permanent after a couple of sessions, which can be as short as 10 minutes, depending on the body part. “After three or four treatments, about 90% of the hair in the area of your body will be reduced,” says Jill S. Waibel, MD, medical director of Miami Dermatology and Laser Institute in Miami, Florida, and subsection chief of dermatology at Baptist Hospital. “Many men choose to have laser hair removal on their backs, specifically.”

There can be situations in which more treatments are necessary, however. If you have ingrown hair, additional treatment time will probably be required. The texture of a man’s hair can also make a difference. “Due to testosterone, men tend to have thicker and denser hairs than women do, and may need more treatments,” says Emily L. Guo, MD, FAAD, a board-certified dermatologist at Dermatology & Laser Surgery Center in Houston. “There may also be a shorter interval in which touch up or maintenance treatment is needed after an initial treatment series. Typical follow-up treatments are scheduled anywhere between 4–6 weeks later, to allow time for hairs to regrow in their cycle.”

2. Laser hair removal can be pricey.

According to the American Society of Plastic Surgeons, the cost of laser hair removal treatment vary widely, depending on the area of the country and how many sessions are needed. Patients can also be charged for additional procedure costs, as well as for medications they need related to treatment. All in all, laser hair removal can add up to thousands of dollars, an important consideration when you’re deciding if it’s right for you.

3. Skin tone and hair color should be considered.

“In general, when the hair is thicker, the hair is dark and there is contrast between the skin and hair color — such as light skin and dark hair — the results are more predictable,” says Dr. Reider. “Men with darker skin tones can still get laser hair removal, although the side effect risk profile is higher. People with extremely fine hair or light or white hair should not have the procedure done, as the laser is unlikely to be effective. The laser targets pigment, so it’s not effective for white hair — and if the skin is heat-sensitive or tanned from the sun, it increases the risk for a laser burn.”

It’s important to ask the doctor what kind of equipment they’ll be using. “Darker skin tones require a longer wavelength laser,” says Dr. Waibel. “This is key, because it’s necessary to cool the upper layer of skin to avoid hyperpigmentation.”

4. There might be side effects.

Minor side effects lasting about 1–3 days can include swelling, red skin and discomfort, says the American Academy of Dermatology. Rarely, you could experience skin blisters, or a cold sore outbreak if you have herpes simplex. Infections and scarring can also occur if laser hair removal is not performed correctly.

5. Doing the right prep is crucial.

“Men should be aware that it’s important to shave before laser hair removal appointments so that the laser energy can reach the bulb of the hair underneath the skin, rather than just singeing the hairs on its surface,” says Dr. Guo. “Don’t wax or pluck any hairs beforehand, though, as that removes the target for the laser, and will reduce the efficacy of the treatment.”

It’s important to be careful when spending time in the sun, both before and after a treatment. “Using quality sunscreen is important as well, to reduce the risk of unwanted side effects,” Dr. Guo continues.

Also, showering isn’t advised before the appointment. Once body hair has gotten wet, its growing pattern may be harder to see. The dermatologist will want to examine how hairs lie on the body to be able to administer the treatment correctly.

andresr//Getty Images

6. The pain is very manageable.

Comfort is a priority when you go to a qualified practitioner. “We use topical lidocaine as a numbing agent,” explains Dr. Waibel. “Don’t use any lidocaine yourself before you come, though — for safety’s sake, your dermatologist must numb you.” The amount of lidocaine used depends on how dense the hair is, plus where on the body it will be removed. It’s important to discuss pain tolerance with the doctor, too, so they can gauge if more numbing will be needed.

Laser hair removal should not feel that bad, though. “The laser typically feels like a rubber band snapping sensation,” says Dr. Guo. The laser will also feel a little warm. Many doctors who administer the treatment are also patients, so they understand what you’ll experience. “Having treated many people and experienced laser hair removal myself, I can tell you that the procedure is quite tolerable,” says Dr. Reider.

7. The actual process is straightforward.

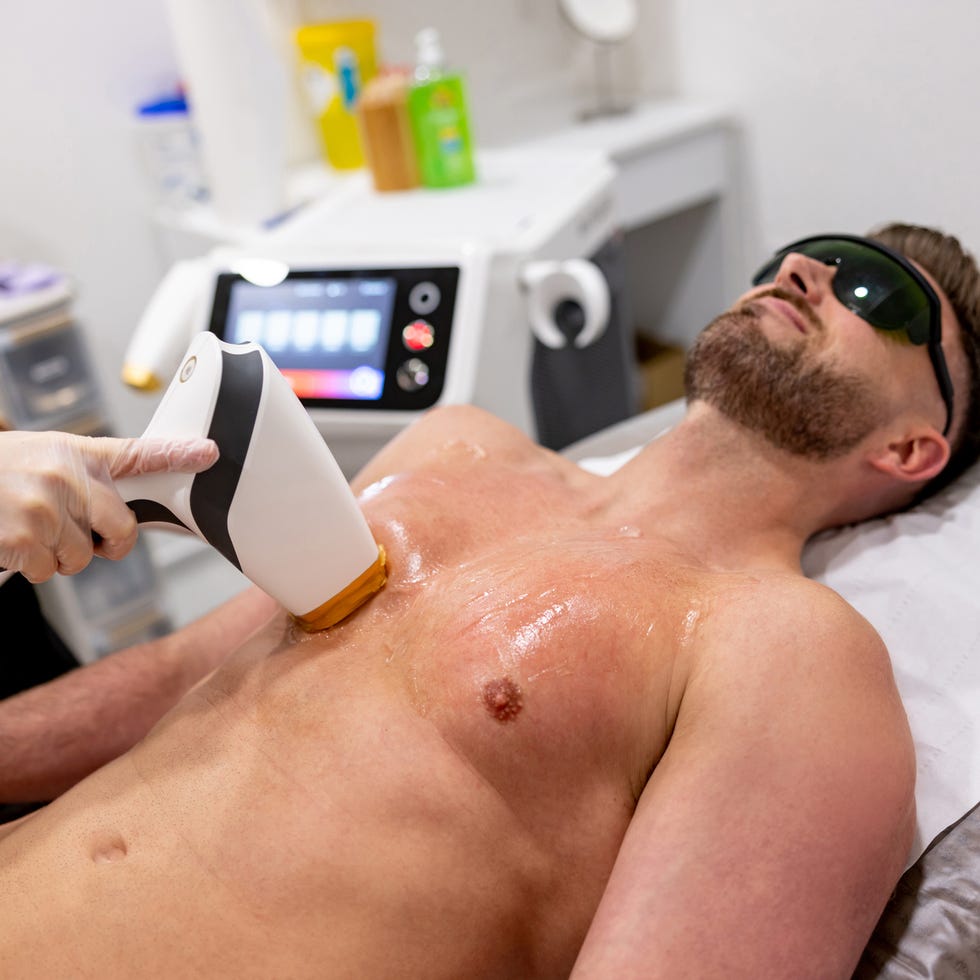
Before a treatment starts, “the hair is shaved down so that only tiny stubble remains,” says Dr. Reider. “The patient puts on protective goggles, and then pulses of high energy laser light are sequentially applied to the areas with hair.”

The equipment sounds like a vacuum. “We work on one body part at a time, and we take care to make sure patients don’t breathe in any of the laser fumes during a procedure,” says Dr. Waibel. “This is because protein in burning hair is carcinogenic.”

8. Some medical conditions can be helped by laser hair removal.

“Laser hair removal is a very reliable and excellent treatment for medical issues like folliculitis, which is the inflammation of hair follicles, or pseudofolliculitis barbae, where hairs repeatedly grow inward and causes inflammation, hyperpigmentation and scarring,” says Dr. Reider.

If you’re experiencing any unusual hair growth symptoms before the treatment, though, you should see your regular physician immediately — and certainly before any laser hair removal. Sudden hair growth can be due to a range of medical problems, from hormonal disorders to tumors to medication reactions, so the cause should be diagnosed and treated first and foremost.

9. Laser hair removal can be done at home.

Yes, there are at-home devices available, but note: They have less power than those used by a dermatologist, and because of this more frequent use is needed.

Also, it’s recommended that you consult with your doctor to get the okay before trying laser hair removal on your own–and of course, it’s in your interest to use a safe product.

These four options below were all cleared by the FDA and vetted by The Good Housekeeping Institute’s beauty analysts.

BEST OVERALL IPL HAIR REMOVAL DEVICE

Ultrafast IPL Permanent Hair Reduction
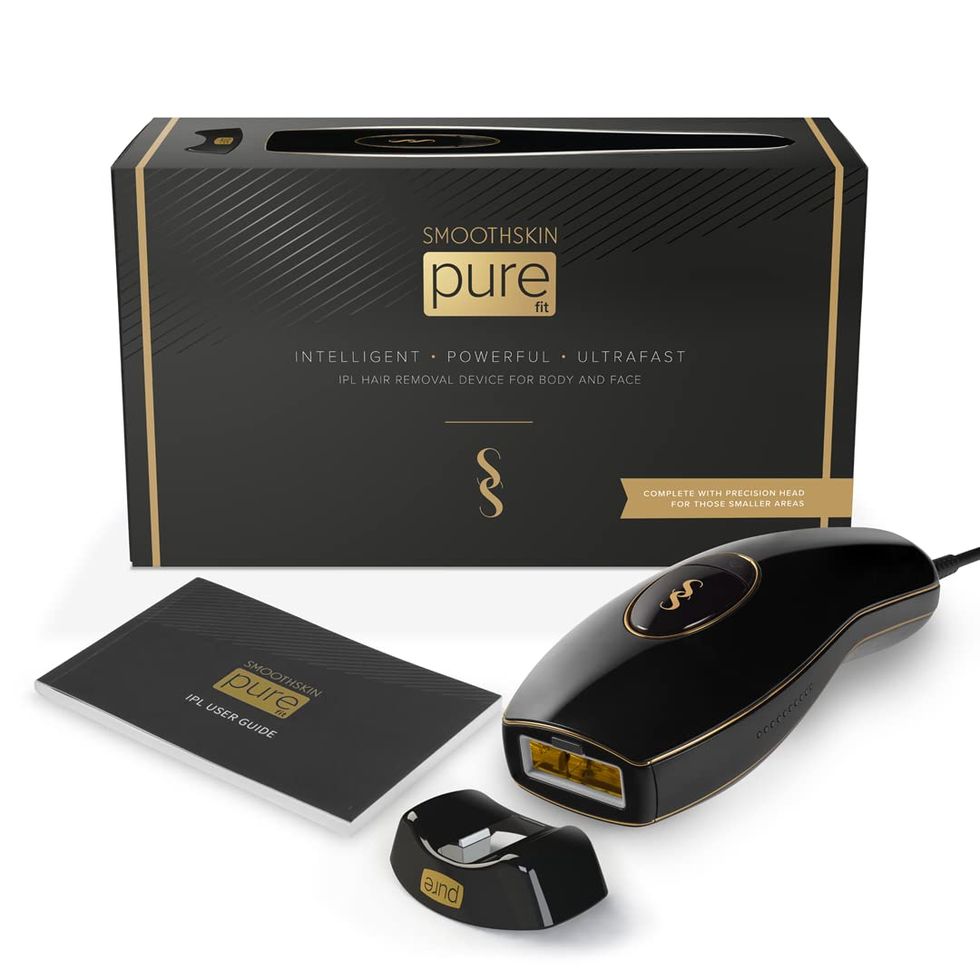
SMOOTHSKIN Ultrafast IPL Permanent Hair Reduction

The executive director of the Good Housekeeping Institute’s Beauty, Health & Sustainability Lab, Birnur Aral, Ph.D, tested this personally and found it caused little discomfort, and said she saw noticeable results after a single treatment. The Institute also liked the sensor that adds to the safety factor.

BEST VALUE IPL HAIR REMOVAL DEVICE

The Flasher™ 2.0

This lightweight, compact device has seven intensity levels; testers for the Good Housekeeping Institute said the instructions were simple to understand. Note: It doesn’t come with a precision head, so it’s not the best option for small areas.

BEST IPL HAIR REMOVAL DEVICE With COOLing

Laser Hair Removal Handset
Ulike Laser Hair Removal Handset

Now 17% Off

This device has a cooling feature that Aral likes: She points out that it lowers the skin’s temp to about 50-degrees, which reduces pain. Experts in the Beauty Lab also found it easy to hold and maneuver.

BEST FAST IPL HAIR REMOVAL DEVICE

IPL Hair Removal Systm
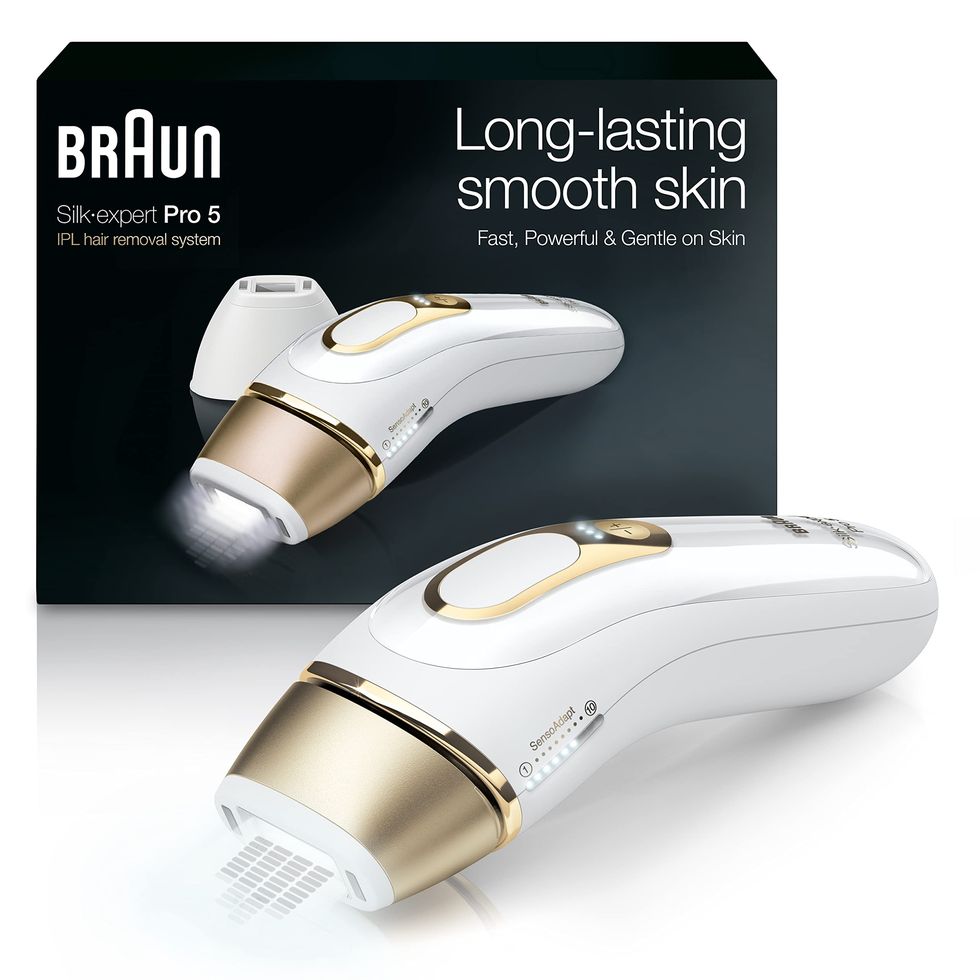
Braun IPL Hair Removal Systm

Now 11% Off

Online reviewers of this product — which is marketed to both men and women — found that it works more quickly than other devices they’ve tried. It’s good for large or small areas of the body, because it comes with different size heads.

Headshot of Lisa Mulcahy

Contributing Writer

Lisa is an internationally established health writer whose credits include Good Housekeeping, Prevention, Oprah Daily, Woman’s Day, Elle, Cosmopolitan, Glamour, Parade, Health, Self, Family Circle and Seventeen. She is the author of eight best-selling books, including The Essentials of Theater.

Headshot of Birnur K. Aral, Ph.D.

Beauty, Health & Sustainability Lab Executive Director

Birnur (she/her) has led the Beauty, Health and Sustainability Lab at the Good Housekeeping Institute since 2007. In addition to overseeing product testing and GH Seal applications, she conducts the brand’s annual Beauty Awards selection process and is an active leader in GH’s green initiatives, including the Sustainable Innovation Awards and Raise the Green Bar Summit. In addition to earning M.Eng. and Ph.D. degrees in chemical engineering, she recently earned a professional certificate in sustainability management from Columbia University. 

Xhicboutique.com – Search for this Product & More at Super Prices!

Source link

Posted on Leave a comment

The "Pineapple" Hair Trick Will Give You Defined Curls Overnight

Anyone with curly hair has heard it: “Your hair is so pretty, I wish I had curly hair!” It’s meant to be a compliment, but curly girls know that having a good hair day is so much harder than it looks. Curls can be unpredictable and difficult to control, and there are days when having wild curls feels less than enviable.

The difference between fighting with your curls and loving them really lies within your hair care routine. Whether or not you subscribe to the Curly Girl Method, finding the right products and hairstyles for your specific curl type makes managing curly hair so much easier, and treating your curls right makes your hair so much healthier, in turn.

Below, you’ll find simple tips and top-rated curly hair products that will keep your waves and curls looking shiny and strong. Then, advance to seven easy curly hairstyle ideas you can tackle at home.

Best hair tips for styling curly hair

Curly hair is different from other hair textures: It requires more hydration, less washing, and, if we’re being honest, more patience than straighter hair types. But curly hair doesn’t have to feel like a curse! These tips, products, and pointers will help you find the best curls of your life with minimal effort — some will even give you better hair while you get your beauty sleep.

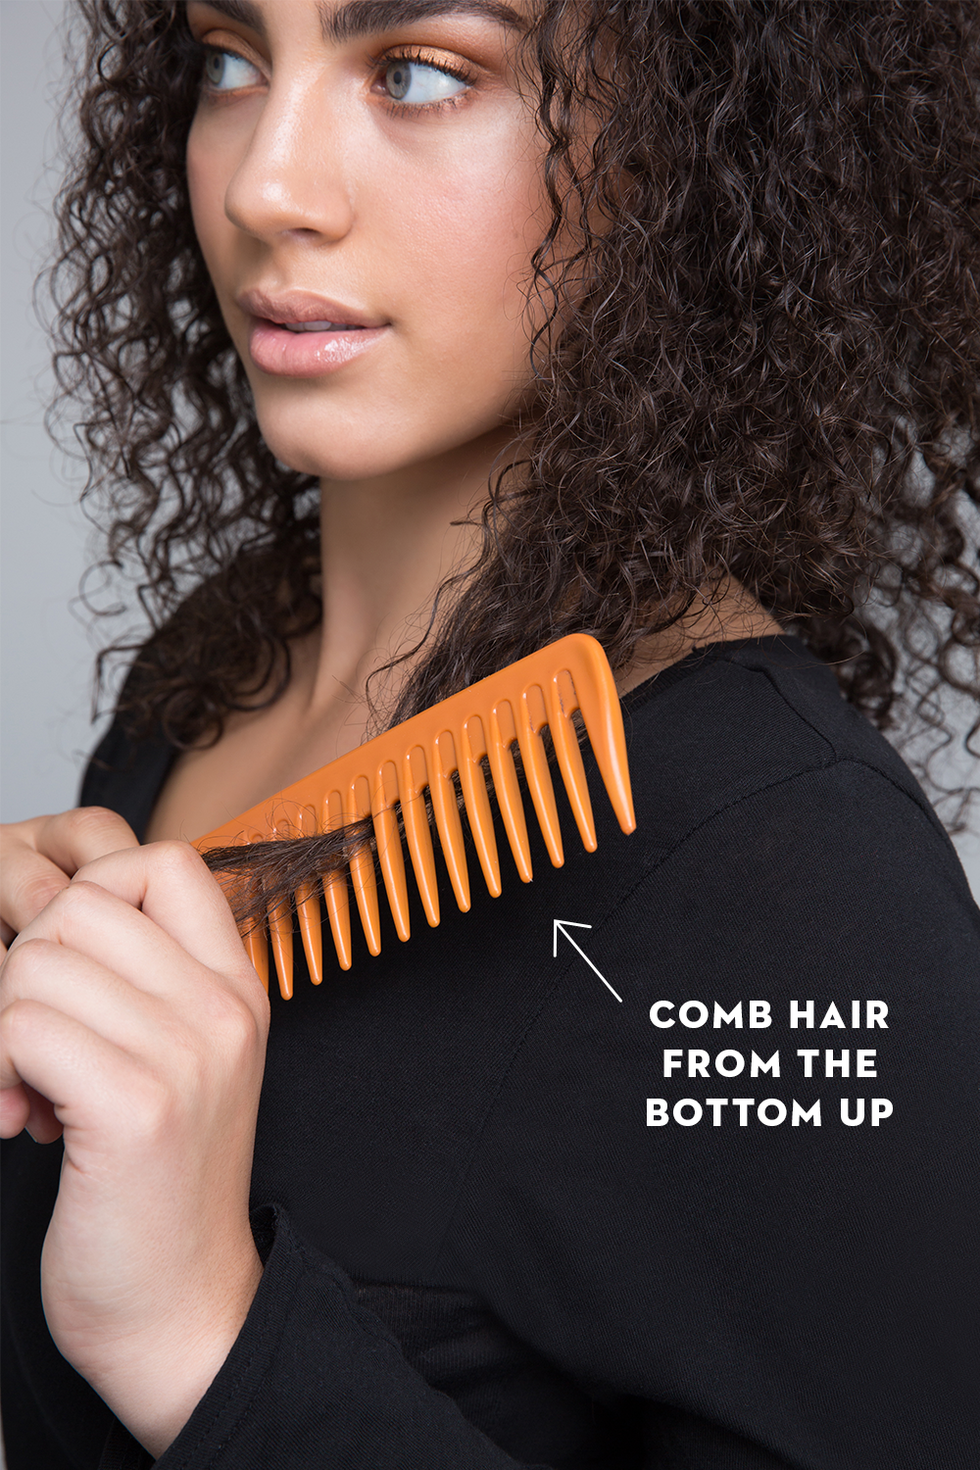
1. Always comb your hair from the bottom up.
kat wirsing

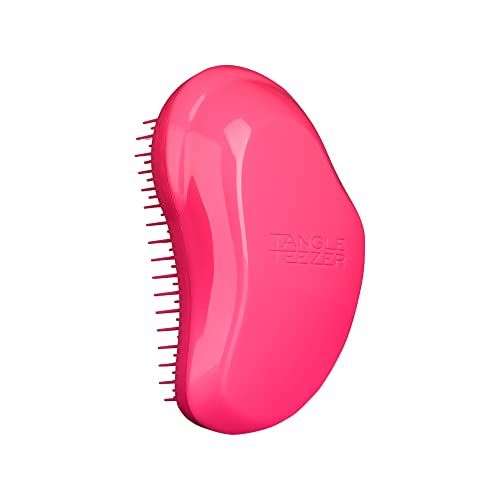
TANGLE TEEZER The Original Detangling Hairbrush

The Original Detangling Hairbrush

TANGLE TEEZER The Original Detangling Hairbrush

Credit: TANGLE TEEZER

Detangling hair from the bottom up allows you to gently detangle each knot, rather than compounding knots toward the bottom and yanking your way through. To protect hair from damage and to detangle efficiently, our experts strongly advise that you saturate hair with a quality hair detangler and always rely on a wide-tooth comb or a specially-designed detangling brush to rake through curly hair.

“Curly hair is the most fragile type on the block, and each curl is a potential breaking point,” explains hairstylist Andrita Renee. “Using a wide-tooth comb is the gentlest way to detangle curls and it doesn’t disrupt the natural curl pattern as much as a brush would.”

2. Get regular trims to avoid split ends.

Curly Hair Tipspinterest icon

Kathryn Wirsing/Designed by Dana Tepper

Damaged hair is never a good look (not to mention split ends can make your hair frizzy!). If you want healthy curls that look bouncy and fresh, head to the hairstylist every six to eight weeks for a quick trim.

3. Use product “cocktailing” to define and hydrate curls.

“Product cocktailing is simply mixing two or more products together to meet your specific styling needs,” explains Renee. Her two favorite cocktails: smoothing serum plus mousse for curls, or coconut oil plus styling gel made for curly hair. Together, these products allow for supreme hold without leaving your hair dry or crunchy.

4. Or opt for a one-step hair hydrator.

If you don’t have the patience for cocktailing, your best bet for a one-step solution is a serum, a curl cream or a leave-in for curly hair which helps to not only smooth your curls but gives them definition and separation, helping curls to hold their form without giving any crunch. “Use three or four pumps at a time. Emulsify the product in your hands and gently take it through your curls,” advises New York City-based hairstylist and colorist Patrick Kyle.

BEST OVERALL GEL FOR CURLY HAIR

Amplified Textures Shine & Moisture Finishing Gel
Dove Amplified Textures Shine & Moisture Finishing Gel
Credit: Dove

BEST OVERALL CURL CREAM

Hydrating Styling Cream
Moroccanoil Hydrating Styling Cream
Credit: Moroccanoil

BEST VALUE MOUSSE FOR CURLS

Totally Twisted Curl-Boosting Mousse
Herbal Essences Totally Twisted Curl-Boosting Mousse
Credit: Herbal Essences

BEST SERUM FOR CURLY HAIR

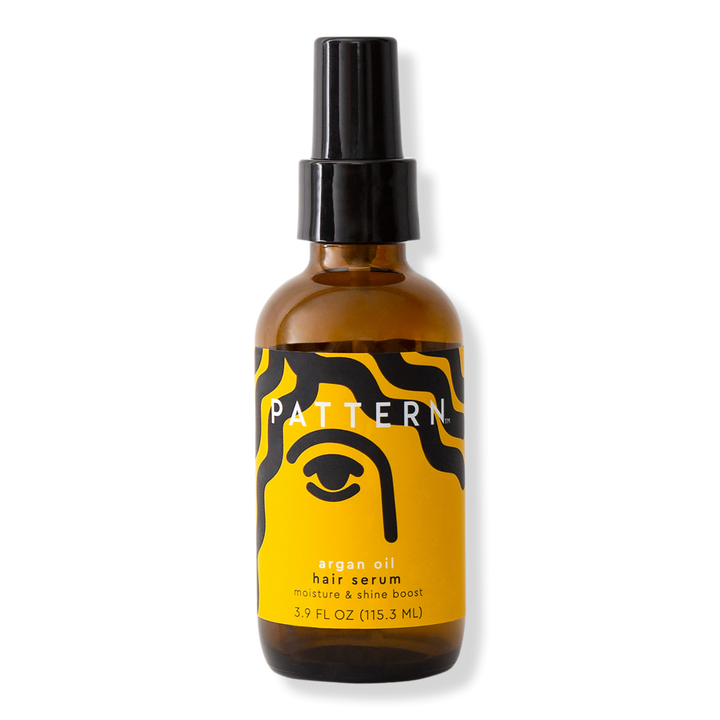
Argan Oil Hair Serum
PATTERN Argan Oil Hair Serum
Credit: Pattern

5. Don’t weigh curls down with too much (or too heavy) product.

curly hair tips

kat wirsing

When your hair goes through a dry or dull phase, what you don’t want to do is weigh it down with a ton of product. Simply use your fingertips to apply a dime-size blob of styling cream or oil to your ends (wet or dry hair is fine!), giving them extra moisture and bounce. If your hair is thinner or you’re looking for a lightweight hydration, spritz an easy-to-use conditioning spray all over the hair, focusing on the ends. For more hydration and definition, smooth a cream-based leave-in conditioner onto soaking wet hair.

BEST OVERALL LEAVE-IN

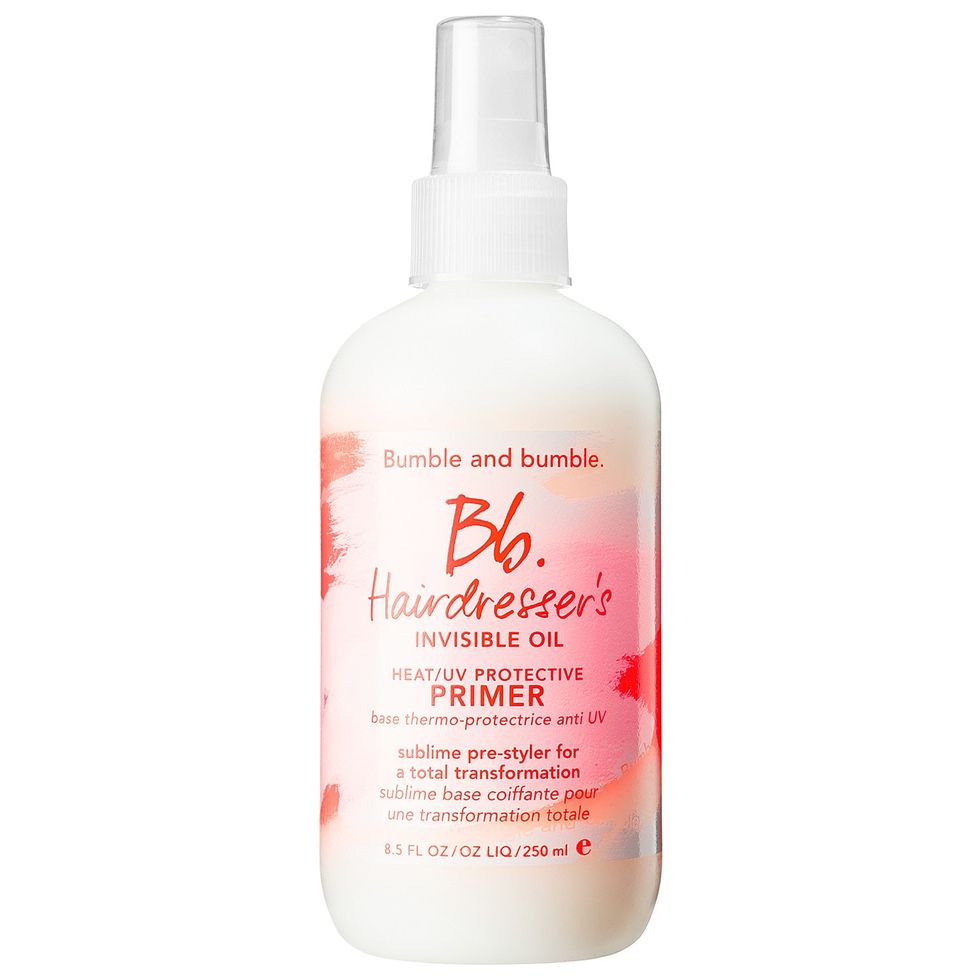
Hairdresser’s Invisible Oil Heat & UV Protective Primer
Bumble and bumble Hairdresser’s Invisible Oil Heat & UV Protective Primer
Credit: Bumble & bumble

BEST VALUE LEAVE-IN

Jamaican Black Castor Oil Leave In Conditioner
SheaMoisture Jamaican Black Castor Oil Leave In Conditioner

Now 23% Off

Credit: SheaMoisture

NATURAL FORMULA

OI All in One Milk
Davines OI All in One Milk
Credit: Davines

BEST LEAVE-IN SPRAY

Miracle Leave-In
It’s a 10 Haircare Miracle Leave-In
Credit: It’s a 10

6. Be careful with how you apply product.

Try applying your favorite styler to soaking wet hair with wet hands using the “praying hands” method as not to disrupt the curl pattern: The combination of the product plus full hair saturation ensures that curls stay frizz-free.

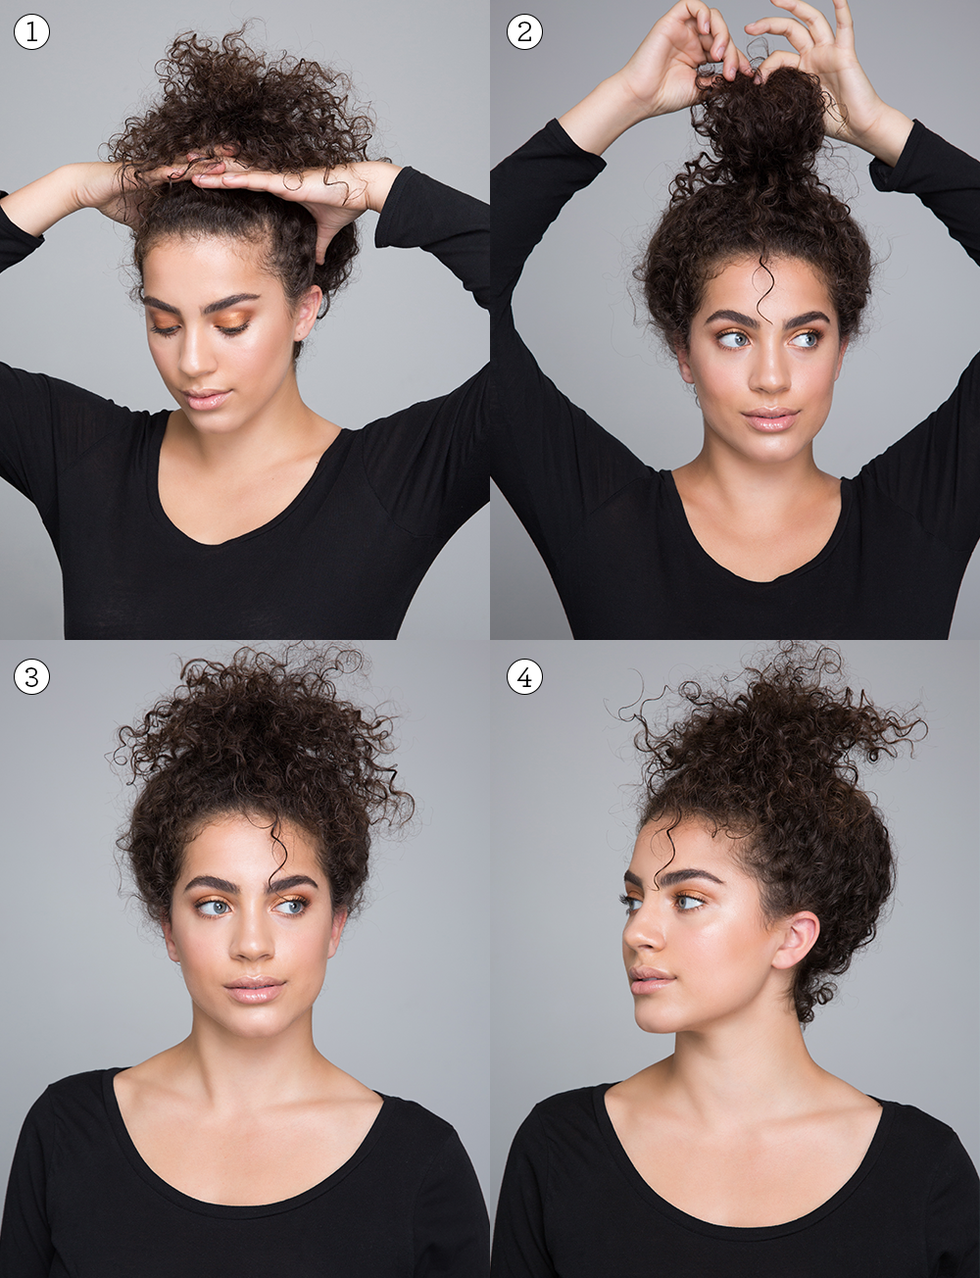
7. Try the “pineapple trick” to keep curls defined overnight.
curly hair tips

kathryn wirsing

MYK Silk Pillowcase

Silk Pillowcase

MYK Silk Pillowcase

Credit: Yala

“Pineappling” is a technique in which the hair is loosely gathered at the highest point of the head, usually before sleep. This protects the curl pattern while helping your hair maintain natural volume while also preventing excessive bedhead. Simply take the pony out and give hair a shake when you’re ready to wear it down.

To keep hair looking even more pristine between wash days, our experts recommend using a silk hair scrunchie for this technique to prevent hair breakage and ponytail creasing. And if you’re not sleeping on a silk pillowcase already, it’s time to make the switch: The benefits of these super-smooth pillowcases are proven to reduce bedhead by reducing friction on the hair overnight, which makes hair look sleek and hydrated day after day.

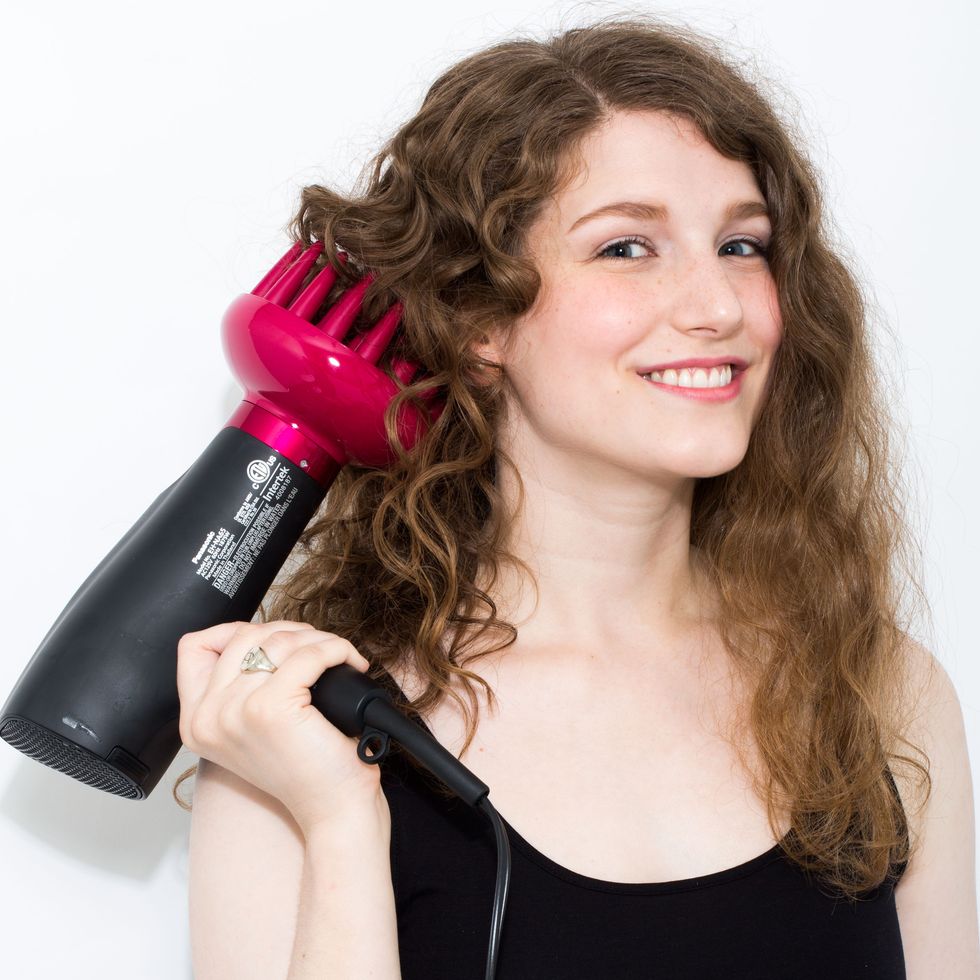
8. Use a diffuser to even out your curl pattern and add more body.
How to use a diffuser

Ben Ritter

If you’re not using the attachments that come with your hair dryer, you’re missing out. By dispersing your hair dryer’s stream of hot air into a larger space, a hair diffuser can “minimize a lot of the frizz that comes when curly hair is naturally air dried,” explains stylist Britt White. Plus, it can help even out your curl pattern and boost the volume of heavy curls, giving more body to your hair. Here’s how to use your diffuser:

  1. First squeeze out the extra moisture in your hair after showering using a microfiber towel in scrunching motions. Don’t use a traditional towel, and don’t turban your hair: While these popular techniques may work for your straight-haired friends, it will disrupt your curl pattern and cause frizz for you.
  2. Apply your favorite hair products and thermal hair protectant (you should be using a heat protectant any time you use heat tools on your delicate curls to protect hair from damage).
  3. Plop your strands into the diffuser, cupping the tool around your hair.
  4. Repeat until you’ve got defined curls all over. It’s OK if your hair isn’t 100% dry: Letting curls air dry a bit can prevent frizz, too.

FAST-DRYING DIFFUSER

Black Orchid Hair Diffuser
xtava Black Orchid Hair Diffuser
Credit: xtava

MICROFIBER HAIR TOWEL

Anti-Frizz Towel
Curly Girl Anti-Frizz Towel

Now 28% Off

Credit: Curly Girl

BEST HEAT PROTECTANT FOR CURLS

Discipline Anti Frizz Smoothing Spray
Kérastase Discipline Anti Frizz Smoothing Spray
Credit: Kerastase

INNOVATIVE DIFFUSER

DevaFuser
DevaCurl DevaFuser
Credit: DevaCurl

9. Refresh curls with a curling iron or wand.

BEST VALUE

Conair Tourmaline Ceramic Curling Wand

Tourmaline Ceramic Curling Wand

BEST VALUE

Conair Tourmaline Ceramic Curling Wand

Credit: INFINITIPRO BY CONAIR

It may sound silly to curl already-curly hair, but when they’ve gotten saggy or unruly, it’s a great way to perk them up. “Pick a curling iron that’s about the same diameter as your curls,” says Sabina Yannone, a Los Angeles-based hairstylist who specializes in curly hair. “If you think your curls are too tight, go up one size to stretch.” If you want tighter curls, choose a smaller-sized barrel.

A curling wand is a great tool to fine-tune naturally curly hair: It allows you to reshape curls exactly where they need some TLC, whether it be at mid-strand, the root, or the end, without having to roll the entire strand up in the iron. The result is perfectly defined curls in just a few minutes’ time.

The cutest curly hairstyles to try ASAP

Now that you know how to treat your curls, you can style them properly, too. Whether you’re trying to keep your curls from getting unruly in the wind or preventing your strands from sticking to your face in the humid summer heat (sweat! frizz!), these styles offer great way to wear your hair down and keep it away from your eyes.

Braids are a godsend for curly girls: By braiding your hair into a different curl pattern, you lock in your moisturizing products and treatments during the night and wake up with a beautiful, low-maintenance style in the morning. Read on for easy, glam, and protective styles, perfect for day or night.

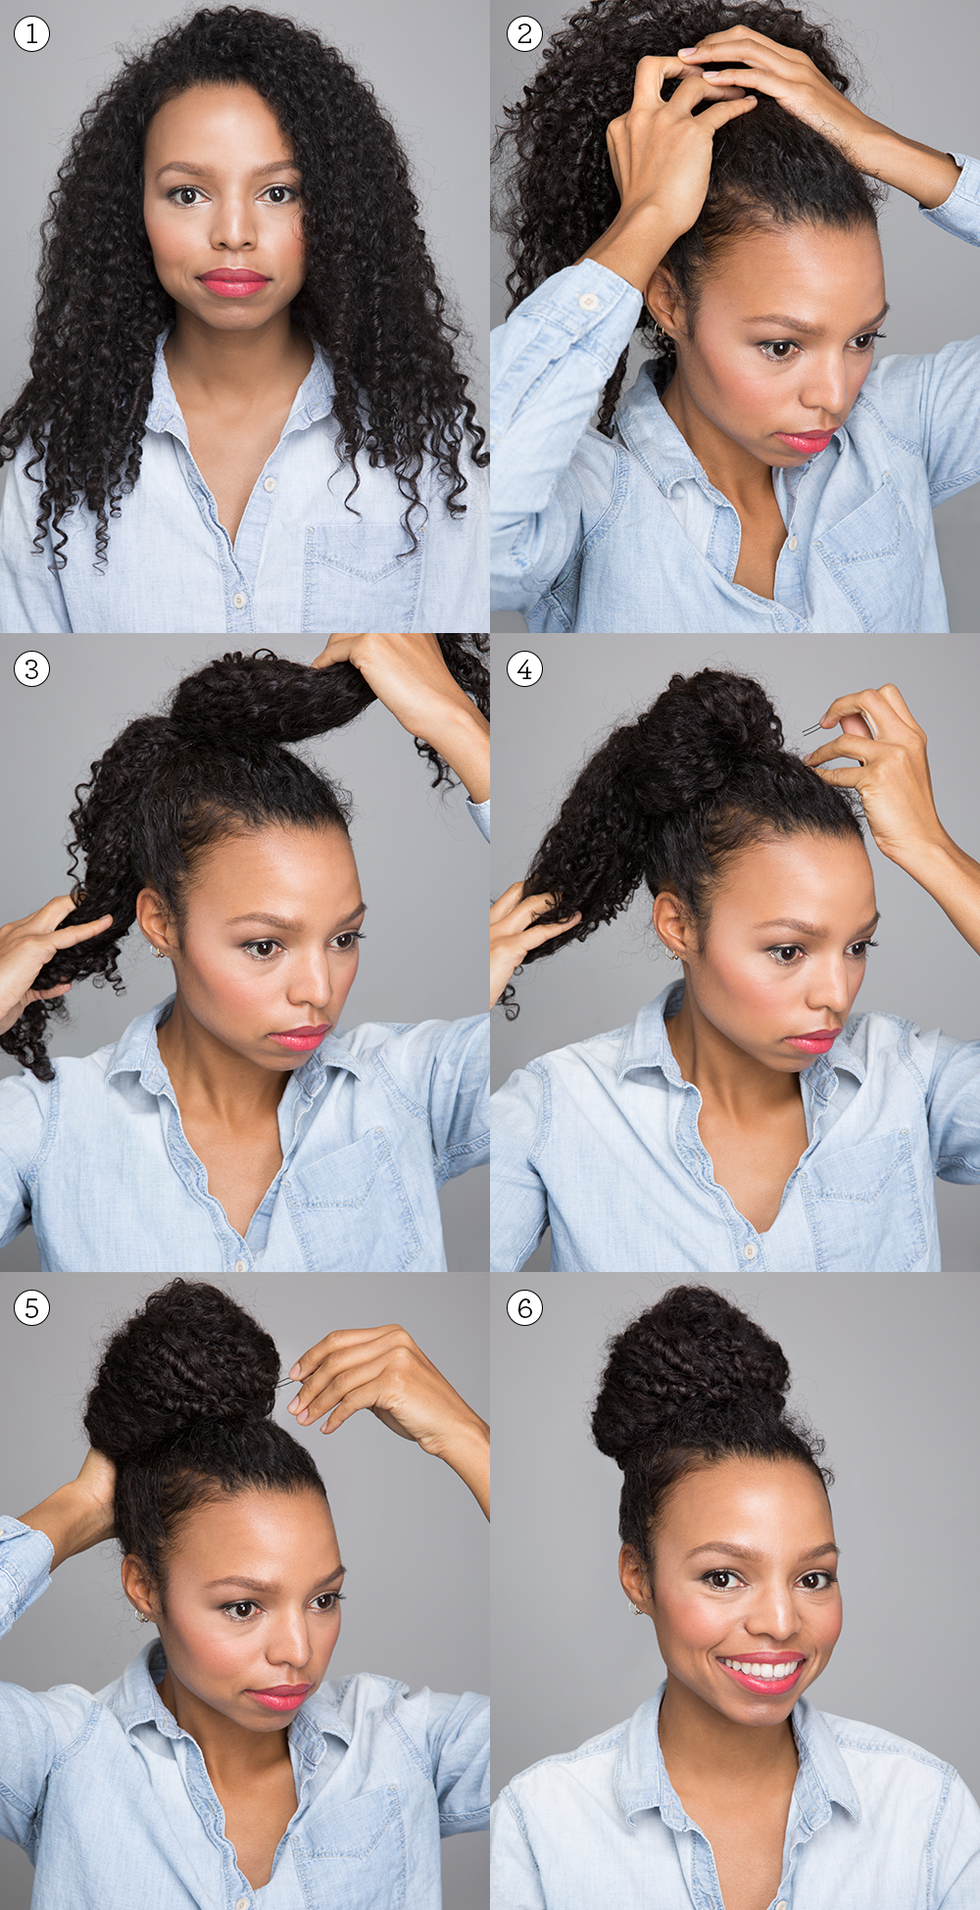
1. Everyday Topknot
Hair, Hairstyle, Eyebrow, Beauty, Black hair, Chin, Long hair, Forehead, Human, Braid,

kathryn wirsing

Get the look: Gather your hair into a ponytail and secure it with an elastic. Divide your hair into two sections, wrap one around the base of the ponytail and pin it with a bobby pin. Wrap the second section around the first and secure it with a bobby pin, then gently tug the bun with your fingers if necessary to give it a full, rounded shape.

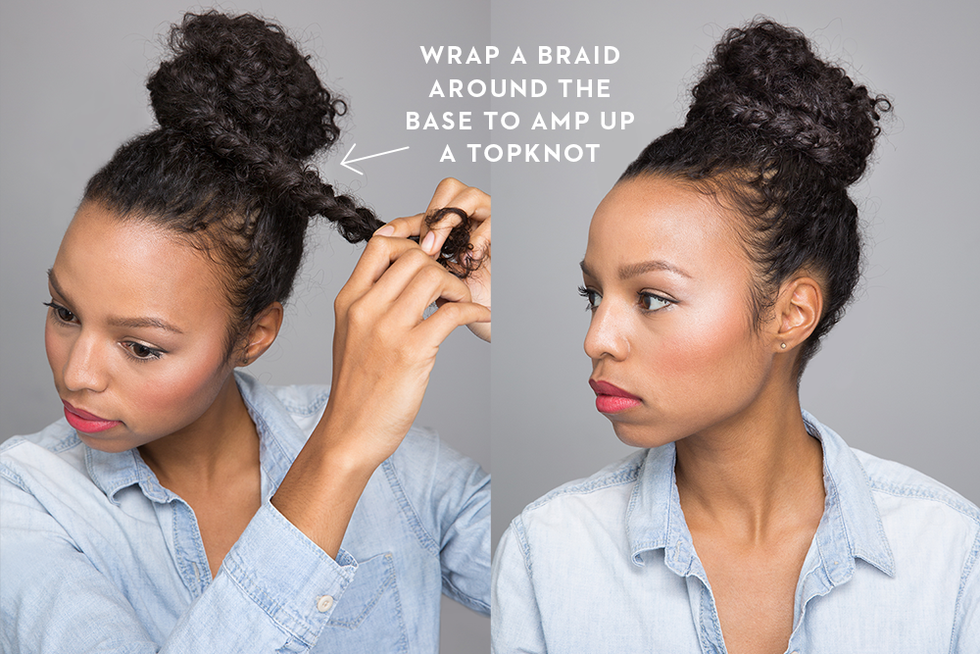
2. Braided Topknot
Hair, Hairstyle, Beauty, Eyebrow, Black hair, Skin, Chignon, Bun, Forehead, Long hair,

kathryn wirsing

Get the look: Leave a small section of hair out while forming your topknot. Once your initial style is complete, braid the section and wrap it around the base of your topknot, securing it with a bobby pin for an elegant overall look.

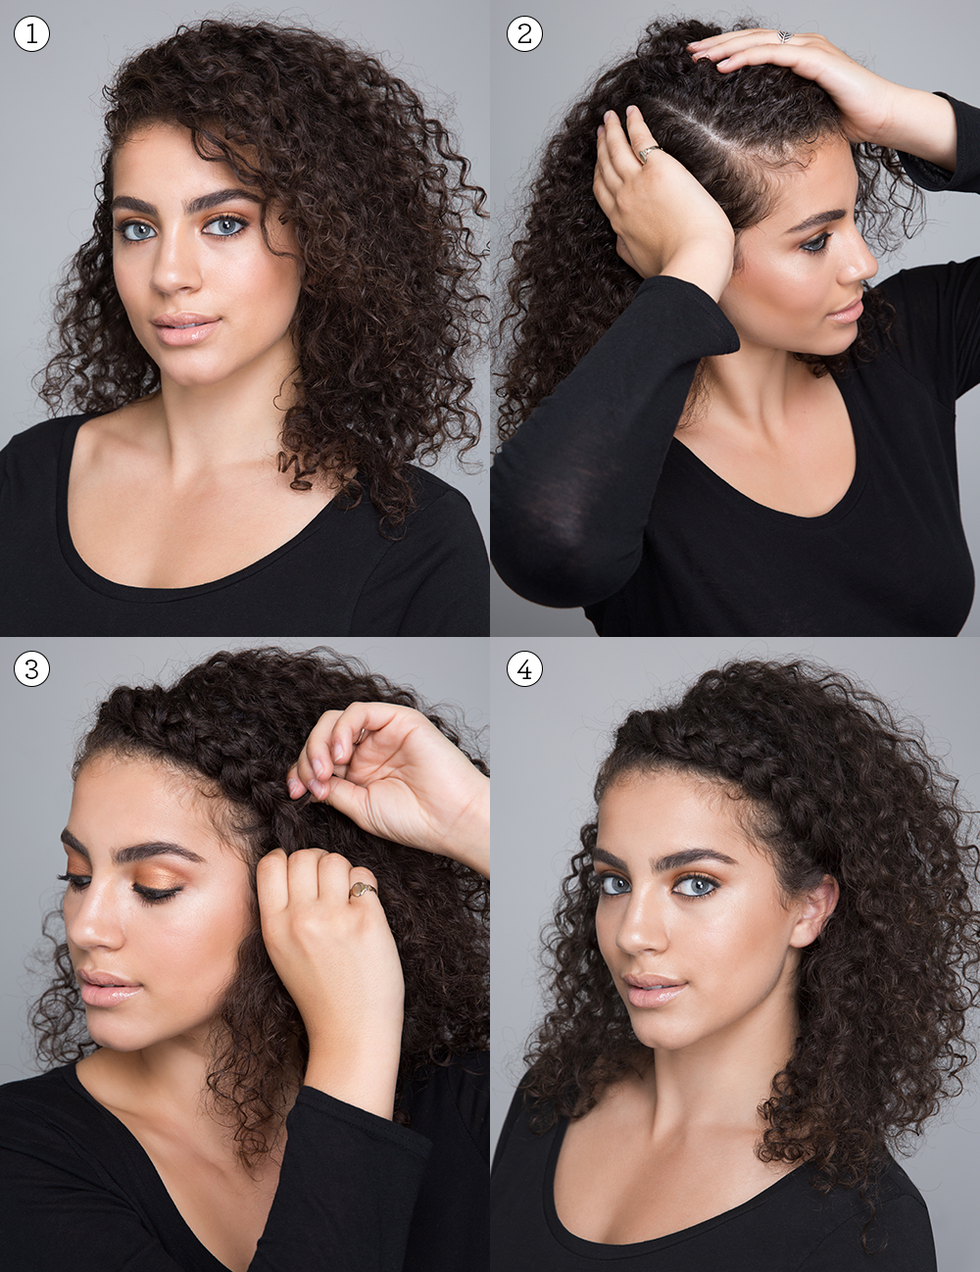
3. Braided Headband
Hair, Face, Hairstyle, Chin, Beauty, Black hair, Eyebrow, Human, Nose, Long hair,

kathryn wirsing

Get the look: Create a deep side part in damp hair and braid along the hairline toward the opposite temple. When you get past your ear, pin the braid beneath the rest of your hair with bobby pins.

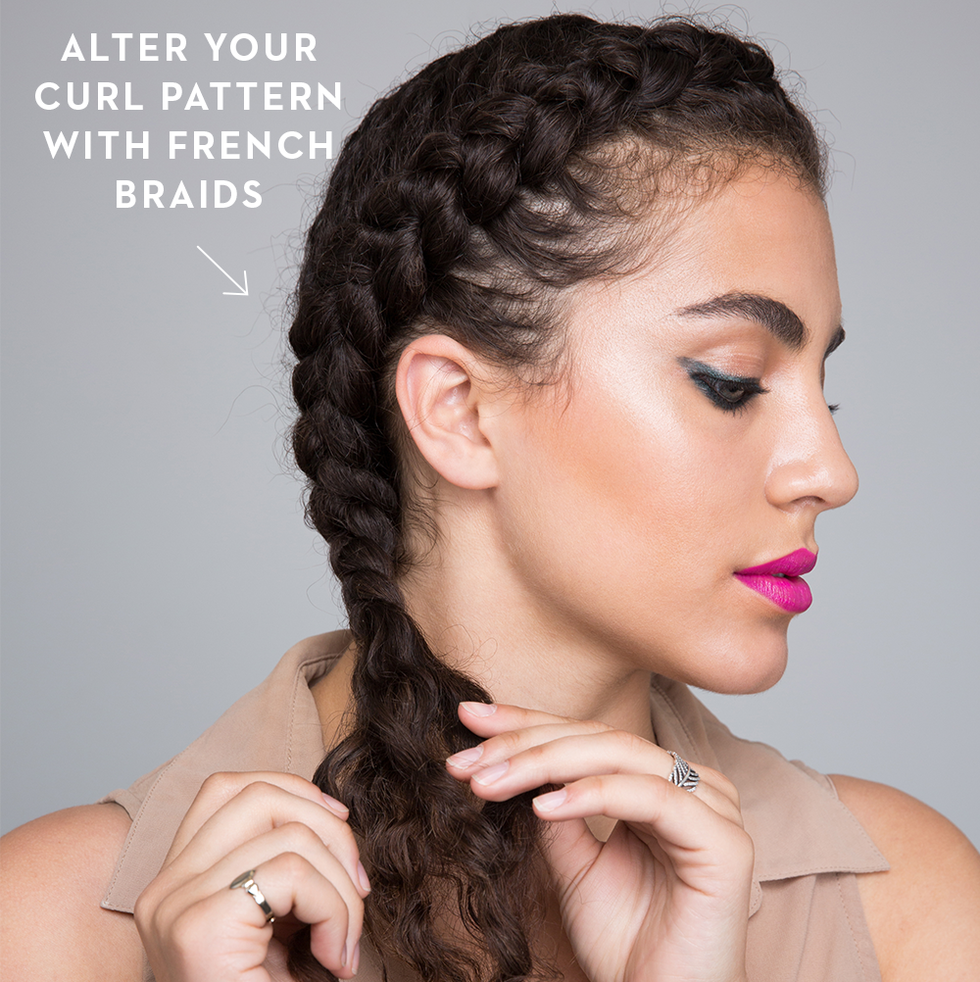
4. Basic Braids
curly hairstyles

kathryn wirsing

Get the look: Try Dutch braids, French braids, or cornrows: It’s the easiest and most versatile protective style a curly-haired girl can ask for. Renee recommends using a hair priming product to moisturize beforehand, then detangle your curls completely to “significantly reduce the amount of tension that will need to be used for braiding.”

Divide your hair down the middle into two sections, then separate each section into three pieces. Starting at the front and top, create a three-strand braid. Cross the piece on the right into the middle underneath the center piece, then repeat on the left side, gradually adding more hair as you braid down to the bottom. Secure each braid with an elastic or clip.

HAIR ELASTICS

No-Damage Hair Elastics
Scunci No-Damage Hair Elastics
Credit: Scunci

BOBBY PINS

Bobby Pins With Case
Conair Bobby Pins With Case
Credit: Conair

HYDRATING PRIMER

Bb. Curl Pre-Style/Re-Style Primer
Bumble and bumble Bb. Curl Pre-Style/Re-Style Primer
Credit: Bumble and bumble

LEAVE-IN HAIR TREATMENT

Heaven In Hair Deep Conditioner
DevaCurl Heaven In Hair Deep Conditioner
Credit: Dermstore

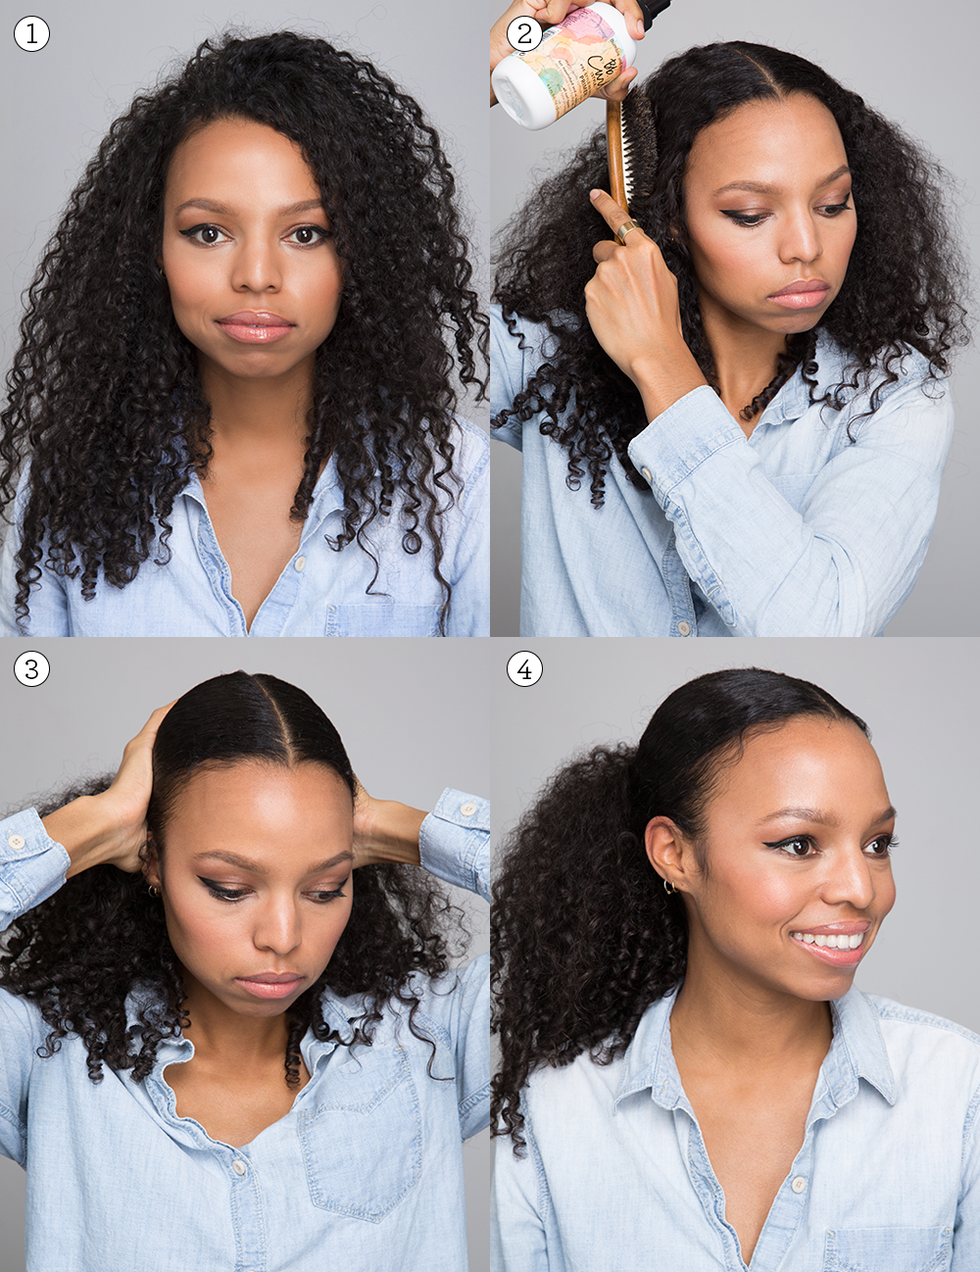
5. Slicked-Back Ponytail
Hair, Face, Hairstyle, Eyebrow, Black hair, Lip, Beauty, Long hair, Nose, Forehead,

kathryn wirsing

Get the look: Apply a lightweight styling gel or pomade through your hair. Then, use a boar brush to pull the top section of your hair back into a sleek ponytail and anchor it with a hair tie. Ruffle the back a bit with your fingers for extra volume. This is another pretty option that allows you to wear your curls down while keeping them out of your face.

6. Three Braid Updo
Hair, Hairstyle, Long hair, Neck, Black hair, Chignon, Fashion accessory, Lace wig,

kathryn wirsing

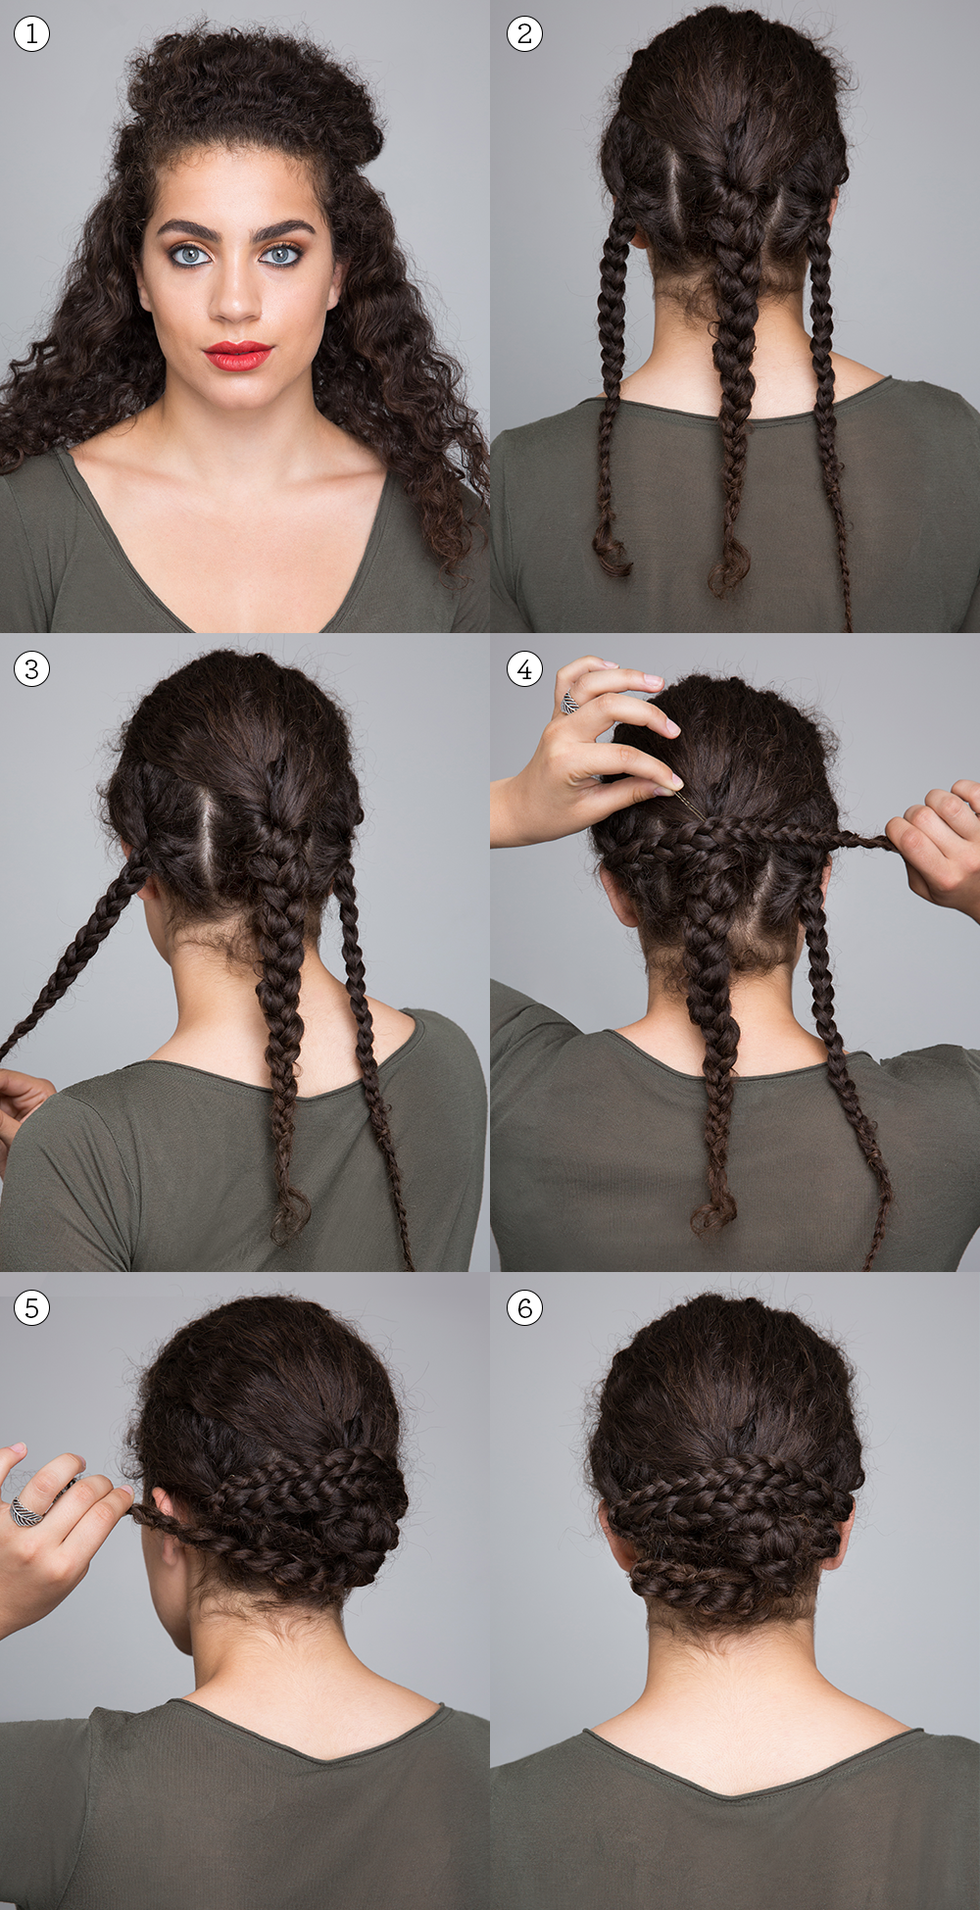
Get the look: Separate your hair into three parts and create a three-strand braid with each section. Hold the top section, pull it across the back of your head and secure it with a bobby pin. Repeat with the second and third sections, then secure any loose pieces with bobby pins. Voila! An unbelievably easy updo.

7. Victory Curls
curly hairstyles

kathryn wirsing

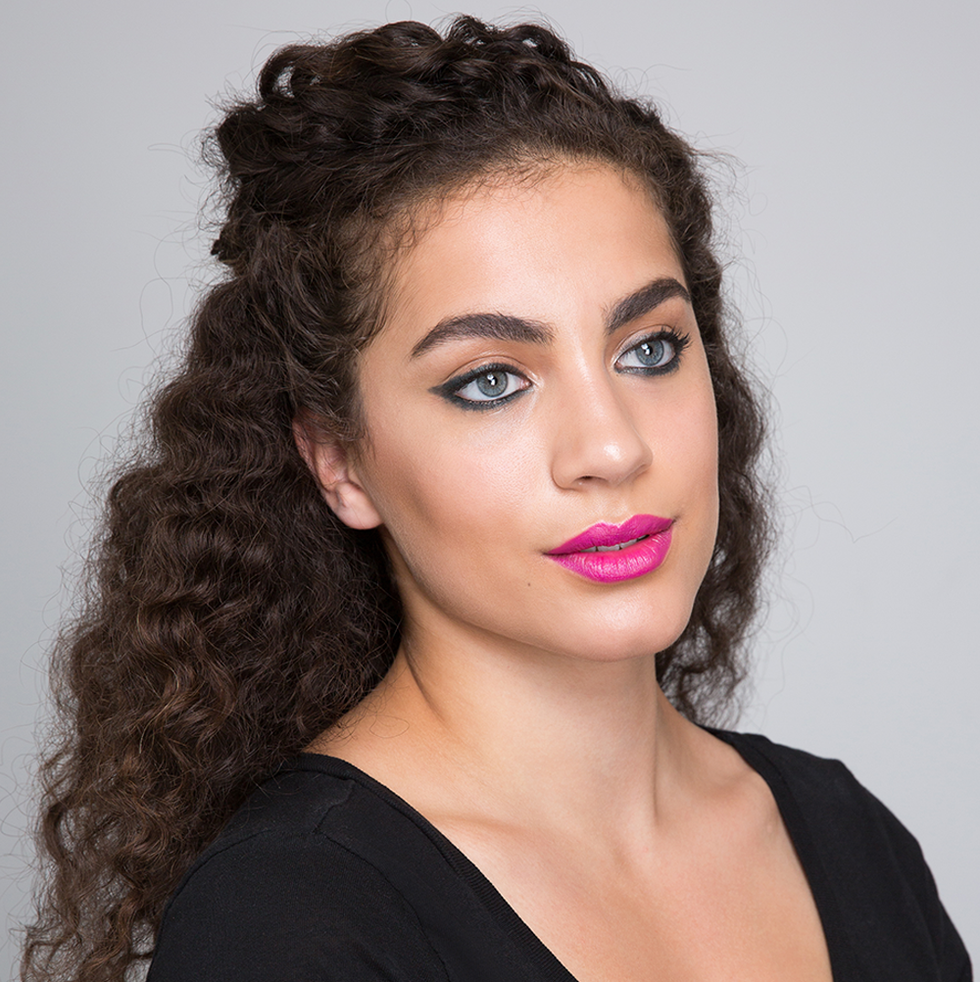
Get the look: This is a curly girl spin on that post-World War II look known as “victory rolls.” Part your hair off to the side, twirl a section of hair from the front, then pin it toward the back. Repeat on the other side. Add sexy cat eyeliner to take this vintage-inspired look up a notch.

Headshot of Jessica Teich

Deputy Editor

Jessica (she/her) is a deputy editor at the Good Housekeeping Institute and a longtime product tester, reviewer, writer and editor of beauty and lifestyle content. She has over a decade of industry experience, previously as beauty editor at USA Today’s Reviewed where she launched the Beauty vertical and tested hundreds of products and has covered trends for publications like The Boston Globe and The New York Times. You can usually find her sorting through piles of beauty products — and testing the best ones on camera. 

Xhicboutique.com – Search for this Product & More at Great Prices!

Source link

Posted on Leave a comment

How Long Can You Really Go Without Washing Your Hair?

“How often should I wash my hair?” is hands down one of the most common questions hairstylists get asked on a daily basis. But it doesn’t necessarily have a straightforward answer. Just like you’d use a different shampoo for different hair (and scalp) types, you also follow a unique set of rules when it comes to cleansing.

“Washing your hair is not a one-size-fits-all process,” says Erinn Courtney, a hairstylist and natural hair expert in Los Angeles. “Our hair is not made equally and needs special care. Finding what works best for you — in terms of the right shampoo and frequency of washing— can take trial and error and doing some research.”

What determines how often you should wash your hair?

  • Scalp oil. “Just like the face, some people are naturally oilier than others and can get buildup after a few days of not washing,” says Dhaval G. Bhanusali, M.D., FAAD, board-certified dermatologist in New York.
  • Activity level. If you are someone who sweats more when you are active, it may increase how often you need to shampoo.
  • Hair type and texture. “Certain ethnicities require less frequent washing,” Dr. Bhanusali says. A general rule of thumb: thicker hair equals less washing.

Is it unhealthy to wash your hair every day?

That really depends on your specific hair type and the shampoo you are using. “Washing your hair daily can cause dryness and breakage, but generally will not cause excessive hair loss,” says Angela Styles, a hairstylist in West Hollywood, CA. While some hair types should avoid a daily wash for those reasons, those with super oily hair “can benefit from washing every day because of the amount of oil it produces,” Courtney explains.

According to Chiara Butler, Beauty, Health & Sustainability Lab Reviews Analyst at the Good Housekeeping Institute, there are studies that show shampooing daily can actually be beneficial to the hair and scalp. “Two studies conducted on East Asian populations showed that markers of scalp health improved with a daily washing regimen,” Butler says. While this may not be true for all hair types, as mentioned by Courtney above, Butler also feels that washing daily can be the right choice for people with oilier scalps, as the alternative is often “a buildup of sebum and resulting irritation caused by not washing.”

Is it okay to wash your hair once a week?

Dr. Bhanusali recommends regular washing to maintain healthy hair and scalp health. The specific number of times varies based on hair type and texture — keep reading for more details. He also advises not to overdo dry shampoo (stick to one or two times per week), as “using it too often has been been associated with hair loss.”

Is it better to not wash your hair?

Washing your hair is important for hair growth,” Courtney says. “It relieves your hair of product buildup and dermatitis that can negatively affect your scalp.” Shannon King, partnering artist with KMS Hair, adds that “not cleansing your hair can lead to issues with dryness, tangles and ultimately, hair loss.” Their key takeaway: As long as your hair and scalp are healthy, your hair will grow.

Butler agrees, explaining that “while shampooing can cause a small amount of mechanical damage and increase color fading, not washing the hair frequently enough can lead to the buildup of oxidized oils on the scalp, which causes scalp irritation.” One study done in Japan “found that when subjects decreased their normal wash frequency, the levels of yeast on their scalps increased, and they experienced itching and flaking.”

How many times are you supposed to wash your hair a week?

Finding the right balance can be tricky. Generally, if your hair isn’t greasy or dry, you should cleanse it every two to three days, King recommends. But if you wash hair too often for your hair type, “it could be very drying to the hair, depending on the ingredients in the shampoo,” King says. Whereas if you wait too long in between shampoos, “you could end up with a scalp that is very clogged, meaning hair won’t be able to grow out of the follicle the way and at the rate that it’s supposed to.”

Don’t stress over sudsing up — we’ve got you covered. See below for our professional stylist-approved guide to how often you should be shampooing your strands, based on your hair type.

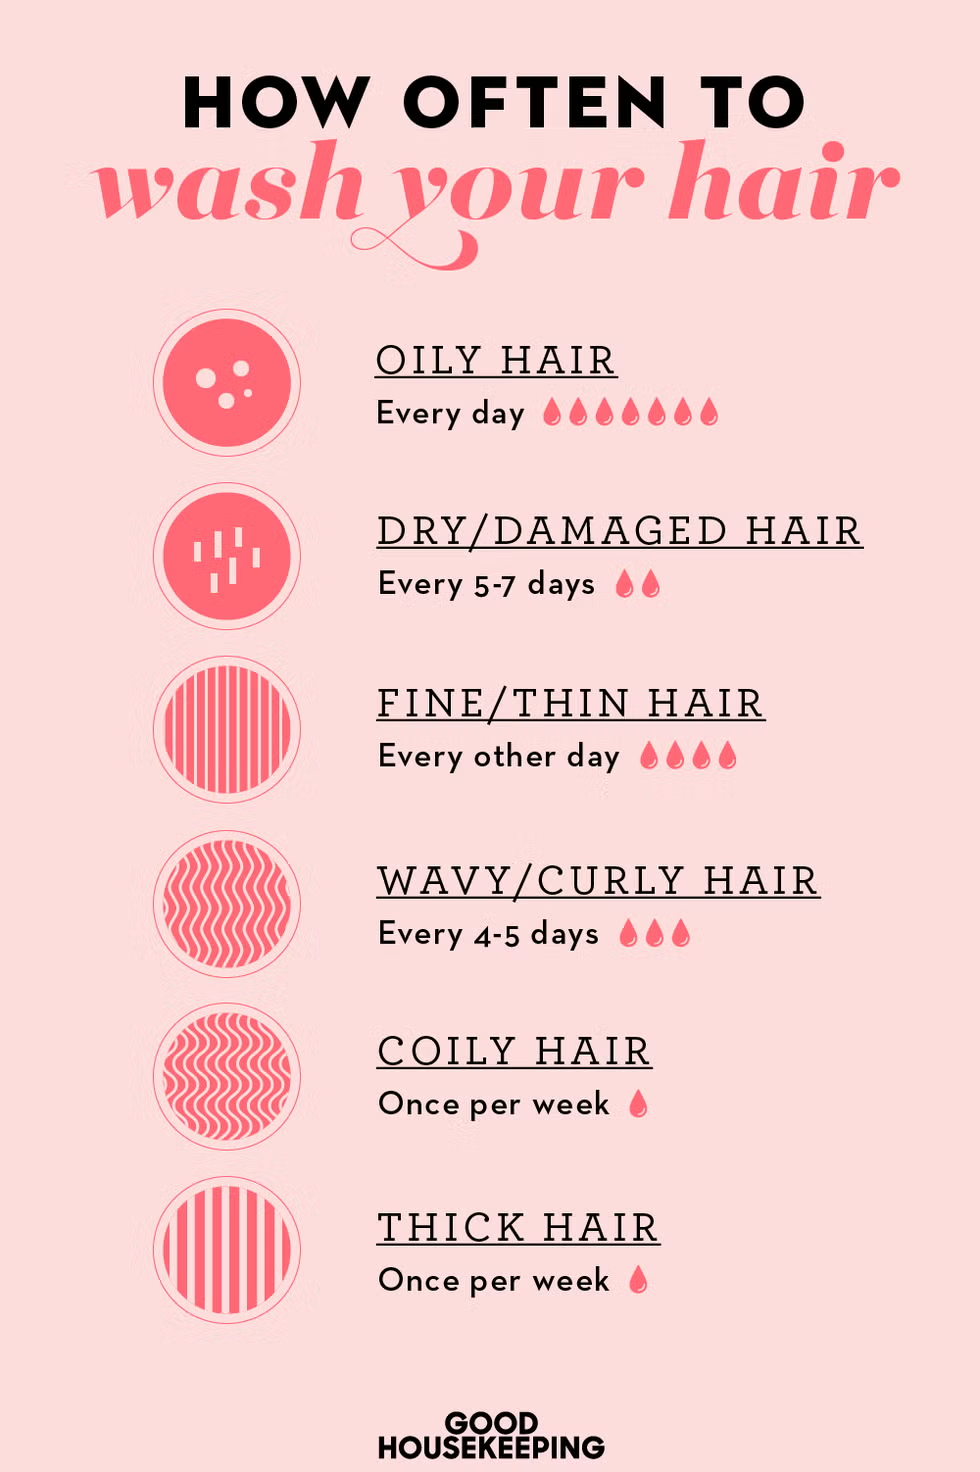
how often to wash hairpinterest icon
  • Oily hair: “Typically you would want to wash your hair every day to prevent build-up, unless you have very long hair or it’s very coarse or curly,” King says.
  • Dry or damaged hair: While noting that it depends on the level of damage and dryness, King typically recommends shampooing every five to seven days, as “you may need to allow some [of the hair and scalp’s] natural oils to get in the mix until that time.” Courtney adds that “if hair is dry and damaged, it could be that you’re shampooing too often.” Make sure not to overuse a clarifying shampoo, as it can strip the hair of the nutrients it needs to be healthy and may allow it to become dry and damaged.
  • Wavy or curly hair: Shampoo every four to five days, King suggests. “It will depend on the density of the hair, but this is a good estimate for this hair type.” If that seems like too long of a stretch, shorten it by a day or two and see how your hair and scalp react.
  • Coily hair: Both Courtney and King suggest washing once per week for optimal hair growth. “Don’t forget to follow with conditioner,” King adds. “It’s equally as important to condition as much as it is to cleanse.”
  • Fine or thin hair: “Fine hair will need to be shampooed as often as every other day to provide it with the moisture it needs to flourish and grow,” Courtney says. Cleansing also helps remove buildup and oils that can weigh fine or thin hair down.
  • Thick hair: “Thicker textures tend to hold onto moisture, so washing once per week is sufficient,” Courtney advises.
  • Hair growth: Stick with the recommendation based on your hair type, listed above. “I haven’t seen any studies that correlate with hair growth and number of times you wash,” says Dr. Bhanusali.
  • If you have dandruff: Dr. Bhanusali recommends three to four times per week for about one month to see if the dandruff lessens. After that, shampoo as needed. “Look for a shampoo specifically made for dandruff, like Nizoral, Selsun Blue or Head & Shoulders, which has pyrithione zinc,” he suggests. “If you are still dealing with dandruff after a month of changing your washing routine and shampoo, it may be worth seeing a dermatologist for prescription options.”

How does the season affect your shampoo schedule?

Seasons change, and so does your hair regimen. Colder weather typically causes scalps to become drier and sometimes produce more dandruff. “Shampooing more often, such as daily or every other day in the winter, can be helpful for those who experience more dryness and dandruff,” Courtney says. During the summer, people tend to shampoo less often, especially those with curlier or coiled textures. “This allows time for people with drier scalps to produce natural moisture and let it distribute through the hair strands before wash day,” she explains.

This content is imported from poll. You may be able to find the same content in another format, or you may be able to find more information, at their web site.

Headshot of Dori Price

Contributing Beauty Editor

Dori Price is a New York City-based freelance writer and editor and beauty, style and wellness expert who was the Beauty & Fashion Director at Family Circle for 13 years before she joined Good Housekeeping, Prevention and Woman’s Day as a freelance beauty editor. She has also written for WomensHealthMag.com, Elle.com and HealthCentral.com.

Xhicboutique.com – Search for this Product & More at Super Prices!

Source link

Posted on Leave a comment

Natural or synthetic hair extensions – Which One Should You Choose?

Hair extensions have revolutionised the way you can transform your hairstyles. In just a blink of an eye you can add length and volume to your natural hair. As the popularity of these products grows, so does the choice of different types of them. So which particular one should you opt for – natural or synthetic extensions?

Embrace the Authenticity with Natural Hair Extensions

Crafted from real human hair, natural hair extensions offer a level of authenticity that is hard to replicate. The strands that make Viola’s hair extensions are sourced carefully, ensuring a high-quality and natural appearance. The major advantage of natural hair extensions is their ability to blend seamlessly with your own hair. They can be styled, dyed, and treated just like your natural hair, providing you with endless possibilities of your hair routine.


Applying natural hair extensions means that you are absolutely free to use heat styling tools, such as curling irons and straighteners without having to worry about damaging the extensions. The durability and longevity of natural hair extensions also make them an excellent investment. Natural hair extensions are also a more sustainable solution, since with proper care and maintenance, they can last for a long time. This applies to different types of extensions, from nano-rings to hair wefts.


Synthetic Hair Extensions – An Easy Way

Artificial hair extensions, as opposed to their natural equivalent, are made from synthetic fibres designed to imitate the look and feel of natural hair. These extensions often come pre-styled, offering a wide range of textures and colours. They may be a safe choice if you desire a specific hairstyle without the need for daily styling. Synthetic hair extensions are usually affordable, which makes them a budget-friendly choice. While synthetic hair extensions are easier to maintain, they will not necessarily give the outcome that you are looking for. Unlike natural hair extensions, they retain their style even after washing. Additionally, synthetic hair extensions are not affected by humidity or weather conditions, ensuring consistent styling regardless of the environment.

Choosing The Right Hair Extensions

When choosing between natural and synthetic hair extensions, it ultimately comes down to your personal preferences and needs. If you value authenticity and the ability to customise your hairstyle, natural hair extensions from Violahairextensions are an excellent choice. They provide a seamless blend and the freedom to style your hair as desired. On the other hand, if you seek affordability, and low maintenance, synthetic hair extensions may be a right choice for you. However, it needs to be noted that they provide much more limited experience of using, whereas natural hair extensions, such as the one made by Viola, offer much more possibilities. Their biggest advantage is certainly being made out of real human hair. Consulting with a professional stylist can also provide valuable insights and guidance based on your individual circumstances.

The Importance of Proper Maintenance

Remember, whether natural or synthetic, proper care and maintenance are key to ensuring the longevity and vibrancy of your hair extensions. Embrace the possibilities and enjoy the stunning results that hair extensions can bring to your overall appearance. By understanding your priorities and considering the factors discussed, you can confidently choose the perfect hair extensions to enhance your unique style and transform your look.

Xhicboutique.com – Discover this Product & More at Super Prices!

Source link

Posted on Leave a comment

Can You Actually Fix Damaged Hair?

Almost everyone has some hair damage, from dryness and brittleness to split ends and breakage. The best way to tackle dry and damaged hair really depends on the cause and type of damage. Find the best fix for your hair with these pro tips on prevention and solutions from the Good Housekeeping Institute Beauty Lab experts and hair specialists.

Can you actually repair damaged hair?

“Once hair is split or broken, nothing can permanently fuse it back together,” explains Beauty Lab executive director Birnur Aral, Ph.D. “Products like split-end menders, leave-in conditioners and treatment masks can seal the outer layer of strands so they temporarily appear smoother and less frayed and feel softer, and help protect hair from further damage.” However, the only real long-term solution is by cutting your hair, to trim off damaged areas.

ID your damage - dryness

Strands that feel or look parched can be a cue that the cuticle, which locks moisture into hair, is damaged.

Text, Font, Line, Logo, Brand,

As the cuticle is further damaged or completely lost, the hair strand can start to fray, or split in pieces, at ends or in other areas.

Text, Font, Line, Logo, Brand, Graphics,

This occurs when a strand’s layers deteriorate enough to cause weak spots along the hair shaft where the strand fractures.

Red, Line, Parallel, Rectangle, Coquelicot,

Severe damage that pulls on hair roots, from causes such as styling, can produce permanent follicle loss.

That said, conditioner is damaged hair’s best friend: Damaged hair is stripped of its protective outer layer, and conditioner helps replenish it with emollient ingredients like silicones and plant oils (such as coconut oil) and butters. “They coat wet hair so it’s easier to detangle, which can lead to less damage and make it silkier and more manageable,” Aral says.


preview for Good Housekeeping US Section: Beauty & Style

For maximum benefits to prevent damage, use a rinse-off conditioner after every shampoo, plus a leave-in conditioner on damp hair. Swap in a deep conditioner or hair mask weekly: “These tend to contain higher concentrations of conditioning ingredients, making them thicker and heavier,” Aral explains.

For the best product picks, check out the GH Beauty Lab’s top-tested hair moisturizers and deep conditioners and masks for damaged hair below.

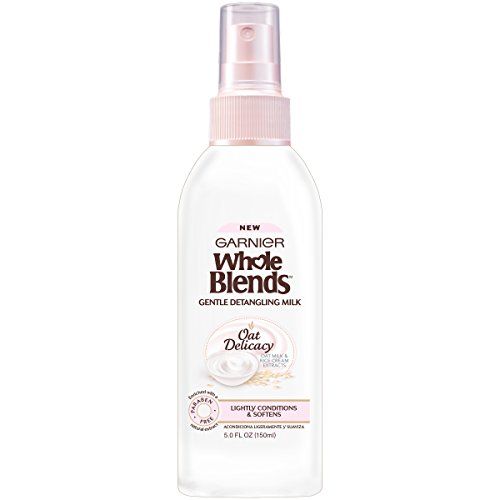
Whole Blends Gentle Detangling Hair Milk
Garnier Whole Blends Gentle Detangling Hair Milk
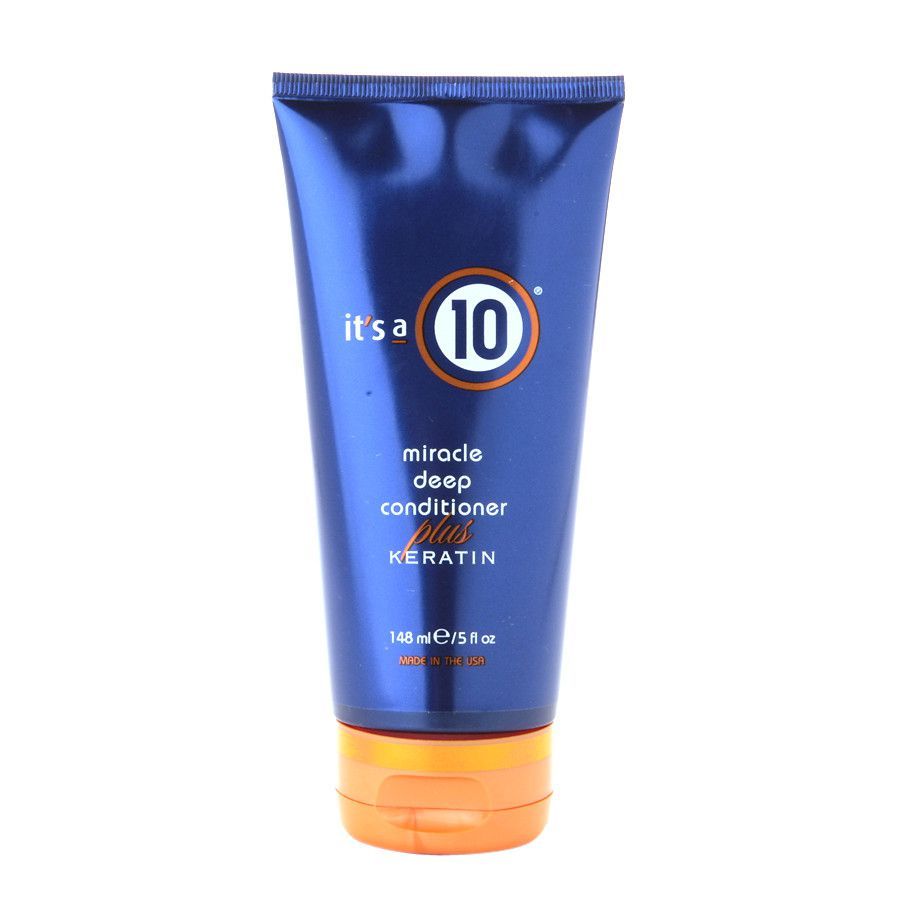
Miracle Deep Conditioner Plus Keratin
It’s a 10 Miracle Deep Conditioner Plus Keratin

Now 27% Off

Credit: It’s a 10
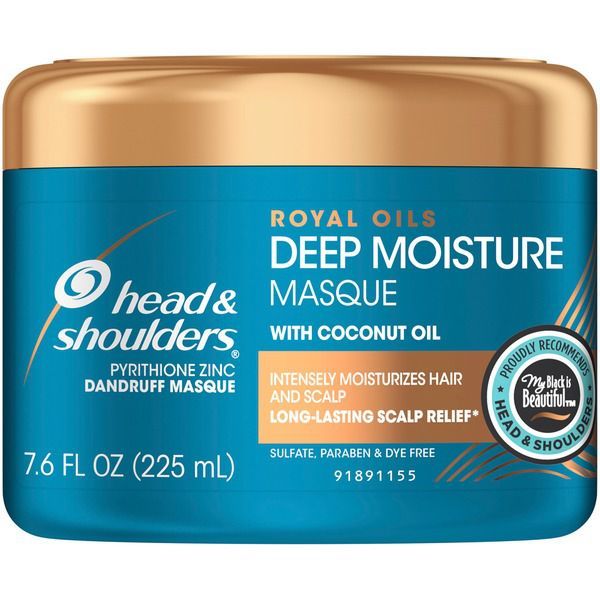
Royal Oils Deep Moisture Masque
Head & Shoulders Royal Oils Deep Moisture Masque
Credit: Head & Shoulders

How to repair chemically damaged hair

When using hair color, chemicals such as ammonia have to be used to open your hair shaft, so the dye can be deposited. Ammonia-free formulas exist, but industry studies have found that they’re just as harmful (you have to use more and leave them on longer).

Your hair is damaged if after showering, your hair dries almost instantly. That shows just how porous those color chemicals have made it, says Katherine Polite, a colorist at Zano Salon in Chicago.

1. Use a moisture-rich hair dye

    Many dyes, like the Beauty Lab’s recommended formulas below, are infused with conditioning ingredients to help protect and repair hair during the color process. For gray coverage, go with a semi- or demi-permanent formula — it’ll fade faster but is less harsh than a permanent dye. To highlight at home, avoid pull-through caps, which often result in damaging color overlap (go for a cap-less kit instead).

    2. Only dye your roots

    When possible, reapply dye to just the roots to minimize chemical exposure on the lengths, and “space dyeing hair 10 to 12 weeks apart at minimum,” says George Papanikolas, Matrix celebrity colorist in Los Angeles. Finally, major color changes can cause major harm (including hair breakage or even loss) when done wrong, so leave those to the pros.

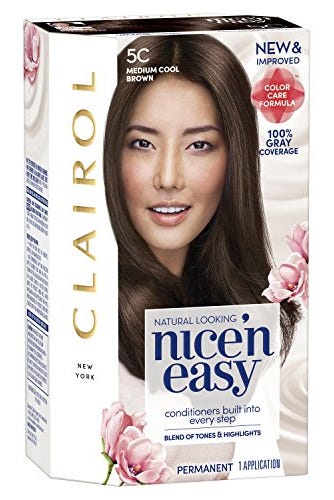
    Conditioning Permanent Hair Color

    Nice 'N Easy Permanent Hair Color
    Clairol Nice ‘N Easy Permanent Hair Color
    Credit: Clairol
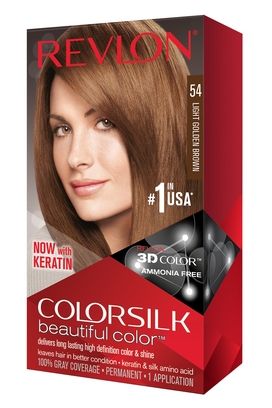
    Colorsilk Beautiful Color Permanent Hair Color
    Revlon Colorsilk Beautiful Color Permanent Hair Color
    Credit: Revlon

    Capless Hair Highlighting Kit

    Superior Preference Glam Lights
    L’Oreal Paris Superior Preference Glam Lights
    Credit: L’Oreal Paris

    How to repair broken hair and flyaways

    The wrong tool or the wrong technique can tangle or, worse, tear your hair. You’re in trouble when you look in a mirror and see tiny hairs sticking up along your part and hairline. These aren’t “baby hairs” growing in, says Cheri McMaster, senior scientist for Pantene: they’re hairs that have broken. Here’s how to to stop that breakage in its tracks:

    3. Invest in a good brush to prevent breakage

    Bristles are the key to preventing breakage. They should be soft, smooth — avoid those with plastic balls on the ends — and spaced out, as on a comb. Wet Brush is designed specifically for wet hair: its thin, perfectly-spaced IntelliFlex bristles are flexible and specially designed to be firm enough to get through knots and tangles, yet soft enough to keep hair healthy and snag-free.

    4. Don’t brush wet hair

    H2O can exacerbate the issue: “Water exposure swells and stretches the hair’s shaft, which causes the shingle-like outer layer to lift, and adding stress from brushing in that state can cause it to break,” explains GH Beauty Lab senior chemist Sabina Wizemann.

    Brush your hair before washing if possible, and if you have to detangle it wet, towel-dry so it no longer drips, apply a leave-in conditioner from roots to ends, and use a gentler wide-tooth comb or detangling brush to reduce friction. Work from the ends up in small sections to avoid ripping strands, she suggests.

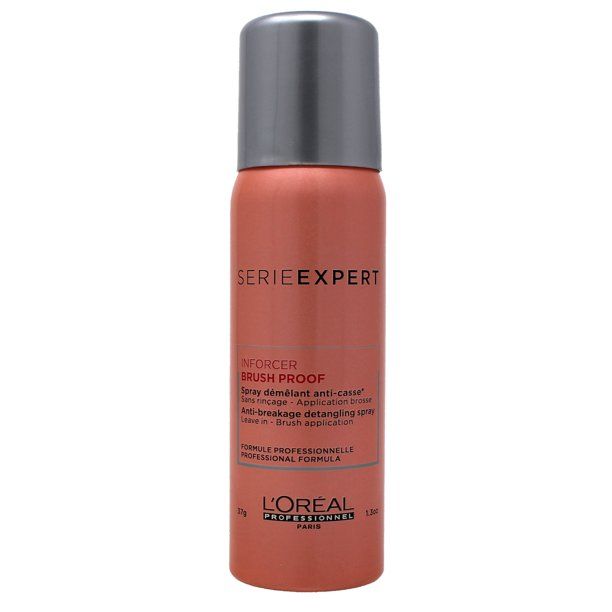
    Inforcer Brush Proof Anti-Breakage Detangling Hairspray
    L’Oreal Professionnel Inforcer Brush Proof Anti-Breakage Detangling Hairspray
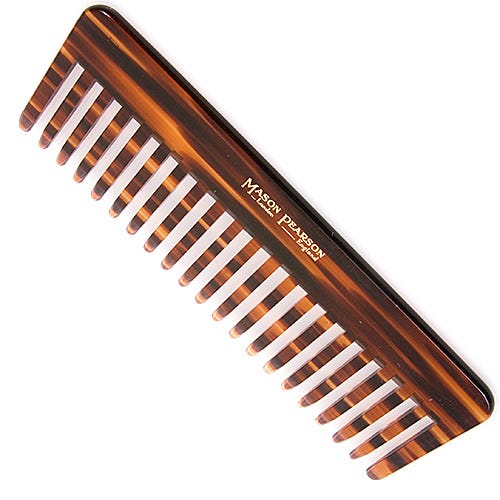
    Rake Comb
    Mason Pearson Rake Comb
    Credit: Mason Pearson

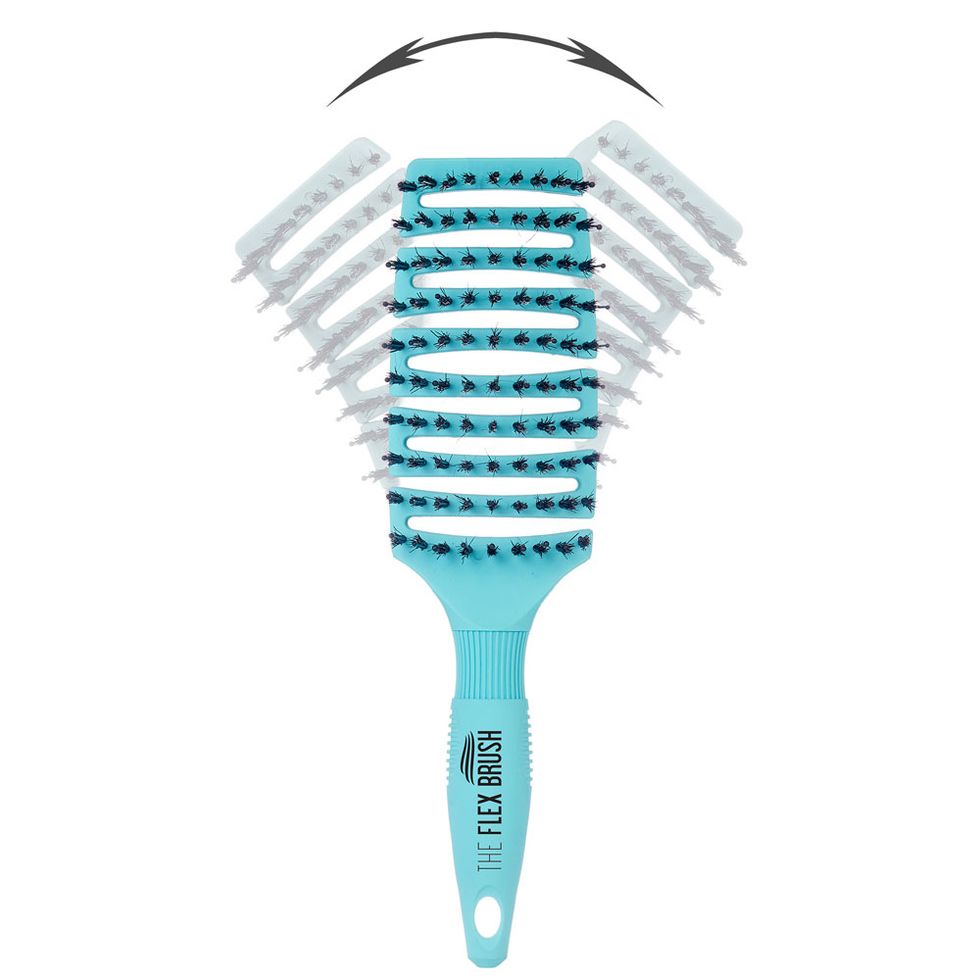
    GH Beauty Award-Winning Detangling Brush

    XL Mixed Bristle Brush
    The Flex Brush XL Mixed Bristle Brush
    Credit: The Flex Brush

    How to repair damaged hair from heat

    Blow-drying, flat-ironing and curling can all cause hair’s outer layer to lift up, releasing valuable moisture and leaving strands brittle, dry, and damaged. To tell if your hair is damaged, pull out a hair, run your fingernail from root to end (as if curling a ribbon), drop the strand into a glass of water — and see if it uncurls. If it doesn’t, your hair has lost elasticity, McMaster says.

    5. Use heat protectant

    Before drying or ironing your hair, McMaster says, use a heat protection hair spray or serum that contains silicones or polymers, which create a protective barrier over strands. “These stylers work by coating hair at the high temperatures of heat styling and shielding the surface of damaged strands, which can improve hair’s manageability, in turn resulting in reduced breakage,” Aral explains.

    6. Make sure hair is dry before styling

    Most importantly, “never blow-dry hair that hasn’t been towel- or air-dried partially first or use styling irons on hair that’s not totally dry, as that can cause any water inside to boil and the strand to rupture,” Wizemann warns. To avoid harmful friction, dry hair by wrapping your head in a small microfiber towel for a few minutes.

    7. Replace old heat tools

    Throw out any heat-styling tool that you’ve had for more than five years: The older the appliance, the higher the chance that the temperature gauge has gone kaput, says Beverly Hills celebrity stylist Cristophe. Use your blow-dryer’s nozzle attachment; it cuts down on cuticle ruffling.

    Pick a flat iron that has ceramic plates: Since ceramic heats up evenly, it straightens hair faster and won’t stick to — or singe — any one spot.

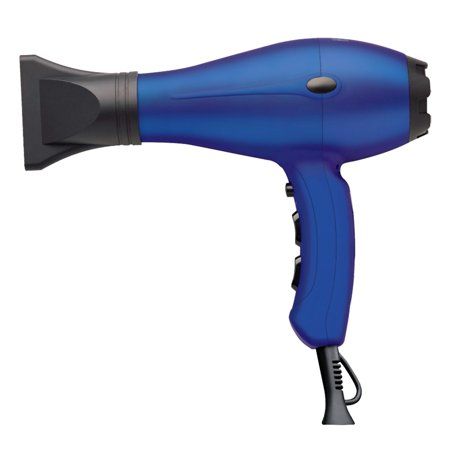
    Professional Titanium Radiant Blue Salon Turbo Ionic Dryer
    Hot Tools Professional Titanium Radiant Blue Salon Turbo Ionic Dryer
    Credit: Hot Tools
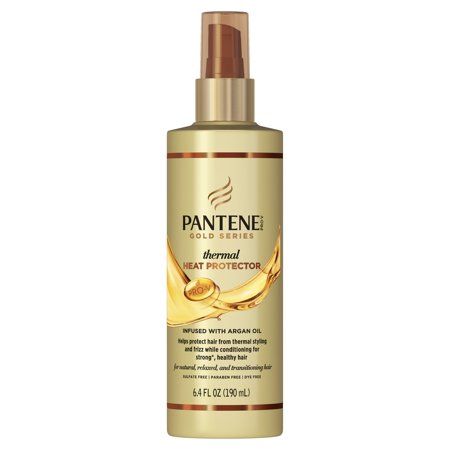
    Gold Series Thermal Heat Protector
    Pantene Gold Series Thermal Heat Protector

    Now 20% Off

    Credit: Pantene
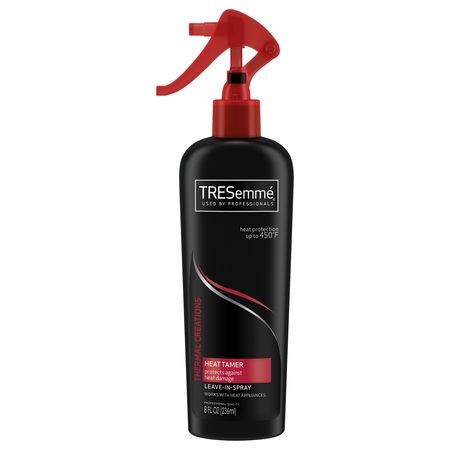
    Thermal Creations Heat Protectant Spray
    TRESemmé Thermal Creations Heat Protectant Spray
    Credit: Tresemme

    How to repair environmental hair damage

    Sun, water, chlorine — a day of fun outdoors can be hard on your hair. These essentials will help.

    8. Shield hair from the sun

    Cover hair with a hat to help shield it from the sun, which can damage hair at high levels of exposure, the Beauty Lab says. A tightly-woven hat can also help prevent sun burns and skin cancer on your scalp. (Bonus points if it has UPF protection, like the one below, which certifies that its fabric weave block’s UV rays.)

    9. Coat hair in a “waterproofing” product

    Before swimming, wet your hair with shower or tap water, then coat it with a leave-in or regular conditioner to form a barrier against the chemicals like chlorine in pool water, which can cause color stripping and breakage, Cristophe says. Plus, dousing hair in clean water means it can’t absorb as much chlorine to begin with.

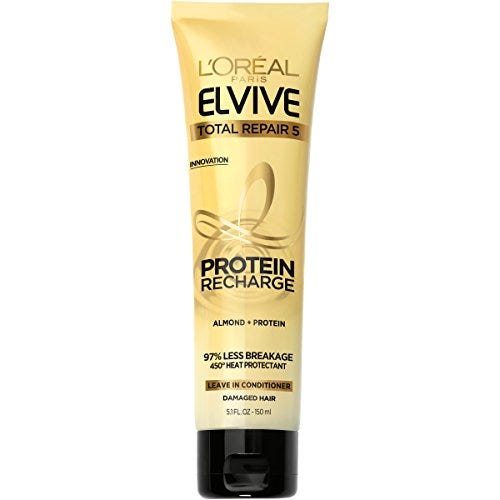
    Elvive Total Repair 5 Protein Recharge Leave In Conditioner
    L’Oreal Paris Elvive Total Repair 5 Protein Recharge Leave In Conditioner

    Now 13% Off

    Credit: L’Oreal Paris
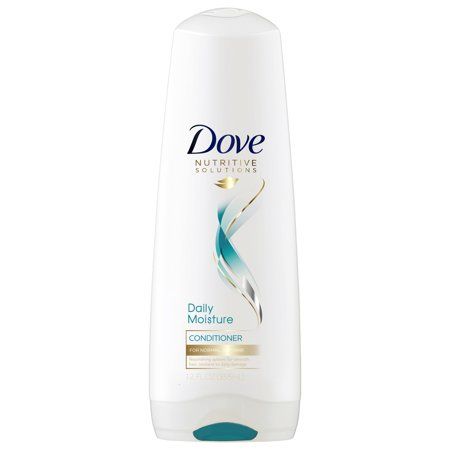
    Nutritive Solutions Daily Moisture Conditioner
    Dove Nutritive Solutions Daily Moisture Conditioner
    Credit: Dove
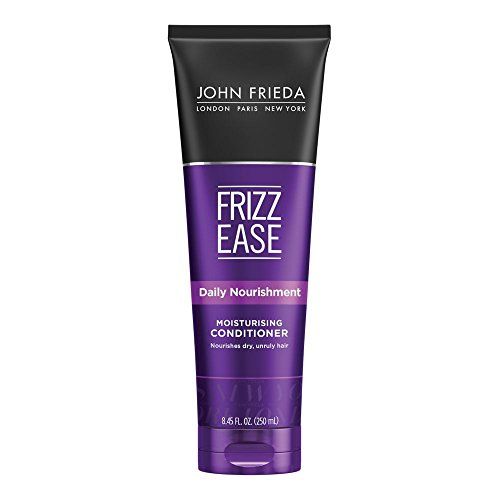
    Frizz Ease Daily Nourishment Conditioner
    John Frieda Frizz Ease Daily Nourishment Conditioner
    Credit: John Frieda
    Headshot of April Franzino

    Beauty Director

    April (she/her) is the beauty director at Good Housekeeping, Prevention and Woman’s Day, where she oversees all beauty content. She has over 15 years of experience under her belt, starting her career as an assistant beauty editor at GH in 2007, and working in the beauty departments of SELF and Fitness magazines.

Xhicboutique.com – Find this Product & More at Discount Prices!

Source link